Configuration management with Chef
Chef de Config
Chef is basically a server that stores customized configuration guides for software. Clients connected to the server access the recipes and automatically configure their systems on the basis of the rulesets the recipes contain.
To do so, the clients not only modify their configuration files, but – if needed – launch their package managers. If the recipes change, or new ones are added at a later date, the clients affected automatically update to reflect the changes. In an ideal environment, this just leaves it up to the administrator to manage the recipes on the server.
Bulk Shopping
Before you can enjoy the benefits, the developers behind Chef expect you to put in a modicum of work. For example, recipes are made up of one or multiple standard Ruby scripts. If you need anything beyond the fairly generic recipes available on the web, you need to have a good command of the Ruby scripting language. In other words, your mileage will vary before you deploy a home-grown and home-tested solution.
The installation is another obstacle – and a fairly complex one, too, because the Chef server depends on several other components, each of which in turn requires even more software packages. The Chef server itself is written in Ruby but relies on the RabbitMQ server and on a Java-based full-text search engine, at the same time storing its data in a CouchDB database.
Finally, your choice of operating system is also important. Chef prefers Linux underpinnings, but it will also run on other Unix-flavored operating systems such as Mac OS X, Open Solaris, FreeBSD, and OpenBSD, according to the wiki http://1. The fastest approach today is offered by Debian 5, Ubuntu 8.10 or later, or CentOS 5.x. Setting up the server on any other system can be an adventure. This article mainly relates to Debian and Ubuntu for this reason. If this is the first time you have ever cooked one of Chef's recipes, it is also a good idea to run your kitchen on a virtual machine. This prevents things boiling over and making a mess on the server room floor.
Valuable Ingredients
A full-fledged Chef installation comprises the systems you want to configure (nodes) and the server that manages and stores the recipes. Chef clients do all the hard work, picking up the recipes from the server via a REST interface and running the scripts. Each client runs on one node but can apply recipes to multiple nodes. Figure 1 shows you how this works.

For simplicity's sake, the following examples just use the Chef server and a single client. The latter only configures the computer on which it is running. The first thing you need to have in place is Ruby version 1.8.5 through 1.9.2 (with SSL bindings). Add to this, RubyGems, which will want to build various extensions and libraries later on, thus necessitating the existence of make, gcc, g++, and the Ruby developer packages. Additionally, you need the wget tool for various downloads. The following command installs the whole enchilada on Debian and Ubuntu Linux:
sudo apt-get install ruby ruby1.8-dev libopenssl-ruby1.8 rdoc ri irb build-essential wget ssl-cert
The packages for openSUSE are called ruby, ruby-devel, wget, openssl-certs, make, gcc, and g++. The certificates from ssl-cert will be required later.
According to the how-to http://1, Chef prefers RubyGems version 1.3.6 or newer, but not 1.3.7. This version contains a bug that kills the following installation mid-way. Because most distributions have an older version of RubyGems, your best bet is to head for the source code archive:
cd /tmp
wget http://rubyforge.org/frs/download.php/69365/rubygems-1.3.6.tgz
tar zxf rubygems-1.3.6.tgz
cd rubygems-1.3.6
sudo ruby setup.rb
If the last command installs the Gems executable as /usr/bin/gem1.8 (as is the case with Debian and Ubuntu), a symbolic link will improve things:
sudo ln -sfv /usr/bin/gem1.8 /usr/bin/gem
Now you can issue the following Gems command to install the Chef package:
sudo gem install chef
When you run a Gem update, keep an eye on the JSON Gem. The version that now comes with RubyGems, 1.4.3, causes an error in Chef. If gem update installs the offending JSON package on your disk, these commands revert to the original version:
sudo gem uninstall -aIx json
sudo gem install -v1.4.2 json
The steps thus far provide the underpinnings for Chef operations. Now, you need to concentrate on the installation, particularly server-side.
Who's the Chef?
Chef can automate the process of installing and configuring software, so it only seems logical to let Chef install itself. The developers refer to this process as bootstrapping. Having said this, recipes that install the server in this way only exist for Debian 5, Ubuntu 8.10 or later, and CentOS 5.x. On any other distribution, you need to perform all of the steps manually as described in the Manual Server Installation boxout.
Listing 1: Template for server.rb
01 log_level          :info
02 log_location       STDOUT
03 ssl_verify_mode    :verify_none
04 chef_server_url    "http://chef.example.com:4000"
05
06 signing_ca_path    "/var/chef/ca"
07 couchdb_database   'chef'
08
09 cookbook_path      [ "/var/chef/cookbooks", "/var/chef/site-cookbooks" ]
10
11 file_cache_path    "/var/chef/cache"
12 node_path          "/var/chef/nodes"
13 openid_store_path  "/var/chef/openid/store"
14 openid_cstore_path "/var/chef/openid/cstore"
15 search_index_path  "/var/chef/search_index"
16 role_path          "/var/chef/roles"
17
18 validation_client_name "validator"
19 validation_key         "/etc/chef/validation.pem"
20 client_key             "/etc/chef/client.pem"
21 web_ui_client_name     "chef-webui"
22 web_ui_key             "/etc/chef/webui.pem"
23
24 web_ui_admin_user_name "admin"
25 web_ui_admin_default_password "somerandompasswordhere"
26
27 supportdir = "/srv/chef/support"
28 solr_jetty_path File.join(supportdir, "solr", "jetty")
29 solr_data_path  File.join(supportdir, "solr", "data")
30 solr_home_path  File.join(supportdir, "solr", "home")
31 solr_heap_size  "256M"
32
33 umask 0022
34
35 Mixlib::Log::Formatter.show_time = false
Listing 2: SSL Certificates for the Chef Server
01 server_ssl_req="/C=US/ST=Several/L=Locality/O=Example/OU=Operations/CN=chef.example.com/emailAddress=ops@example.com"
02 openssl genrsa 2048 > /etc/chef/validation.key
03 openssl req -subj "${server_ssl_req}" -new -x509 -nodes -sha1 -days 3650 -key /etc/chef/validation.key > /etc/chef/validation.crt
04 cat /etc/chef/validation.key /etc/chef/validation.crt > /etc/chef/validation.pem
05 openssl genrsa 2048 > /etc/chef/webui.key
06 openssl req -subj "${server_ssl_req}" -new -x509 -nodes -sha1 -days 3650 -key /etc/chef/webui.key > /etc/chef/webui.crt
07 cat /etc/chef/webui.key /etc/chef/webui.crt > /etc/chef/webui.pem
Life is a little easier with one of the operating systems officially supported by Chef. To begin, make sure the computers involved have Fully Qualified Domain Names (FQDNs), such as chefserver.example.com. If you don't, you will be bombarded with error messages like Attribute domain is not defined! (ArgumentError) later on. Additionally, the repositories need to provide the runit program in a package named runit (don't install this yourself!).
The Chef server also requires Sun Java SDK version 1.6.0, which the distributions love to hide in a special repository. Debian users need to enable the non-free package source for this, whereas Ubuntu users can add the partner repository with the following two lines:
sudo add-apt-repository "deb http://archive.canonical.com/lucid partner"
sudo apt-get update
Theoretically, the Chef server will run with the OpenJDK, although the developers do not give you any guarantees.
Lonely Kitchen Helper
After fulfilling all the requirements, you can create configuration files for Chef Solo on the server and the client. This Chef variant runs the recipes directly on the client without involving the server. Without the server, Chef Solo is only useful as an aid to creating simple scripts – for installing the full-fledged server and clients. To do this, create a ~/solo.rb file with the following three lines on each of the systems involved:
file_cache_path "/tmp/chef-solo"
cookbook_path "/tmp/chef-solo/cookbooks"
recipe_url "http://s3.amazonaws.com/chef-solo/bootstrap-latest.tar.gz"
This tells Chef Solo where the installation recipes are located.
Chef on Call
Now it's time to move on to the server candidate. On this machine, create a JSON configuration file named ~/chef.json to provide information about the node. See Listing 3 for the file content.
Listing 3: ~/chef.json for the Server
01 {
02   "bootstrap": {
03     "chef": {
04       "url_type": "http",
05       "init_style": "runit",
06       "path": "/srv/chef",
07       "serve_path": "/srv/chef",
08       "server_fqdn": "chefserver.example.com",
09       "webui_enabled": true
10     }
11   },
12   "run_list": [ "recipe[bootstrap::server]" ]
13 }
To match your local environment, you need to modify the server name for server_fqdn. To set up the full-fledged Chef server, give the command:
sudo chef-solo -c ~/solo.rb -j ~/chef.json
If the command terminates with a cryptic error message, try running it again. During testing, the installation ran without any errors. First, the command installs a Chef client, then RabbitMQ, CouchDB, the developer packages for zlib and xml, and the Chef server, including the indexer and a web GUI you can use later to manage the Chef server (WebUI). It then goes on to create matching configuration files and the required directories and adds init script entries for the server to round off the process.
At the end of this procedure, the Chef server should be listening on port 4000; the web GUI is accessible on port 4040. Java and RabbitMQ use the Apache SOLR-based full-text search engine built into the Chef server. Among other things, it provides information about the existing infrastructure, which in turn can be referenced for recipes. For details of the search function, see the wiki page http://4.
Workers
Once you have the server up and running, it's time to turn to the client. Start by creating a ~/chef.json JSON configuration file. Listing 4 gives you the content. The server_fqdn entry here must contain the server name, not the client's.
Listing 4: ~/chef.json for the Client
01 {
02   "bootstrap": {
03     "chef": {
04       "url_type": "http",
05       "init_style": "runit",
06       "path": "/srv/chef",
07       "serve_path": "/srv/chef",
08       "server_fqdn": "chefserver.example.com"
09     }
10   },
11   "run_list": [ "recipe[bootstrap::client]" ]
12 }
Now you can launch Chef Solo:
sudo chef-solo -c ~/solo.rb -j ~/chef.json -r http://s3.amazonaws.com/chef-solo/bootstrap-latest.tar.gz
The tool creates a couple of directories, corrects the configuration files, and adds chef-client to the init scripts. The latter ensures that the client will talk to the server on booting and execute any recipe changes that have occurred in the meantime.
After this, the client has to register with the server. To allow this to happen, copy the /etc/chef/validation.pem file from the server to the /etc/chef/ directory client-side and then restart the client manually:
sudo chef-client
The client automatically creates a key, which you need to add to the /etc/chef/client.pem file and which will sign every transaction with the server from this point on. Then you want to delete the validation.pem file for security reasons.
Librarian
Now that you have the server and the client running, the next step is to create a repository server-side for your recipes: This is simply a hierarchy of multiple, standardized (sub-)directories. Of course, you could create them all manually, but the template provided by Opscode does a quicker job; you just need to download and unpack:
wget http://github.com/opscode/chef-repo/tarball/master
tar -zxf opscode-chef-repo-   123454567878.tar.gz
Because this cryptic number is difficult to remember in the daily grind, you might want to rename the directory (incidentally, the number comes from the versioning system and represents the Commit ID):
mv opscode-chef-repo-123454567878 chef-repo
cd chef-repo
Table 1 explains the directory hierarchy in chef-repo.
Tabelle 1: Directories in a Repository
|
Directory |
Content |
|---|---|
|
|
SSL certificates (typically created by |
|
|
General configuration files for the repository |
|
|
Complete cookbooks |
|
|
Role definitions |
|
|
Modified cookbooks; any cookbooks stored here will overwrite or modify the ones stored in |
The recipes stored here are injected into the server by a tool named knife. To prepare a recipe for action, run the command
knife configure -i
and confirm the default responses by pressing Enter – except, enter your own username when asked Your client user name?, and type . (dot) in response to the Path to a chef repository (or leave blank)? query. Knife then registers a new client on the Chef server, creates the above-mentioned certificate in /.chef/my-knife.pem, and finally creates the /.chef/knife.rb configuration file.
Convenience Food
Multiple recipes with the same objective can be grouped in a cookbook. For example, the mysql cookbook contains all the recipes required to install and set up the free database. For an initial test, it is a good idea to look for a simple cookbook http://5.
In the section that follows, I will use the cookbook for emacs from the applications group as an example. In this example, I'll use the package manager to install the popular Emacs text editor.
After downloading the Cookbook archive, unpack it in the cookbooks subdirectory, then introduce the server to the new recipes:
rake upload_cookbooks
The rake command automatically calls knife with the correct parameters, and knife then uploads all the cookbooks from the corresponding directory. To upload a single cookbook to the server, do this:
rake upload_cookbook[emacs]
The target, upload_cookbook, is defined in the Rakefile provided by the repository.
GUI Management
The server now knows the emacs cookbook, but the clients don't. To change this, launch a browser and access the web front end with http://chefserver.example.com:4040. Chef does not offer SSL encryption here. If you prefer a more secure approach, you could use Apache as a proxy.
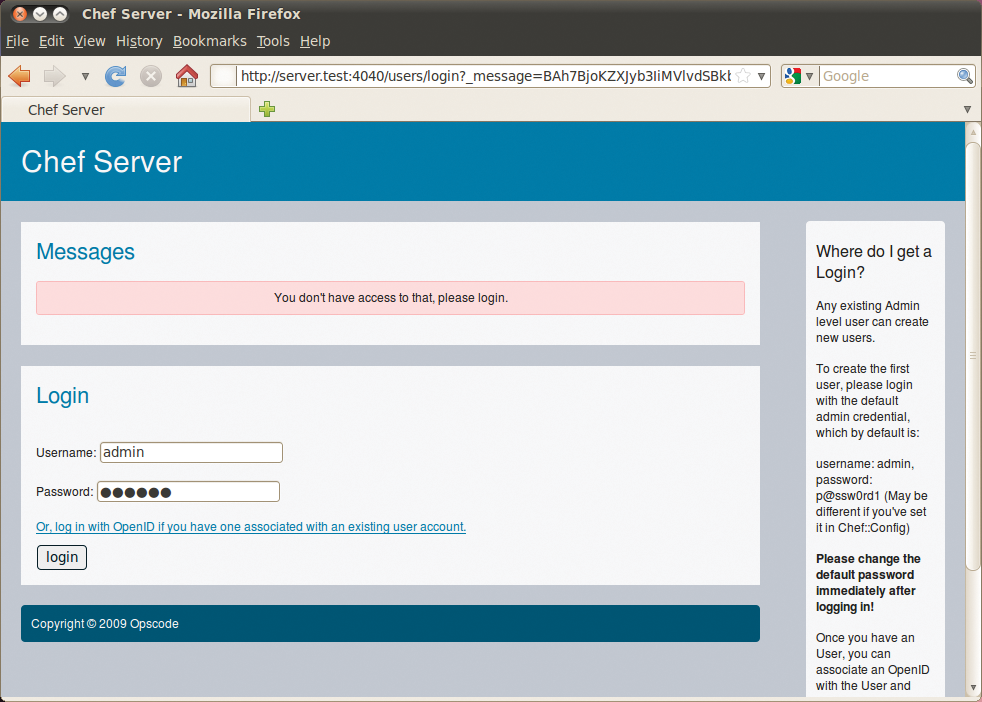
In the form that then appears, log in by typing the admin username Figure 2. The matching password is stored in the web_ui_admin_default_password line of the /etc/chef/server.rb file. Changing the slightly cryptic default after logging in the first time is a good idea.

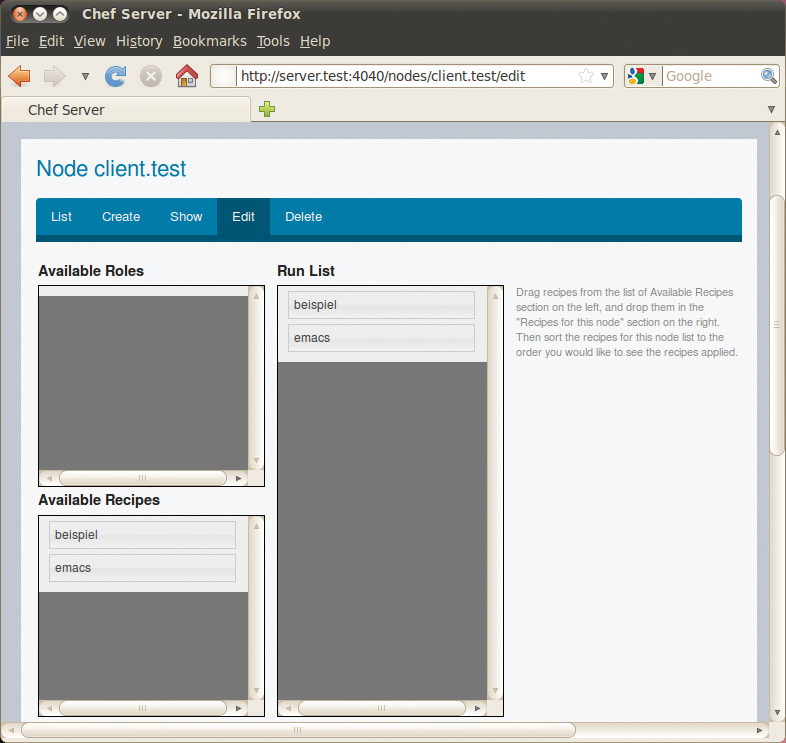
Now go to the Nodes menu. When you get there, click the client name, change to the Edit tab, and finally drag the recipe you want to use from Available Recipes and drop it into the Run List (the recipe will slot into the top position in the list). In the example, you would now see emacs at the top Figure 3. To store this assignment, press the Save Node button bottom left on the page.

beispiel recipe first, followed by emacs.
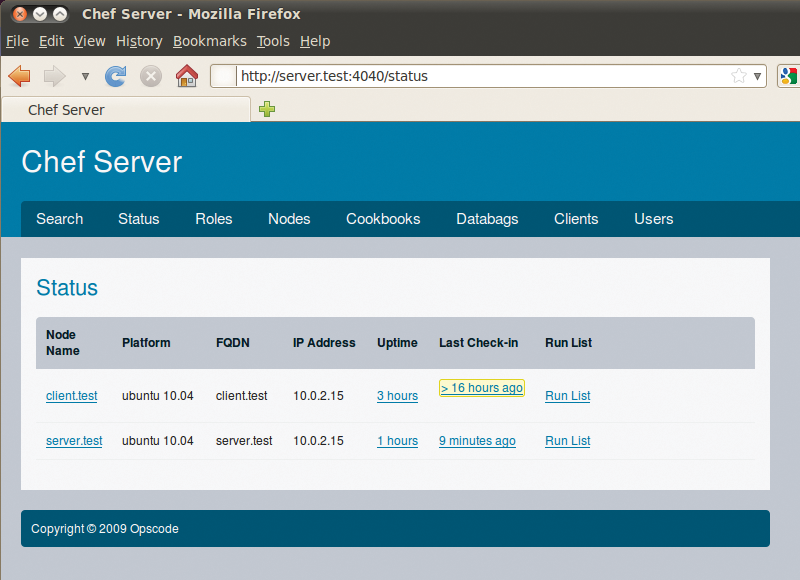
Status tab lists all the nodes with their last contact attempts and recipe assignments (following Run List).Client-side now, manually launch the chef-client tool:
sudo chef-client
This command line immediately opens a server connection, picks up the recipes assigned to the client (only emacs for the time being) and executes the recipes Figure 5. To allow this to happen on a regular basis, you should run the client at regular intervals as a daemon:

chef-client -i 3600 -s 600
In this example, the client contacts the server every 3,600 seconds. The -s parameter lets you vary the period slightly. If you don't set this, all of your clients might query the server at the same time and get in each other's way.
Role-Out
To group multiple cookbooks in a role, create a new file below Roles in the repository, say, beispiel.rb, with the following content:
name "beispiel"
description "Example of a role"
run_list("recipe[emacs]", "recipe[zsh]", "recipe[git]")
This groups the emacs, zsh and git recipes under the beispiel role name. Then send the role to the server like this:
rake roles
In the web front end, you can assign roles to a node just like cookbooks using drag and drop.
Freshly Stirred
Ready-made recipes and cookbooks off the Internet will only cover standard application cases. For special cases, or individual configurations, you will typically need to create your own cookbook.
The following, extremely simple example, creates a text file on the client called /tmp/thoughts.txt that is based on the quick_start cookbook http://6, and it adds a sentence that is generated dynamically in part. Start by creating a new cookbook called beispiel in chef-repo:
rake new_cookbook COOKBOOK=beispiel
The command creates a beispiel folder below cookbooks, populates it with the required subdirectories, then creates an empty recipe named default.rb.
Before you start filling this with content, first create a template for the file you want to create, /tmp/thoughts.txt. This will later contain the sentence
Thought for the day:
and the recipe will append an ingenious thought on a daily basis. The complete template is thus:
Thought for the day: <%= @thought %>
The recipe will replace the wildcard with text later on. The new template needs to be in templates/default/; you can save it as thoughts.txt.erb. Most recipes use templates like this, or, to quote the developers: "We love templates."
Hand Mixer
Now, compose a matching recipe that picks up the template and uses it to generate the /tmp/thoughts.txt file. To save work here, you can extend the existing, but empty, default.rb recipe in the recipes subdirectory. The recipe for this example looks like:
template "/tmp/thoughts.txt" do
   source "thoughts.txt.erb"
   variables :thought =>       node[:thought]
   action :create
end
This should be fairly self-explanatory for Ruby aficionados: It creates the /tmp/thoughts.txt file from the thoughts.txt.erb template and then replaces the wildcard with the content of the thought variable. Now you just need to think about what thoughts to use here.
Spice
In this example, thought will be an attribute. Attributes store node-specific settings in a cookbook for recipes to evaluate and use. A typical attribute would be, say, a command-line parameter for a program launched automatically by a recipe. The attributes are identical for each call to the recipe and, thus, no more than constants provided by the recipe author.
In contrast to genuine Ruby constants, attributes can be modified via the web interface (in the window used to assign cookbooks to nodes).
A cookbook groups all of the attributes in its attributes subdirectory. For the example here, you need to create a beispiel.rb file with the following content:
thought "Silence is golden ..."
Now you just need to register the new cookbook with the server
rake upload_cookbooks
and assign it to one or multiple nodes in the web front end. After running chef-client, the /tmp/thoughts.txt file should appear.
This recipe leaves much scope for improvement. For example, you could randomly choose the thought of the day, which Ruby programmers should handle easily. Because recipes are full-fledged Ruby scripts, you can draw from the full scope of the language and on RubyGems. In the case of the latter, the recipe should first check to see whether the Gem exists on the client and, if not, install it.
The beispiel/metadata.json file stores metadata on the new cookbook. Before you roll out the cookbook in a production environment, you might want to add some details. As the file extension suggests, the file uses the JSON format.
Conclusions
Chef is a complex piece of software, and once you have it running and have finished modifying or creating your recipes, it does make the administrator's life much easier – at least on Linux systems. Unfortunately, the learning curve is very hard going for newcomers. The online documentation for Chef is fairly chaotic and incomplete http://7. If you need to know more about writing cookbooks, it is a good idea to download prebuilt examples and investigate them. The cookbook for emacs shows you how to use action :upgrade to install a package for example.
Additionally, it is hard to find help or how-tos, even on the web, if you have a problem. Your best option here is to post your questions on the mailing list http://8.
