Virtualization with KVM
All for One
Whether you want to lock up your web server, test security functions, put a really powerful server to better use, or just try out a new distribution, virtual machines can be very useful. The Kernel-based Virtual Machine (KVM) [1] is a fairly recent project now being promoted by Red Hat, and it's another candidate for the job of launching and managing your virtual machines. Although KVM is frequently overlooked in the wake of VirtualBox and VMware, it offers an impressive feature scope, is included by nearly every distribution, and is totally free. The virtualization functions in Red Hat Enterprise Linux are based on it.
Building Blocks
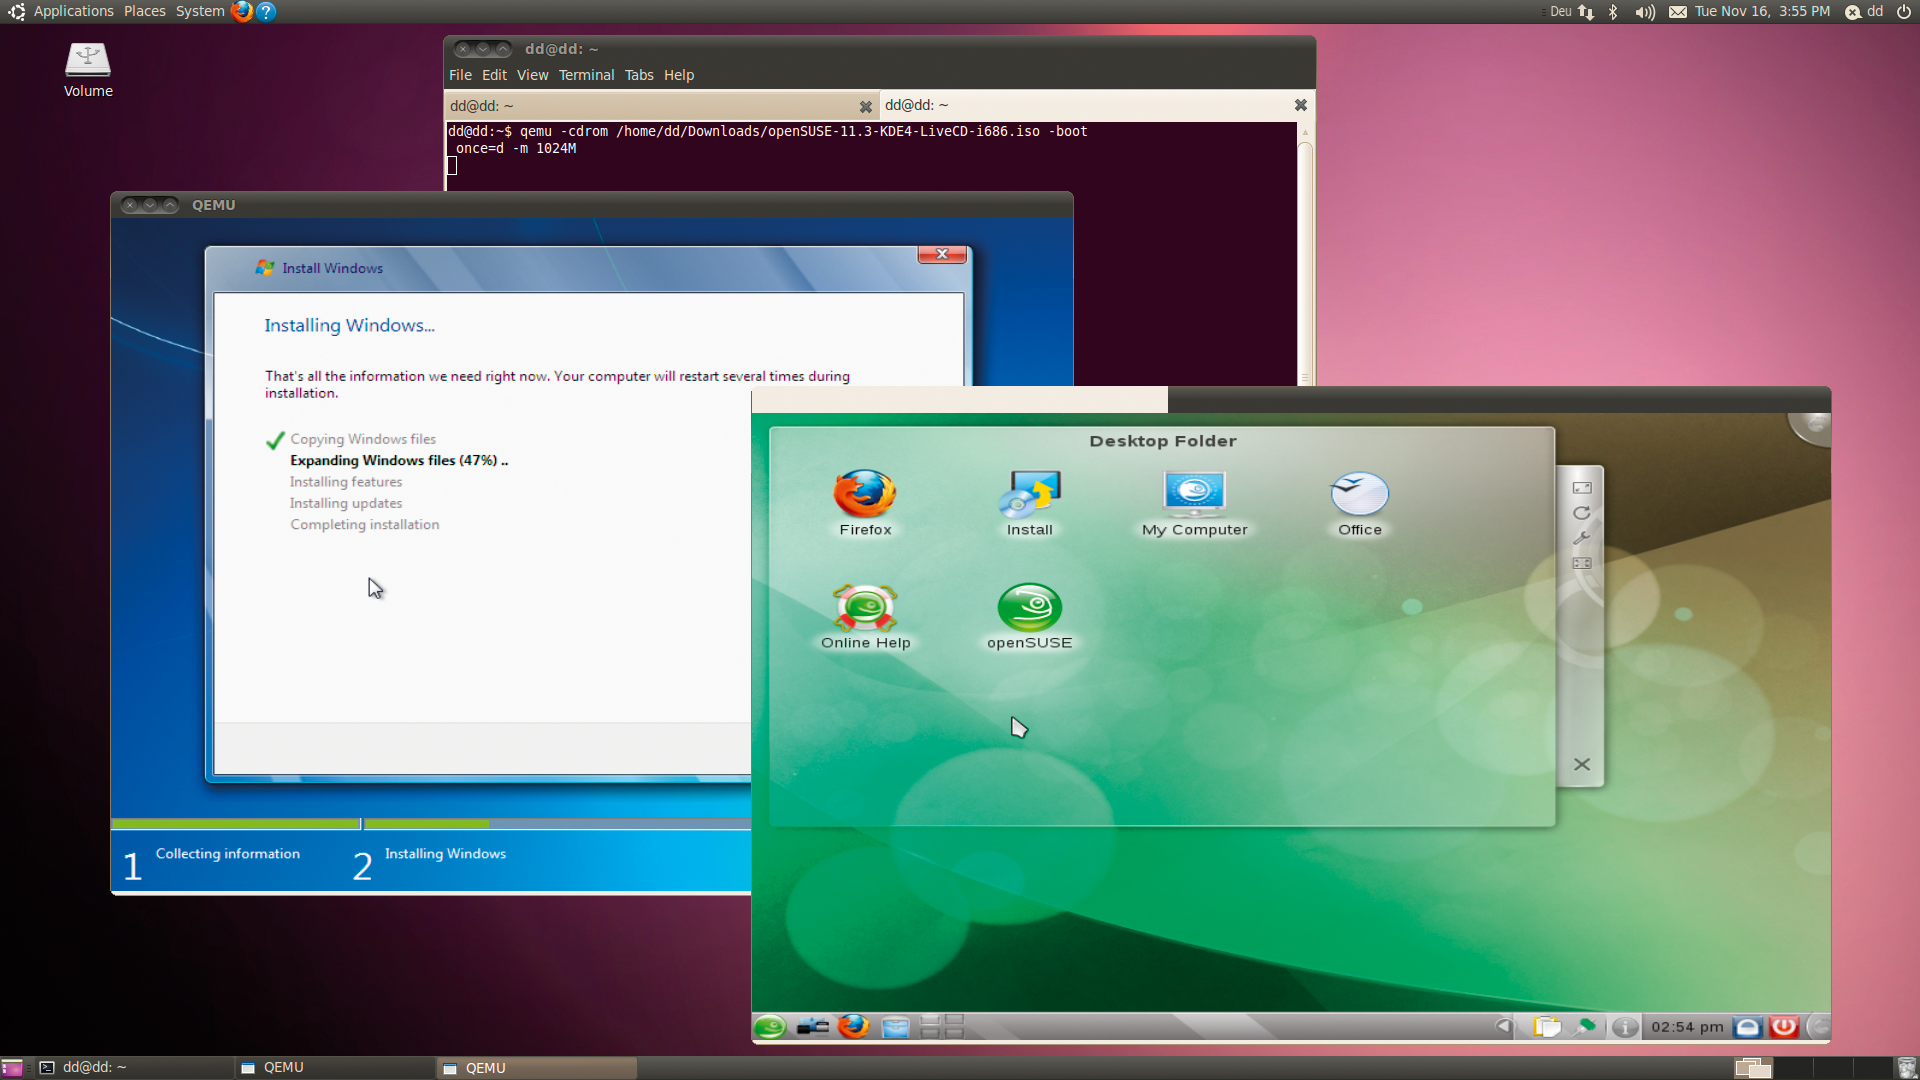
KVM comprises individual modules that handle different tasks. To start, Qemu [2] emulates the hardware of one or multiple computers. Operating systems can coexist peacefully on the virtual machines that Qemu provides without fighting over the physical network interface (Figure 1).

Of course, simulating computer components is heavy on CPU cycles. To improve the execution speed of the guest operating systems, Qemu hands over some management tasks to the kernel driver developed by the KVM project. Among other things, the driver ensures efficient memory management and runs the programs on the virtual machines directly on the physical processor. To allow this to happen, the driver relies on the advanced instruction sets provided by state-of-the-art processors such as Intel VT or AMD-V. Because Qemu only has to worry about emulating a couple of hardware components, the guest operating systems are nearly as complete as on the physical computer. Figure 2 shows how KVM and Qemu interact.

Basically, any software could use the infrastructure that KVM provides. But right now, only Qemu actually has this ability. Because the competitors all provide their own kernel modules, this situation likely will not change, at least not in the near future. And, if you decide to use the KVM and Qemu team, you can't run VirtualBox or VMware at the same time because of conflicting modules.
Numbers
If you are thinking of deploying KVM and Qemu, you need a CPU with Intel VT or AMD-V. You can discover whether your computer has this technology with a simple command:
egrep -c '(vmx|svm)' /proc/cpuinfo
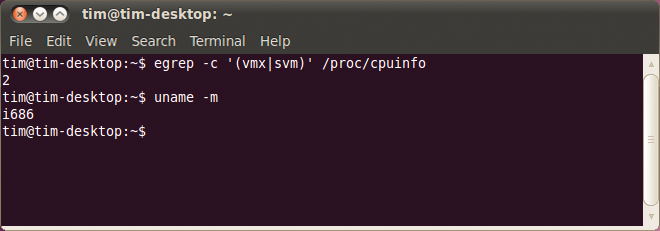
The result must be greater than 0 (Figure 3). If not, either the processor doesn't support the special commands, or the commands have been disabled in the computer's BIOS. Users with Intel processors can additionally check their model's capabilities [3]. Qemu will actually run without processor support, but doing so slows the virtual machines down to a crawl.

2), but the 32-bit Ubuntu (i686) can only run 32-bit systems.If you want to launch 64-bit operating systems on your virtual machines, the Linux host system must provide a 64-bit kernel. To determine this, run the uname -m command, and it should output a value of x86_64 or amd64. You can run virtual machines with a 32-bit operating system and 64-bit system, but not the other way around. Using a 64-bit kernel as your basis also has the advantage that you can use more than 4GB of RAM. Thus, you can run several more virtual machines or assign more memory to the existing machines.
Luckily, KVM became an official component of all Linux kernels as of version 2.6.20. In other words, you only need to install Qemu and a couple of tools. Most distributions provide a compact meta-package that lets you do so. On Ubuntu version 10.04 or later, the package is called qemu-kvm (and not kvm-qemu in contrast to what the documentation maintains); in openSUSE 11.3, the package is simply called kvm.
Building a House
The next step is to create a home for the future guest system. To do so, you can either provide each operating system a physical hard disk, or you can choose the low-budget approach and use images. The latter works similarly to ISO files for CD-ROM: Whereas the operating system on a virtual machine thinks that it is working with a physical hard disk, Qemu actually packs all the data into a giant file. You can back up a hard disk image like this with any backup program and quickly copy it to another machine, or you can replicate it on another machine, without needing to launch a partitioning program. A new blank image is easily created with qemu-img:
qemu-img create -f qcow2 windows.img 30G
This command creates a new hard disk image with a name of windows.img in the qcow2 format; the image can store a maximum of 30GB of data. The advantage of the qcow2 format is that it grows dynamically to reflect the content. In other words, the image is only as big as a file that it contains. But, because an image really can reach its maximum size limit, you should make sure you have at least 30GB of free space on the physical disk.
Qemu can also use images created by its competitors VirtualBox 1.1, VirtualPC (.vhd file extension), and VMware (.vmdk file extension). You can also use disk images with uncompressed raw data created by, say, the dd tool.
Wake-Up Call
Now that you have an image, you can launch a virtual machine directly:
qemu -hda windows.img -cdrom /dev/cdrom -boot once=d -m 512M
Some distributions, including openSUSE call this program qemu-kvm, but the parameters stay the same (see the "Double Trouble" box):
qemu-kvm -hda windows.img -cdrom /dev/cdrom -boot once=d -m 512M
Qemu mounts the image that you created as the first hard disk (-hda) then mounts the physical CD-ROM drive (which uses a device called /dev/cdrom in the sample). Qemu immediately boots from the CD-ROM (-boot once=d; to boot from the first hard disk, you would need once=c). Then Qemu opens a new window in which all the screen output from the virtual machine is displayed. If you do not want to use the physical CD drive, you can integrate an ISO image:
qemu -hda windows.img -cdrom /home/tim/debian.iso -boot once=d -m 512M
This process provides a fairly simple way to try out a new distribution without needing to waste a CD. By default, Qemu gives virtual machines just 128MB of RAM – state-of-the-art operating systems will just laugh at this. To assign more RAM, you need the -m parameter; the example assigns 512MB, but you will need at least 1GB for Windows 7.
You should avoid assigning all of your physical memory resources to the virtual machines. Doing so would leave the host system and Qemu without enough air to breathe. The amount of RAM needed depends on the distribution. Ubuntu and openSUSE will need at least 512MB.
Modulo
Qemu output shows important status messages to the terminal window (Figure 4). In Figure 5, the output is complaining about a lack of support from KVM. In a case like this, you should first check to see whether the driver is loaded correctly.


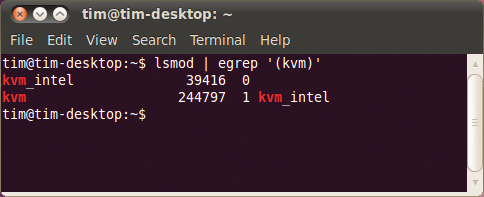
lsmod command shows, both KVM kernel modules (kvm and kvm_intel) have loaded correctly.The driver comprises the kvm.ko kernel module, which provides some basic functionality to Qemu, and a processor-specific module, kvm-intel.ko or kvm-amd.ko. The following should provide your current combination:
lsmod | egrep '(kvm)'
Otherwise, the following commands let you load the module manually:
sudo modprobe kvm
sudo modprobe kvm-intel
Or, for an AMD model:
sudo modprobe kvm
sudo modprobe kvm-amd
If this approach doesn't work, messages in your kernel log will provide more information. The KVM FAQ [5] is also useful, and questions are answered on the KVM mailing list or forum [6].
Grabbers
You can install the operating system normally on the virtual machine. Clicking the window with the mouse captures the mouse cursor and lets you use it on the guest system. Pressing Ctrl+Alt gives the mouse back. Some Linux distributions detect Qemu and do without mouse cursor integration. You can then use Qemu like any normal application on the host system.Besides a Cirrus CLGD 5446 PCI graphics adapter, Qemu emulates older hardware for which nearly any operating system will have matching drivers. However, you can't run 3D apps, especially not games.
If the desired operating system refuses to launch, you can try switching off KVM by executing qemu with the -no-kvm parameter. Also, you can try replacing the virtual graphics adapter with a simple model by adding a -std-vga switch. For Windows XP, you also need to disable the power saver function by adding -no-acpi.
X-Ray Vision
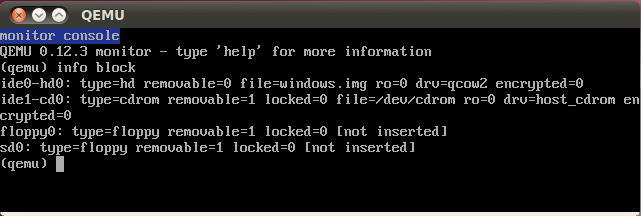
The Ctrl+Alt+2 keyboard shortcut toggles to the Qemu Monitor (Figure 6). A special command line lets you tinker with your virtual hardware and retrieve status information.

info block command outputs details of the drives.To change the CD or DVD, you must discover the internal name of the drive:
info block
In Figure 6, ide1-cd0 is the only CD drive (typ=cdrom). Do
eject -f ide1-cd0
to eject the disk. Then, to mount the new medium, you would use the following command:
change ide1-cd0 /tmp/debian.iso
Again, you can specify a physical drive instead of an ISO file. Additionally, you can press Ctrl+Alt+1 to change back to the virtual machine.
The operating system on the virtual machine comes with a DHCP server and firewall that uses a static IP address of 10.0.2.2. The system can use these details to retrieve a valid IP address using any DHCP client. IP address 10.0.2.2 is also the default address of the host system.
If you have an SSH server running on it, you can then use scp as a convenient method of exchanging files. Although this setup allows the guest system to access the Internet without breaking a sweat, you have no way of accessing the virtual machine from the outside world. After all, the virtual machine is just a normal program from the host system's point of view, meaning that a web server running on the virtual machine would be inaccessible.
Port Forwarding
Port forwarding is the way to resolve this situation. The host system forwards requests to one of its ports to the virtual machine, and
qemu -hda windows.img -m 512M -net nic -net user,hostfwd=tcp::5555-:80
sends any incoming requests for TCP port 5555 on the host to port 80 on the virtual machine. If you point a browser on the host system at the address http://localhost:5555, you'll receive a response from the web server on the virtual machine. Port forwarding can be easily set up in Qemu Monitor:
hostfwd_add tcp::5555-:80
You can stop it just as easily with:
hostfwd_remove tcp::5555
As an alternative to port forwarding, you can use the TUN/TAP device to set up a virtual NIC on the host system and then use a virtual bridge to connect it with the NIC in the virtual machine. This setup is not entirely trivial, and many factors will depend on the distribution you use.
Conclusions
Qemu supports many more parameters and commands both at the command line and in the monitoring tool, most of which are interesting if you're involved in hosting servers.
For example, you can suppress screen output from the virtual machines (-nographic parameter), thus restricting the guest systems to text-only output; you can even reroute the output using VNC.
Multiple virtual machines can be grouped on a separate virtual network, which is really useful to test a new infrastructure.
All of the functions referred to in this article are also explained in the extremely long manual on the Qemu website [4]. If the command line is too complicated for your liking, you can easily load a graphical front end like AQemu (see the "Push the Mouse" box).
