Two-factor authentication for WordPress blogs
Key Ring
YubiKey is a two-factor authentication hardware tool combined with one-time passwords (OTPs). To authenticate, users need their standard password and a one-time password, which YubiKey creates. The key is very practical because it emulates a USB keyboard and is identified by the PC as such. In other words, you don't need a special driver – assuming your computer supports USB keyboards.
If the USB ports in your local Internet cafÈ are not disabled, you can even use the YubiKey/OTP combination to log in there and thus give yourself additional protection. If hackers manage to sniff or log a one-time password, they can't do anything with it because it expires after use. Also, no one can do anything with your YubiKey if you lose it, because another password is still needed to authenticate.
One practical application of this tool is protecting a WordPress blog with the technique I just mentioned and a separate plugin for the YubiKey [1]. WordPress is a PHP application, which explains why the plugin accesses the YubiKey PHP library; the library is free, as are the libraries for many other languages [2]. If you modify the blog privileges so that the web server can write to the corresponding directories, you can install the plugin directly via the WordPress administrative interface. Otherwise, you can use SSH to unpack the package or upload via FTP for the installation. Then, you can enable the plugin in the admin interface.
At the Press of a Button
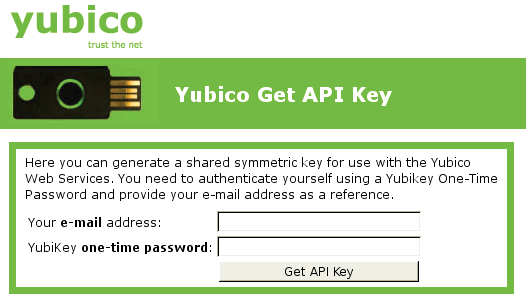
To configure the plugin, you'll need a Yubico ID and an API key, which you can request from their website [3]. Enter your email address in the field at the top, move the cursor to the lower field, and then press the button to enable YubiKey (Figure 1). It then outputs a key in the field. When you press the Get API Key button on the website, the client ID and secret key are displayed.

Now enter the client ID and the API key in the WordPress plugins settings under Settings | YubiKey. On the Users | Your Profile page, enter the key ID, which is the first 12 characters that YubiKey automatically outputs. Now, switch YubiKey authentication to Use Yubico Server.
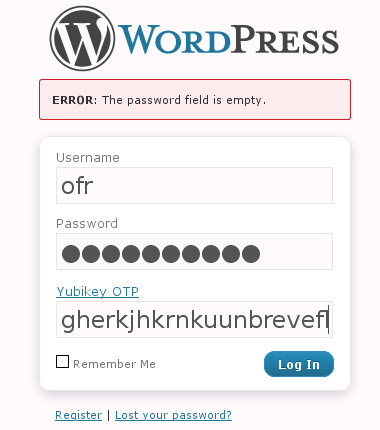
After completing the configuration, WordPress will prompt you for a one-time password in addition to your normal password when you log in; you can enter the OTP by pressing the YubiKey button (Figure 2). Prebuilt bindings for the YubiKey are available for Drupal and MediaWiki as well, and there's even an Apache module.

