
pfSense firewall and router distribution
InflatableFirewall
Chris Buechler and Scott Ullrich were unhappy. Although the FreeBSD m0n0wall distribution gave them a quick option for setting up a firewall and a router, it was designed for use on embedded systems. Because it had to run in RAM, extensions were difficult. This situation prompted the two to start working on their own distribution and spawned the development of pfSense [1].
The core of version 2.0 from late September 2011 comprises FreeBSD 8.1, which is tailored for use as a firewall and router. If desired, pfSense will also act as a DHCP server, a data provider for sniffers such as Wireshark, a VPN access point, a DNS server, and even a WLAN access point. Despite all this, the complete system weighs in at just 100MB, and to get started, you just need a USB stick and 128MB of RAM.
If the built-in functionality is not sufficient for your needs, you can extend pfSense by adding packages. For example, this could include a web proxy or an Intrusion Detection System (courtesy of Snort). Components are set up conveniently in a sophisticated web interface. Additionally, thanks to the BSD license, the whole package comes free of charge.
All-Purpose
pfSense takes its strange name from the PF firewall in OpenBSD. It offers stateful inspection; in other words, it can remember who opened what connection. The firewall can use rules not just to block individual ports and protocols but also to restrict the number of simultaneous connections for specific computers and to route traffic via predefined gateways.
Thanks to the p0f tool, pfSense can even distinguish between operating systems, which could be useful if you want to, say, prevent all of your Windows computers from accessing the Internet. pfSense automatically tries to correct or normalize strange-looking packets (scrubbing), thus preventing potential attacks [2].
To improve availability, you can combine multiple active pfSense firewalls. If one firewall fails because of a hardware error, another firewall automatically takes its place. The Common Address Redundancy Protocol (CARP) is used in the background [3]. If needed, a pfSense installation can transfer its configuration to all other firewalls and then run pfsync to keep the state tables of all the active firewalls synchronized.
Besides the firewall, pfSense includes a DHCP server and can handle Network Address Translation (NAT) naturally in combination with port forwarding and with multiple public IP addresses. pfSense can be used as the endpoint for a Virtual Private Network (VPN), assuming the VPN uses the protocols IPsec, OpenVPN, or PPTP. The Captive Portal is particularly interesting for hotspot operators: When it is enabled, users have to authenticate against a special website to access the network or the Internet [4].
Load balancing removes some of the headaches in large networks. pfSense then distributes the outgoing data traffic to multiple WAN interfaces. If one of them fails, pfSense automatically redirects the traffic to the working interfaces. In a similar way, pfSense can distribute incoming requests and connections to multiple servers. This feature is useful if you run a frequently visited website. If one of your web servers fails, pfSense automatically forwards the requests to one of the others.
On the downside, pfSense only supports x86 or AMD64 processors. The frugal system requirements also only apply for simple firewalls and small networks. If the computer needs to handle, say, 200Mbps, pfSense needs at least a 1GHz CPU. Any packages you install retrospectively, such as Snort, will need additional RAM. The developers have published a useful calculation table [5].
Burnt and Plugged
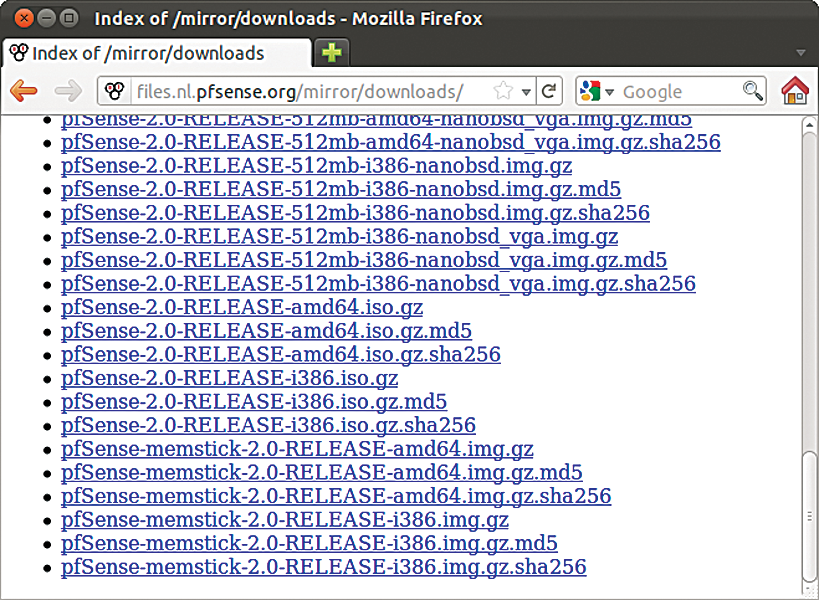
If you follow the Downloads page to a mirror, you might be overwhelmed by the list of innumerable files (Figure 1). Normally, however, all you need is the approximately 100MB ISO image, pfSense-2.0-RELEASE-i386.iso.gz, from the bottom of the page; if you have an AMD64 system, download pfSense-2.0-RELEASE-amd64.iso.gz instead.
If you burn the image onto a CD, you can either boot from the CD to launch an installation program or boot a Live system containing the firewall. A couple of features are missing in the latter mode; thus, it makes more sense to install pfSense on a computer or a virtual machine.
pfSense 2.0 saw the introduction of an image for USB sticks. This version offers the same content as the CD and is designed for computers without a CD drive. The files pfSense-memstick-2.0-RELEASE-i386.img.gz or pfSense-memstick-2.0-RELEASE-amd64.img.gz are the ones you will need in this case.
Besides the Live system, the developers also offer an embedded variant that boots from a compact flash card and runs entirely in RAM. Several images exist for the embedded version: one for each combination of processor architecture, CF card size (or internal flash memory), and target system graphics adapter. As an example, the pfSense-2.0-RELEASE-1g-amd64-nanobsd_vga.img.gz package includes an image for a CF card with capacity of 1GB, which you plug into a system with an AMD64 processor that additionally has a graphics card. Packages without the _vga suffix suppress all screen output and can only be accessed via a serial port on the machine. Additionally, a prebuilt virtual machine for VMware is available, although this contained only the older 1.2.3 version when this issue went to print.
To demonstrate how easily you can deploy and set up pfSense, I will be using it in an example to replace a Fritz!Box, that is, to connect a small (company) LAN securely with the Internet (Figure 2). In this scenario, users are only granted access after authenticating against pfSense with a personal password on a portal page.

Question Time
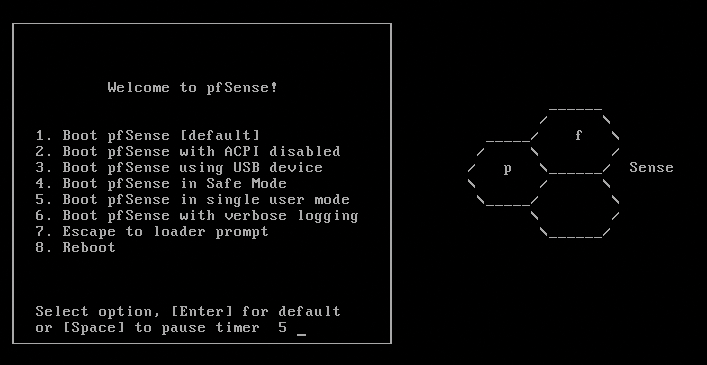
After booting from the Live CD, skip the FreeBSD menu by pressing Enter or wait for 10 seconds (Figure 3). If a problem occurs during the boot process that follows, try the other boot options. From the top down: 2 switches ACPI off, 4 boots in safe mode, and 6 switches the underlying FreeBSD to verbose mode, so you can identify any misbehaving hardware.
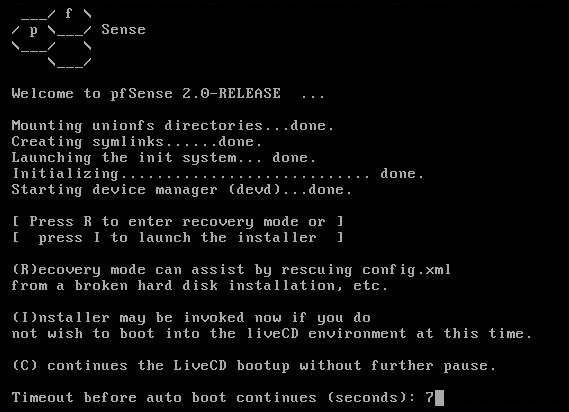
If everything works, pfSense will ask you whether you want to launch the installation program or the Live system (Figure 4). It is a good idea to press i within the 10-second time limit. If you fail to do so, pfSense will automatically boot to Live mode. The program then asks you the same questions as on the first boot from disk (more on that later).
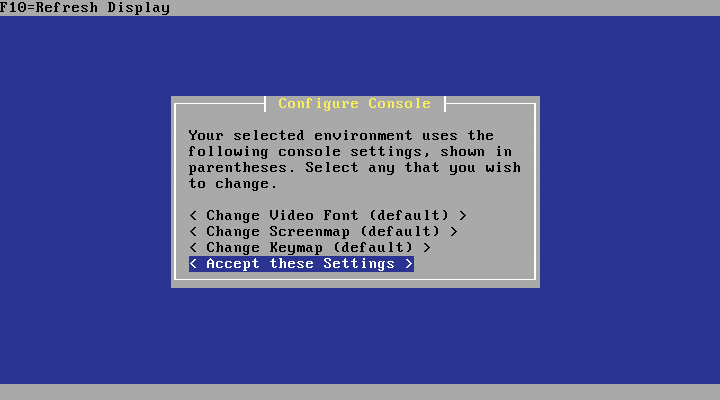
If you chose the installation program, you should see an installation wizard. In the first screen, you can accept the font and keyboard defaults by pressing Accept these Settings (Figure 5). The Quick/Easy Install that you are now offered is no idle boast: You just need to confirm the security prompt, and the wizard will delete the first hard disk and set up pfSense in the free space. Because I just want to install pfSense on the computer in the lab, this is the right choice here. You will only need a user-defined installation (Custom Install) if you want to partition and set up the hard disk manually.
Once you have pfSense on disk, you have to decide which kernel to use. On a standard PC, the first item Symmetric multiprocessing kernel will be the right choice. The Embedded kernel is used on embedded systems that don't have a screen (or maybe even a graphics card) or a keyboard. The Developers Kernel is only interesting for pfSense developers.
Finally, you just need to Reboot, remove the CD, and wait for pfSense to boot from disk. You will see the familiar boot menu, which you can skip by pressing Enter. After a while, pfSense will show you a list of network interfaces and ask whether you want to set up a VPN. This is only necessary if you will be deploying pfSense (exclusively) between or with VPNs. Because you can set up the VPN function later in the convenient web interface, you can say n to this question.
The next thing pfSense wants to know is the name of the WAN interface (Figure 6). The list with the network interface is a big help here. If you are unsure, you can tell pfSense to identify the correct interface itself. To do so, unplug all the network cables from the computer, press a, plug in the wire to the WAN, press the Enter key, and hope that pfSense identifies the interface automatically.
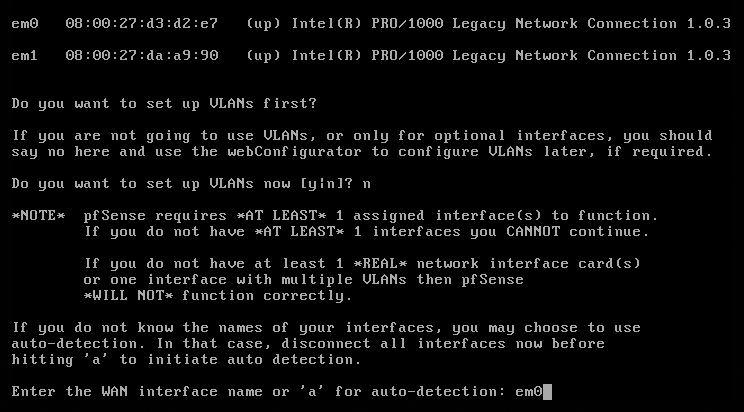
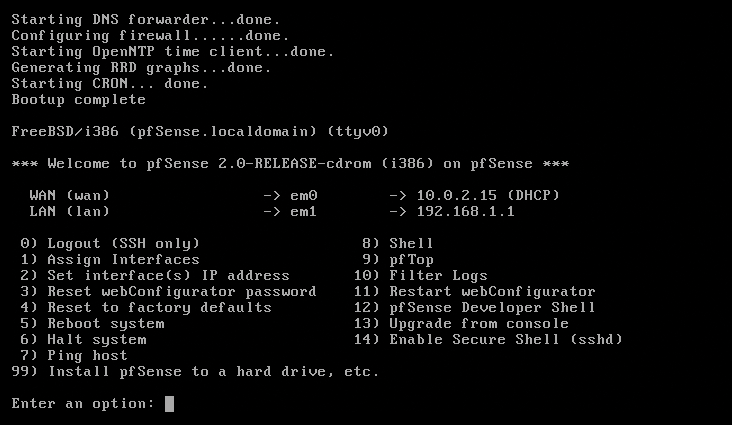
em0, is the WAN or Internet interface.In the next step, you need to enter the names of the LAN interfaces in a similar procedure. If you have multiple interfaces, just repeat the steps as often as needed. Again, pfSense has an a option for automatic detection. After registering all the cards, press the Enter key when you are asked for new LAN cards. pfSense lists all the assignments, and, if they are correct, you can press y. Once the menu in Figure 7 appears, you have successfully negotiated the installation; pfSense will now work much like a Fritz!Box. Although the DHCP server, NAT, and firewall components are already up and running, the setup will typically need some manual attention in the web interface (Figure 8).
Getting Started
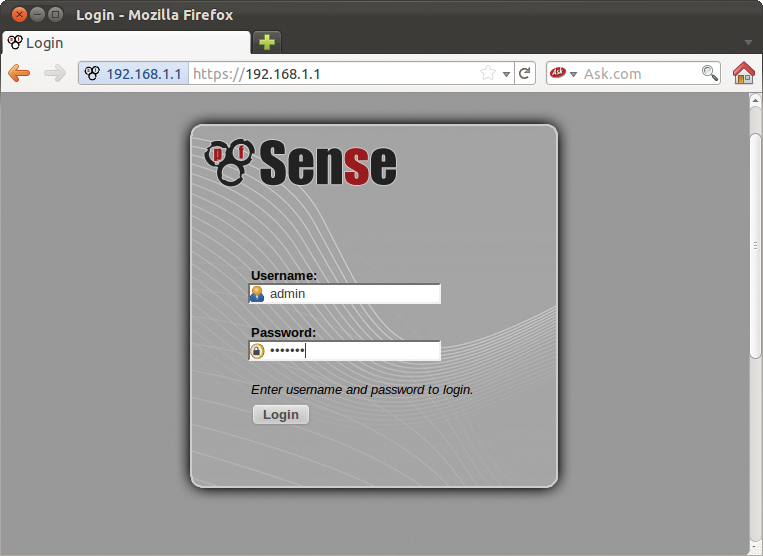
In the default state, the built-in DHCP server assigns IP addresses in the range 192.168.1.100 through 192.168.1.199 to all the computers connected to the network via the first LAN interface. On the network, point your browser at 192.168.1.1 to reach the pfSense web interface. Accept the self-signed certificate that pfSense issued for itself as an exception.
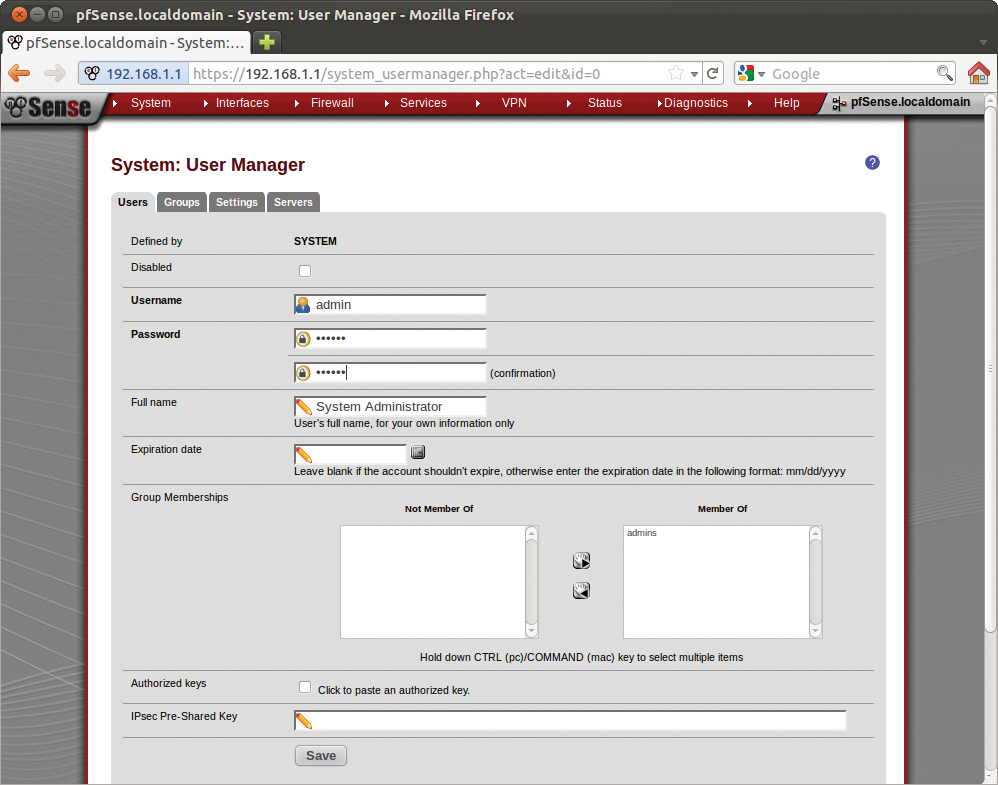
Initial access to the web interface uses a combination of the username admin with a password of pfsense. These are the credentials of the all-powerful administrator, who is allowed to change everything. One of the first things you should do is change the password. To do this, access System | User Manager, click the e icon on the right in the admin line, and type a new password for Password (Figure 9). You always need to save any changes you make in pfSense explicitly by pressing Save at the bottom of the screen.
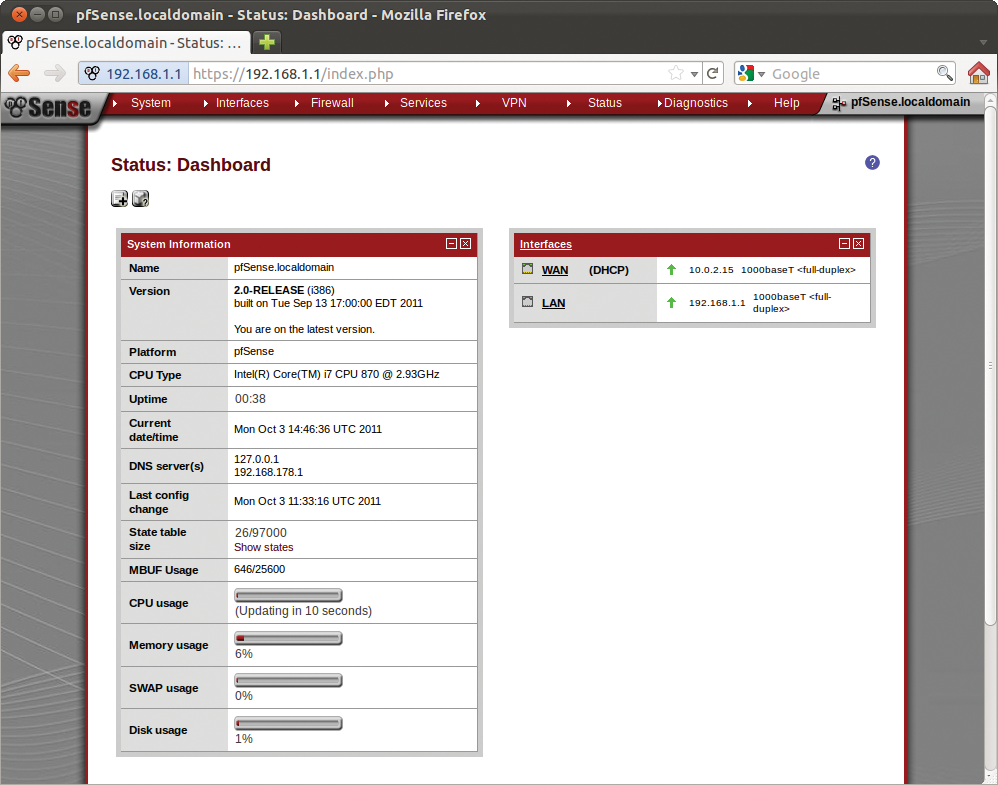
Clicking the pfSense logo in the top left corner takes you back to the first screen, or dashboard. This gives you an initial overview of the system and its current load (Figure 10). If you need more information, you can add widgets. To do so, just click the small plus icon below Status and choose a new source of information. One of the things that I have found useful is the Traffic Graphs widget, which provides a graphical overview of your traffic. See also the "Information Theory" box.
Numbers
By default, pfSense uses a DHCP client to retrieve an IP address for the WAN interface. In line with RFC 1918, it refuses IP addresses from the areas reserved for private LANs, 10/8, 172.16/12, and 192.168/16. In some cases, such as for UMTS access, providers will assign precisely these IP addresses. To tell pfSense to accept them, you need to uncheck Block private networks at the bottom of Interfaces | WAN. A check mark in Block bogon networks will block addresses not assigned by the IANA, such as 0.0.0/8. Both functions improve security and should only be disabled if you have a good reason to do so.
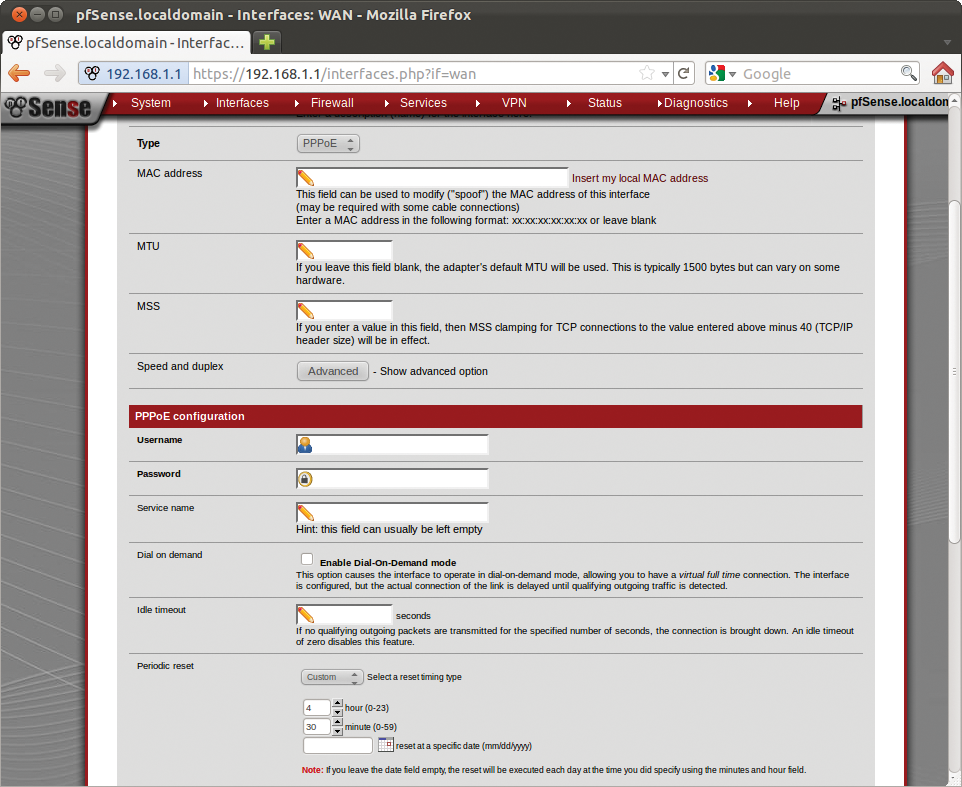
If you want pfSense to use ADSL to create an Internet connection, you need to teach the WAN interface to use PPPoE. To do so, simply set the Type to PPPoE and then enter your access credentials in the fields below PPPoE configuration. Many ADSL providers automatically interrupt the connection after 24 hours if you have an unlimited download broadband plan. pfSense can perform the reset at a specific time. To do so, go to Periodic Reset, select Custom in the drop-down menu, and then define the time in the two fields (Figure 12).
All of the PCs connected to the LAN are automatically assigned an IP address via the built-in DHCP server. If you want to assign addresses from a specific address range to your machines, start by going to Services | DHCP Server and then assign the address Range. The bottom of the screen shows you a table (empty by default). You can assign IP addresses to specific PCs here. To create a rule of this kind, click the small plus icon, enter the machine's MAC address, the desired IP address, and the hostname.
The Regulator
If you take a quick look at Firewall | Rules, you will see that the firewall blocks all incoming packages from WAN by default. In a similar fashion, all the PCs on the LAN are allowed to open outgoing connections. To create a new rule, press the small plus icon at the top right. This takes you to a form where you can point and click to create rules (Figure 13).
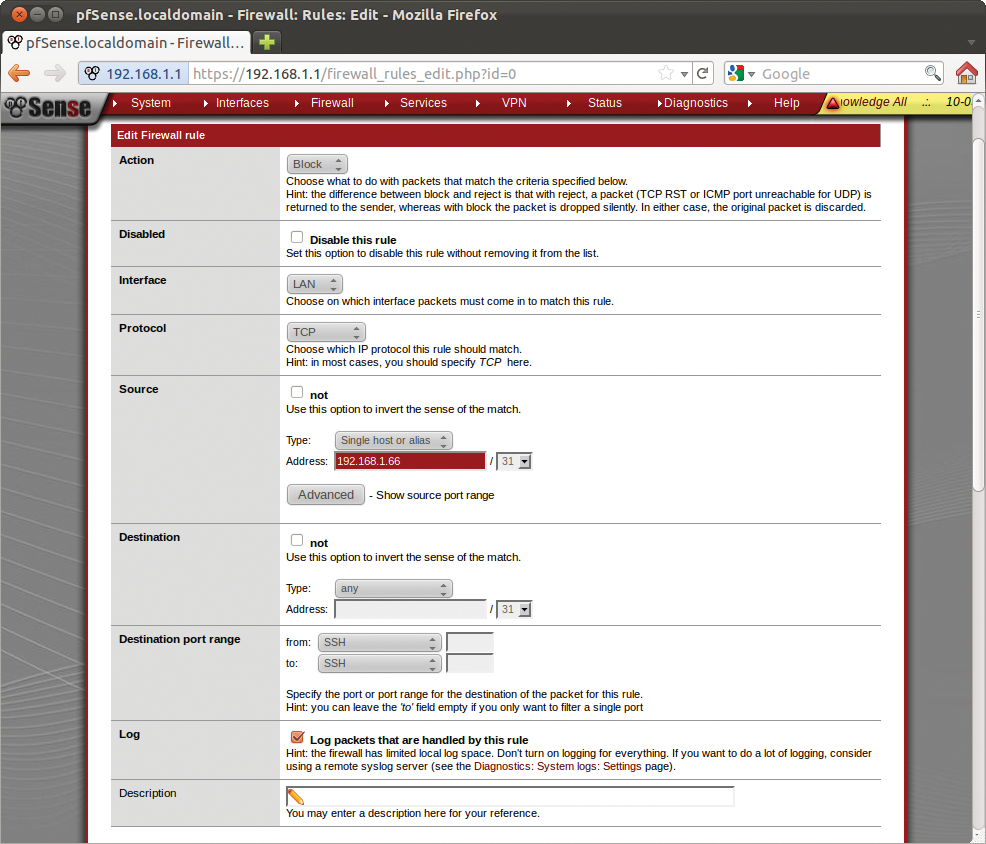
You need to watch out for two pitfalls here: Because of the non-editable Anti-Lockout Rule, all the machines on the LAN are always allowed to access the pfSense computer. Even with the rule shown in Figure 13, the computer with the IP address of 192.168.1.66 was still able to use SSH to log in to the pfSense machine (this assumes that SSH access is enabled). To prevent this, you can disable the Anti-Lockout Rule in System | Advanced by unchecking Anti-lockout. However, this means running the risk of locking yourself out because of a careless mistake.
Additionally, the firewall processes all the rules from the top down. The first valid rule wins, and pfSense ignores all the others. You can move a rule by clicking to select the rule and then pressing the arrow icon next to the new position at the edge of the table. If you have the correct order, but a blocking rule still doesn't seem to take effect, you might want to go to Diagnostics | States and reset all the states by clicking Reset in the Reset states tab. The browser might trip up here and infinitely reload the page; if so, just refresh the page.
Personnel Department
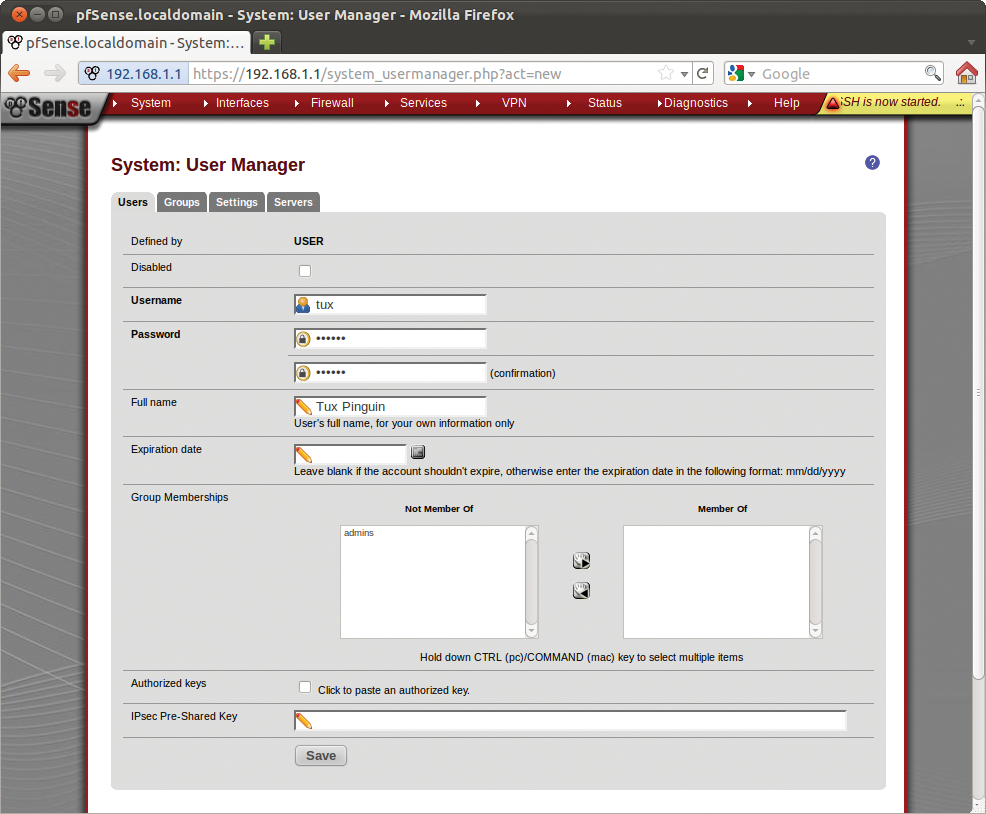
Before your LAN users start accessing the Internet, they need to authenticate on a special portal page by typing their username and password. For this to happen, you first need to store these credentials in pfSense. To keep things easy, I will be using the built-in User Manager in pfSense, which you will find in System | User Manager. In this case, you press the plus icon in the User Manager to add a new user account for each user. The form only requires you to enter a username and a password (Figure 14). For production use in a corporate environment, you will probably want to use RADIUS-based authentication instead of the User Manager approach.
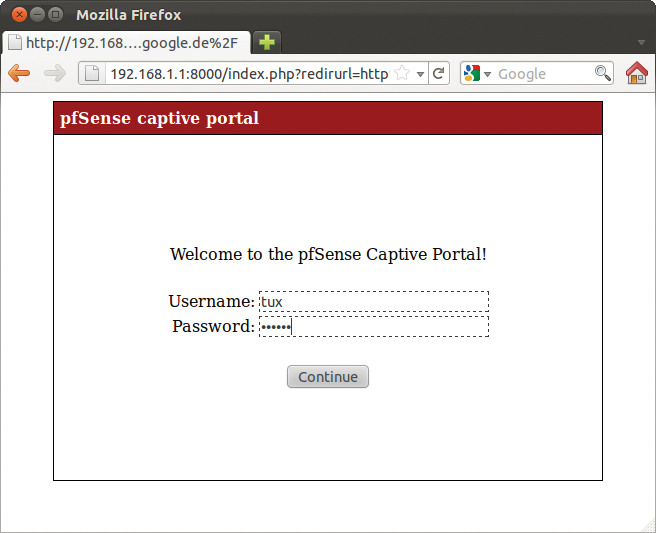
The login page comes courtesy of the Captive Portal. To enable the page, check Enable captive portal in Services | Captive Portal. You want the login page to appear when a user on the LAN wants to access the Internet; in other words, check LAN in Interfaces. If the user is idle for a certain period of time, pfSense automatically logs the user off. You can define the number of minutes until the Idle Timeout occurs. If this field is empty, there is no time limit. Hard Timeout is somewhat more strict: After a certain number of minutes, pfSense throws out the user – even if they were working on the Internet at the time.
When a user logs on, pfSense automatically takes them to the URL you defined in After authentication Redirection URL. The usernames and passwords are stored in pfSense's own User Manager in the example here, and this explains why Authentication is set to Local User Manager / Vouchers. As Vouchers suggests, you can also create vouchers in the Vouchers tab to give users temporary access to the Internet. This is useful for hotels, for example, where guests can purchase vouchers for online time.
After pressing Save, whenever a client on the LAN tries to access the Internet, the user is automatically shown the login screen that you can see in Figure 15. The user needs to enter the credentials stored in the User Manager to access the Internet.
Finally, just a reminder to always save your changes before opening a new menu item in the web interface, unless you want to discard all your changes, that is.
In some cases, such as with the DHCP server settings, you also need to apply the new settings explicitly. If you are installing pfSense on a production machine, you will also want to run the setup wizard in System | Setup Wizard: It prompts you for the necessary information, such as the hostname, which will otherwise default to pfsense.localdomain.
Conclusions
In this article, I have only provided an overview of the basic pfSense features; the firewall distribution's feature set is far greater than described here. Unfortunately, the documentation right now is fairly gappy, and the wiki is sparsely populated [6]. This article, and the books available in the stores right now, are mainly based on the older 1.2.x versions. Much of the content is still applicable, and if you are fairly familiar with the services, you will quickly find your feet. Incidentally, a number of companies have started offering hardware or appliances with pfSense preinstalled; a list of companies recommended by the developers is available online [7].
