Setting up your own NAS with FreeNAS 8.0.2
Flexible Storage
Whether you need more storage space for your users or for a server, setting up network attached storage (NAS) is a popular approach. NAS is cheaper than a storage area network (SAN) and is particularly well suited to smaller environments or storage for backup systems.
Preconfigured and prebuilt appliances swamp the markets, all allowing administrators to integrate NAS storage into their networks by buying both the hardware and the software. However, in many cases, companies have working hardware and smaller servers that are due for replacement.
This type of system is perfect for setting up NAS because the technology itself doesn't pose any major hardware requirements. Even if you don't relish the idea of using these systems in production, you can still use a NAS system to install, for example, a cluster for test purposes, for training, or to document the installation of clusters in the data center.
In the open source world, the tool of choice here is FreeNAS, which lets administrators quickly set up an easy-to-use NAS system. Among other things, FreeNAS lets you set up storage as an iSCSI target. Targets can be shared on the network and used by Windows servers, for example. You could also wire up your NAS to an ESX server or vSphere, and the list of supported systems includes Apple computers.
Convenient
FreeNAS uses its own operating system, which makes the computer and its hard disks available on the network. In other words, you don't need to install the operating system first and then FreeNAS; this is a single-stop install. Management is done through a convenient web interface, but experts can also log in via SSH if needed.
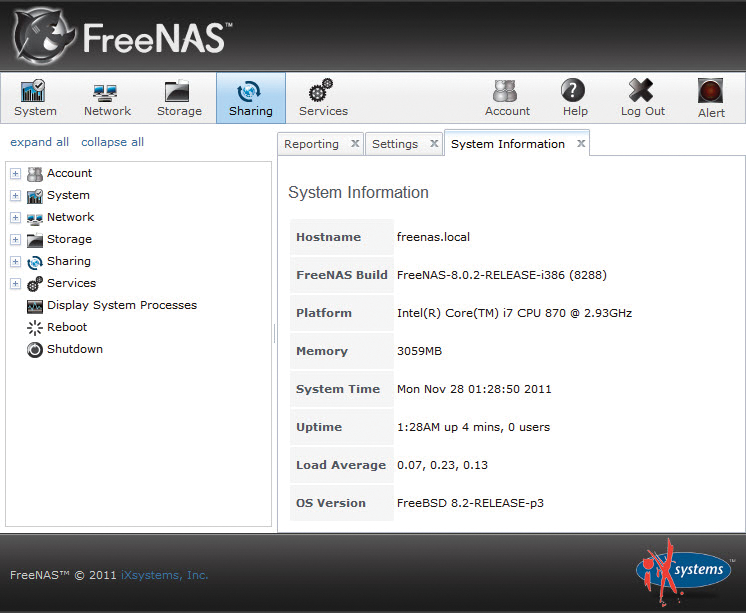
Users can access the storage via SMB, NFS, CIFS, AFP, FTP and TFTP, RSYNC, and SCP. You can also integrate the NAS as an iSCSI target. The filesystems FreeNAS offers are UFS, ZFS, ext2/3, FAT, NTFSm, and RAID-Z. You can monitor the server with SMART or via the logfiles, email, and SNMP. Again, management mainly relies on the web interface (Figure 1).

Authentication can be handled by LDAP, and you can integrate the system in your Active Directory. Of course, you can also create local users and thus share the system with smaller workgroups. If you use iSCSI, you can manage user privileges on the target servers via Active Directory or locally as needed.
When planning the disks in your future FreeNAS, make sure you configure them correctly: You can't use the disk from which FreeNAS itself boots as NAS storage. The best idea is either to use two disks or to boot from a USB memory stick. Additionally, the server should have at least 4GB of RAM for the latest version to run FreeNAS as an iSCSI target for a Hyper-V cluster or Exchange. Although you can use less memory, you will then want to use the older UFS filesystem rather than ZFS.
Built-In RAID
With FreeNAS, you can set up software RAID levels 0, 1, 3, and higher, but again, you need to be aware that hardware RAIDs are faster and safer. The system also lets you set quotas, create snapshots, and compress storage space, but you do need to use ZFS for this.
FreeNAS is based on the free FreeBSD operating system and the NanoBSD distribution. Future version numbers of FreeNAS will reflect the FreeBSD version on which the system builds. This explains why the developers moved from 0.7 to 8.0.2 and will be sticking to this schema in future.
New Versioning
After merging the changes from FreeBSD 8.2 into FreeNAS, the developers will raise the version number to 8.2. The new version offers a revised user interface that is easier to use. Additionally, the ability to support Apple computers was improved in the form of the Apple Filing Protocol (AFP), and Windows computers benefit from the Common Internet File System (CIFS). The developers have accelerated iSCSI access and made it more stable. Unfortunately, there is no option for updating directly from the previous version. The new version 8.0.2 also fixes a bug that affected mail delivery and improved the quota configuration feature. All told, using the new version is worthwhile.
Download and Installation
You can download FreeNAS from the website [1] in the form of an ISO file. Depending on the hardware you are using, you can download and install FreeNAS as a 32-bit or 64-bit system. Although you can choose the current version as a Live CD, you always need to install.
Alternatively, you can install the system on a USB memory stick. When you boot the device on which you are installing FreeNAS from the CD, the installation program immediately comes up. Although the process is not very complicated, you do need to pay attention to it.
The installation wizard deletes all of the data partitions on the disk that you target for the installation, and the data on the other disks in the computer will be deleted later. This means that you shouldn't save any data on a FreeNAS server before installing and fully setting up the system. The space required by the system is fairly small; you can use hard disks or USB memory sticks with a size of 1GB. FreeNAS itself needs about 64MB.
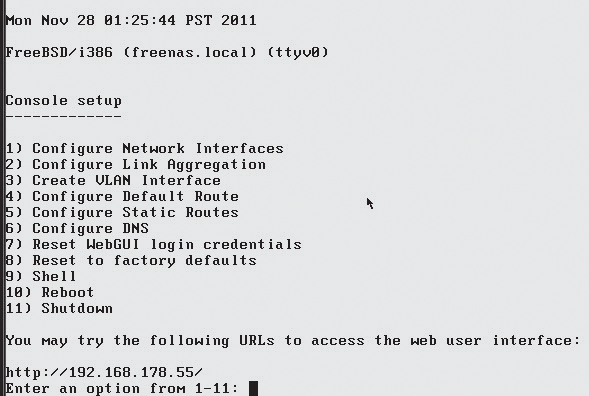
The installation just takes a couple of minutes. After rebooting, FreeNAS is already accessible; however, you will want to change a couple of settings in the Network section in the shell. To help you do so, FreeNAS displays the configuration window (Figure 2). You can change all of the other settings over the network in the web interface. FreeNAS uses DHCP to retrieve an IP address by default. To change that behavior at the console, select item 1 and then type n. The wizard then asks if you want to continue using DHCP – again you want to type n. The next step is to press y to configure the IP address. Item 6 lets you configure the DNS server for FreeNAS. This step is necessary if you want to connect the server to Active Directory.

Management and Initial Configuration
You can access the web interface by typing http://IP. Access is unencrypted by default and, as of version 8.0.2, the admin doesn't have a password. In other words, before you continue with the rest of the setup, you need to set a password for the admin user and change access to HTTPS.
You can start by clicking on Account | My Account | Change Admin User and then choosing the Account tab. Then, press Change Password. In the dialog that appears, you can type a password for the user or configure a new user account. After making these changes, log in again and open the same section. Go to the Settings tab and click on General. Here, you can enable HTTPS as the protocol and select the IP address that you will be using to access the GUI. If needed, you can also change the port of access, but you will need to enter this port when you type the address for accessing the web interface in the browser.
In the same section, you can also change the time zone and the language for the interface. Press Save to store your changes and restart the web interface. After enabling SSL, the address changes to https://IP address:port. Log in with the user account you configured and type the password.
Your browser will show you a certificate warning, because the SSL certificate that FreeNAS uses is self-signed. Of course, you can go to System | Settings | SSL to deposit a new certificate for an optimum configuration, but perhaps none of this is necessary in a test environment.
Adding and Configuring Storage
To allow FreeNAS to share its storage capacity on the network, you need to select the hard disks you will be managing. To do so, click on Storage | Active Volumes | Create Volume. If you will be sharing FreeNAS as an iSCSI target, you must not define any volumes. In this case, proceed as I will describe later.
When you are configuring an iSCSI target, you must select a disk that is not in use or, alternatively, create all ZFS units on a hard disk that is already mounted and use these as your iSCSI targets.
If you are sharing FreeNAS in the usual way, you can first mount the hard disks and then create the shares. After you do so, a new window pops up in which you need to type the name for the new volume and select the hard disk that will serve up the volume; then, you can select the filesystem. Other initial options are between UFS and ZFS.
ZFS is the better choice of filesystem, because it supports snapshots. After configuring the volume, you can define when FreeNAS should create snapshots. You can change the settings at any time, but you can also create snapshots manually.
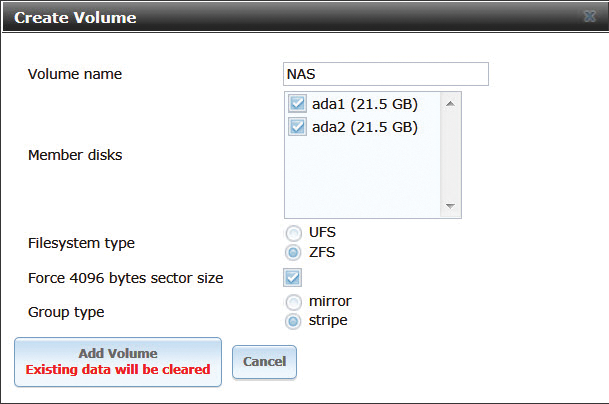
If you select multiple hard disks simultaneously, you can create a software RAID (Figure 3). After doing so, you can choose to mirror the disks (RAID 1) or group to improve speed (RAID 0, striping). After making your choice, press Add Volume, but do remember that all of the data on the hard disks involved in this operation will be deleted.

Optimizing Storage Space and Creating Snapshots
After adding all the hard disks you want to share on the network, you can monitor them directly in the web interface, as well as modify their configurations (Figure 4), by clicking on the Storage tab. In the case of ZFS disks, the first step is to configure when you will be creating snapshots.

The settings are located in Storage | Periodic Snapshot Tasks. The Add Periodic Snapshot option lets you create a new task. For each snapshot task, you need to define storage space, the time at which to grab the snapshot, and how long FreeNAS should keep the data.
The Volumes section shows you all of the configured hard disks, and View All Volumes shows you the status and lets you change settings, grab snapshots manually, and display the disk health states. All of these options are pretty much intuitive; the system will always prompt you before deleting data.
Defining Access Services and Creating Users
After connecting the hard disks to the system, you need to define the protocols that can be used for accessing the shares on FreeNAS. By default, all protocols and services that users could use to access the volumes are disabled after the installation. Click on Services and enable the services that you want to be used for access to the server. Clicking the screwdriver icon lets you modify the individual services. You could use the services, for example, to set up FTP servers accessible via dynamic DNS or to provide shares for a variety of operating systems.
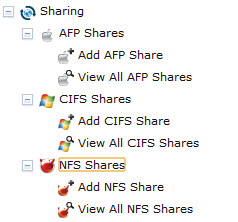
The services also let you connect FreeNAS to your Active Directory or to local users who are allowed to use the storage in the Users section (Figure 5). If you use the same usernames and passwords in the workgroups, users don't need to authenticate to access the shares. After disks, services, and users have been created, the next step is to configure the shares that you will be storing on your NAS disks. The settings for this are located in Sharing, where you can define access for Apple, Linux, and Windows systems. You can create Windows shares with CIFS (Samba).

In the case of these services, you may also need to define what access can occur – for example, whether anonymous access is permitted. Other options here are authentication via Active Directory or local authentication based on user accounts that you defined in the Users section. In the case of local authentication in FreeNAS, you first need to create the user accounts. If you assign the users to a workgroup, it is a good idea to create the users with the same usernames and passwords that they use on the local computers. For Home Directory, enter the path to the volume where you will be creating home directories for your users.
If you want to use permissions for the groups, you can define them in the Groups section. Then, in View All Groups click on the group you created and on Members. This is where you can add the user accounts you created in FreeNAS. You can now assign privileges to these users and groups. If you share an iSCSI target, none of this is necessary because access privileges are controlled by the server, which uses FreeNAS as its target.
Anonymous Access
If you want to allow anonymous access for all users on your network, you can create a new user by the name of guest. You can then assign this account access for new shares. You can also select the share that you want to provide to the guest user on your network, for example, \mns\nas. Then, enable the Disable password logins option to make sure the user doesn't need to enter a password.
After completing these steps, go to the Storage section to access the permissions for the system by clicking on Change Permissions for the volume in question. For Owner (user) and Owner (group), choose guest in both cases to allow anonymous access and enable the Set permission recursively option. If you are working with users and groups, enter nobody for Owner (user) and the user group for which you are granting access to the volumes for Owner (group). Make sure you set the permissions you want to assign. By default, users are not allowed to write, and you will thus need to enable the Group for Write.
When you create a new share, or modify existing shares, make sure the Guest user is selected for Guest Account. Also, you need to enable the option Allow Guest Access to support anonymous access. In Services, enable the Anonymous authentication mode for CIFS, select the guest user for Guest Account, and enable Allow guest access, Allow Empty Password, Enable home directories, and Enable home directories browsing. Then, select the volume for which you are enabling anonymous access.
These settings are only necessary for anonymous access or if you want to enable home directories for users. If you want users to authenticate, enable the Local User option in Services | CIFS. You will also see the name of your FreeNAS server here. Make sure to use the same workgroup that is on the workstations; this setting defaults to WORKGROUP on Windows. At this point, you can also modify all of the other settings for the FreeNAS server.
Using FreeNAS as an iSCSI Target
To use a FreeNAS system as an iSCSI target, you basically need settings similar to those for legacy shares. Additionally, you need to configure the iSCSI system service and connect the servers involved. If you run FreeNAS as an iSCSI target, servers are given block-based data access. This is often necessary if you want to store database files or Exchange data on the system or if you are connecting FreeNAS to a cluster. To configure FreeNAS as an iSCSI target, you should always start by configuring iSCSI. To do this, you need a volume that you have not yet used in FreeNAS or a ZFS volume.
As a general rule, it is advisable to complete the iSCSI settings in Services | iSCSI before creating shares and volumes for other areas. To begin, go to Portals | Add Portal to create a new portal for iSCSI. You can keep the standard configuration of 0.0.0.0:3260. Of course, you can also modify the IP address and standard port at this point, but this is not initially necessary.
Next, click on Authorized Initiator | Add Authorized Initiator. Again, keep the default settings in the test environment. In a production environment, you will want to restrict access by defining which servers can use FreeNAS as a target. You can also use a user account for this; you can create the account in the FreeNAS iSCSI configuration | Authentication section, but more on that later.
The next step is to select Target | Add Target. Enter the name of your choice for the target, for example, freenas, or the name of a cluster drive, such as cluster01 or cluster02. The best option for type is Disk if you are providing the corresponding volume as a disk on the target server. Select 1 for Portal Group ID and Initiator Group ID and then confirm your changes by pressing OK.
Next, select Device Extents | Add Extents. As the Extent Name, type the name that you assigned to the target (i.e., freenas, cluster01, or cluster02), and then select a hard disk that you have not yet used on your FreeNAS system.
If you do not want to use the whole disk, but just part of it, you first need to create a normal volume with the ZFS filesystem and then a new virtual ZFS volume. I will show how to do this in a moment. Next, click on Associated Targets | Add Extent to Target and connect the targets to the extent that you created. Finally, make sure that the iSCSI service is running. This completes the target configuration, and you can connect FreeNAS to a target server.
Safeguarding iSCSI with a User Account
To safeguard an iSCSI target in FreeNAS with a user account, you need to modify the iSCSI configuration in various places. The first step is to click Authentication | Add iSCSI User in the FreeNAS iSCSI configuration. Enter a username and a secret (password) for the user in FreeNAS. The other fields can remain blank. Then, click on Target Global Configuration and select the Chap option for Discovery Auth Method and select 1 for Discovery Auth Group. Click on Save to save all your changes.
Next, go to Targets to access the targets for which you are enabling authentication. Again, select 1 for Authentication Group number. After making the changes, you need to authenticate in the Browse tab's iSCSI Initiator settings on the target server. But, you can also integrate iSCSI without authentication.
After configuring FreeNAS as an iSCSI target, you can connect the required servers to the system. Windows Server 2008 R2 and Windows 8 Server provide an easy option for this. You can use the iSCSI Initiator, which is provided as a built-in tool on Windows Server 2008 R2 and Windows 8 Server. You can launch this via Start | Management. For Windows 8 Server, search for iSCSI in Start | Search.
The first time you start the software, you need to confirm that you want to start the corresponding service, which is currently blocked. You can then configure the service in various tabs. The connection is handled identically in Windows Server 2008 R2 and Windows 8 Server. Follow these steps:
1. Change to the Browse tab.
2. Click on Find Portal and enter the IP address or name of your FreeNAS server.
3. Go to the Targets tab. Windows will show you the drives it has discovered on FreeNAS.
4. Press Connect. This tells the server to open a connection to the device. The device is available but not yet connected to the computer at this point.
5. Check the Add this connection to the list of preferred targets. You need to set this option separately for all disks.
6. Confirm all windows by pressing OK.
After connecting the drives to the server, you need to switch them to online status, then initialize, partition, and format local drives in the hard disk manager. To launch the hard disk manager, type diskmgmt.msc in the start menu search box. The drive is then accessible like any local drive on the server.
Windows Clusters
You can also use FreeNAS as an iSCSI target for Windows clustering in test environments, for Exchange clusters, and even for Hyper-V in some cases. The best approach is to set up one of the disks in FreeNAS as a normal ZFS volume first.
After creating the drive, click on Create ZFS Volume in the Volumes | Existing ZFS disks. This command creates a virtual disk with the ZFS filesystem within a ZFS volume you create in FreeNAS. To do so, select the volume you've created and enter the size of the virtual ZFS drive (e.g., 10GB). Then, click on Add ZFS Volume. You can create multiple ZFS volumes on a single disk that you defined as a volume in FreeNAS and then configure them as targets in FreeNAS. To do so, just select the ZFS volumes in the wizard in the previous steps.
Use the disk as the basis for a cluster: Converting to a dynamic disk is not recommended for clustering. For use in a cluster, proceed for the second node as described previously for the first node. Because the disk has already been initialized and formatted on the first node, there is no need to repeat this for the second node.
On the second node, just enable and change the drive letter, which must match the letter for the first drive. If you want to test Hyper-V, you need a Cluster Shared Volume (CSV) to store the data for the virtual computers. For this to work, you need to connect at least two targets in FreeNAS and bind them to the cluster nodes before installing failover cluster management.
