Avoiding chaos in clusters with fencing
Fenced In
Administrators frequently come across the word Fencing in the context of high-availability clusters, but here, I use it to describe a method that allows one node in a cluster to throw another node out of the cluster – using brute force if necessary. This sounds archaic, but it is very much part of real life in a production environment. Cluster nodes blast each other out of the cluster to avoid simultaneous write access to sensitive data leading to inconsistency.
Is the Cluster Doing What it Should?
Fencing mechanisms are important in the context of clusters whenever you need to ensure data integrity on the one hand and service availability on the other. Fencing always serves to guarantee the functional state of the entire cluster by removing individual resources or nodes. The cluster management software always assumes that it is responsible for interpreting all of the actions that occur in the cluster. In the case of Pacemaker, it assumes it has issued all the commands running in the cluster. To ensure that this happens, communication with cluster nodes must work without a hitch. Additionally, you must ensure that the services configured in the cluster really work as their maker intended.
Fencing has to intervene in the cluster if one of these two points is not fulfilled. How should the cluster manager handle nodes that suddenly disappear from the cluster? In the worst case, Pacemaker itself might crash on the missing node, with resources still running that are beyond Pacemaker's control. The Pacemaker instance on the node that is still running can only assert its rights by fencing the other machine. In practical terms, this means rebooting the machine.
The same thing applies to resources that cannot be stopped gracefully. For example, if Pacemaker tells MySQL to terminate on a node, it expects MySQL to do precisely that. If the stop action fails, Pacemaker has no way to discover the reason why – it simply has to assume that an uncontrollable MySQL zombie is running on the node. Again, the only way to end this mischief is by enforcing a reboot of the machine. Pacemaker has ways to regain control over a cluster that has gone haywire.
Fencing Levels
Many roads lead to Rome: Fencing in Pacemaker can be configured at the resource level as long as the data management solution offers this option. Resource-Level Fencing is the more conservative approach and aims, in the case of a failure, simply to configure a certain resource so as to avoid data corruption.
In practical terms, the relevant application here is a distributed replicated block device (DRBD) that supports resource-level fencing in cooperation with Pacemaker.
Variant B literally creates a clean sheet: Node-Level Fencing lets a Pacemaker node physically manipulate another node in the cluster – that is, to enforce a reboot or even a shutdown. In cluster-speak, this is known as STONITH: shoot the other node in the head.
Preparations
Whatever fencing method you choose, you always need to prepare correctly. The rules that apply to redundancy in normal Pacemaker operations are even more applicable in a fencing context. The individual cluster nodes need multiple, independent communication paths. If you are using a DRBD, this is not typically an issue: In two-node clusters with a DRBD, you frequently find a separate back-to-back link for DRBD communication.
This connection, in combination with the "normal" connection to the outside world, via which the other cluster nodes are also accessed, gives you a down-to-earth, redundant network setup. For all communication paths to fail in this scenario, the switch through which the nodes communicate or the internal network hardware would have to fail, thus preventing a direct network connection.
Communication paths are referred to as rings in Pacemaker, which makes such a setup a redundant ring setup.Even if you are not using a DRBD, you should have more than one ring through which the cluster nodes can communicate. Any setup that has a mutual single point of failure is not good. If you have two communication rings that share a switch, you aren't fooling anybody but yourself; failure of the switch obviously takes down both communication paths.
Resource-Level Fencing with DRBD
As mentioned earlier, DRBD permits resource-level fencing. In a worst case scenario, this allows Pacemaker to disable the DRBD resource temporarily on a cluster node. This feature is very useful, in that it allows Pacemaker to compensate for the failure of a DRBD replication link.
Under normal circumstances, a DRBD resource will assume the primary role on one node and take the secondary role on another. As long as the exchange of data works and the disk state of the resource on the node is UpToDate – you can check this by looking at the content of /proc/drbd (Figure 1) – everything is fine for the DRBD.

If the DRBD link fails, the replication solution runs into difficulty because it will not notice that the record on the secondary node is falling farther and farther behind. Without outside intervention, the primary node might fail; Pacemaker would then failover and carry on working with the obsolete data on the secondary node, which could be promoted to the primary role.
The task of resource-level fencing in this example is to ensure that the secondary node is tagged as outdated. The outdated flag is a separate disk state in DRBD. Once it is set, DRBD refuses to switch the resources to primary mode.
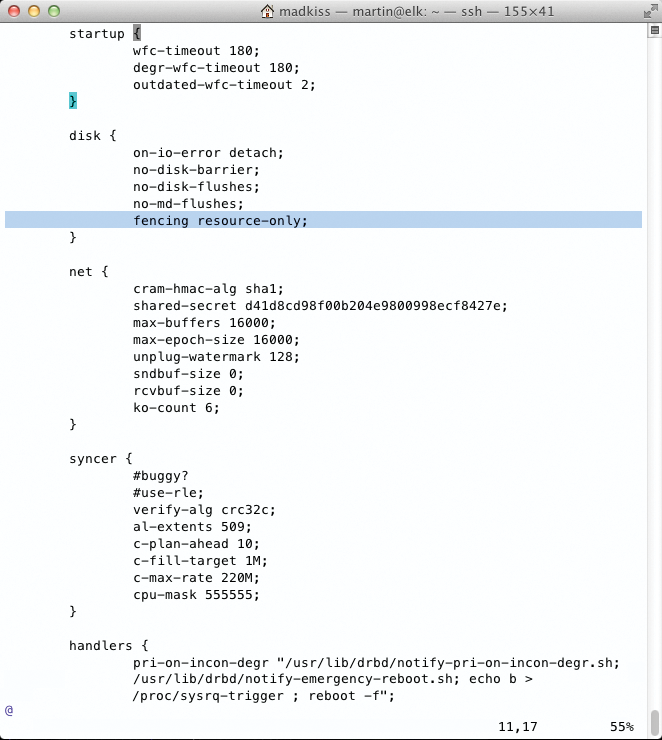
If you have multiple communication rings in this scenario and one of them is still working, Pacemaker can set the flag for the failed node, as long as the fencing function is enabled in DRBD. To do this in DRBD 8.4, you need to set the fencing resource-only parameter in the disk { } block of one resource (Figure 2). Additionally, the handlers { } section for the resource needs the following entries:

fence-peer "/usr/lib/drbd/crm-fence-peer.sh";
after-resync-target "/usr/lib/drbd/crm-unfence-peer.sh";
If you want to enable these options for all of the resources, these entries need to be in the common { } sections, which are typically defined in /etc/drbd.d/global_common.conf. If you make these changes on the fly, it is also important to issue a drbdadm adjust all after making sure the configuration has made its way to the other cluster nodes – fencing is then enabled.
STONITH in Pacemaker
If you want to use Pacemaker's STONITH features, you first need to have the right hardware – that is, a management interface that supports access to a machine without a working operating system. Candidates include HP's iLO cards, IBM's RSA, and Dell's DRAC. Alternatively, you can use Pacemaker with any other management card that understands the Intelligent Platform Management Interface (IPMI).
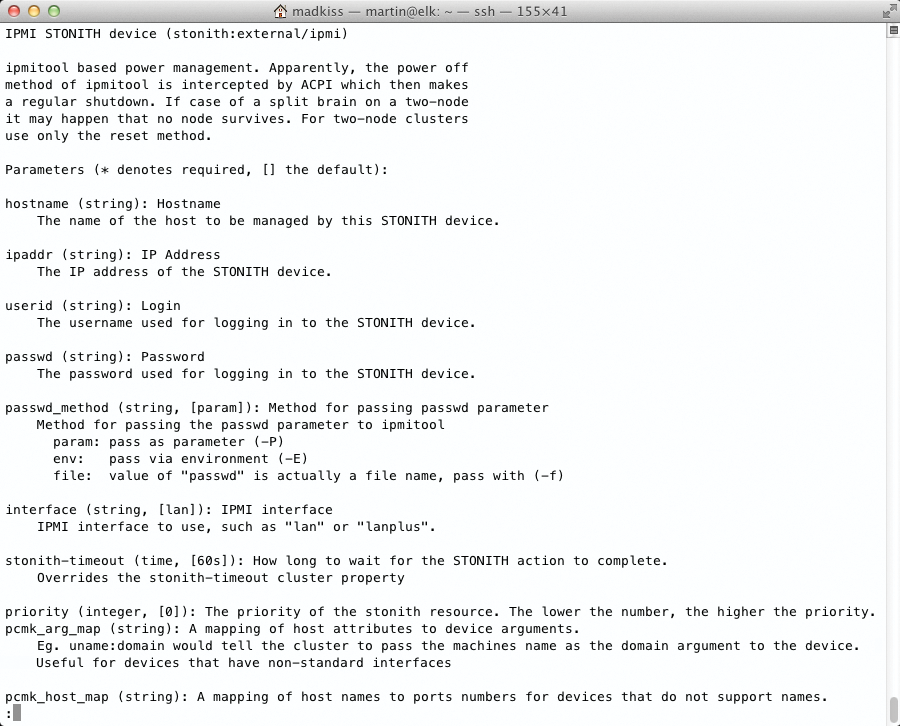
Pacemaker relies on plugins to handle STONITH commands (Figure 3); this is a separate module for the cards just referred to or the generic IPMI plugin. STONITH is then configured via Cluster CIB, (i.e., the Cluster Information Base). STONITH entries are the primitive instructions that don't use a resource agent but a STONITH plugin.

/usr/lib/stonith/external.Some information is necessary to use STONITH with IPMI: You need to know the management card IP addresses, the username, and the password for IPMI login (Figure 4). Once you have this data, it's a good idea to run a test with ipmitool:

crm ra meta stonith:external/Plugin – for ipmi, for example.ipmitool -H address -U login -a chassis power cycle
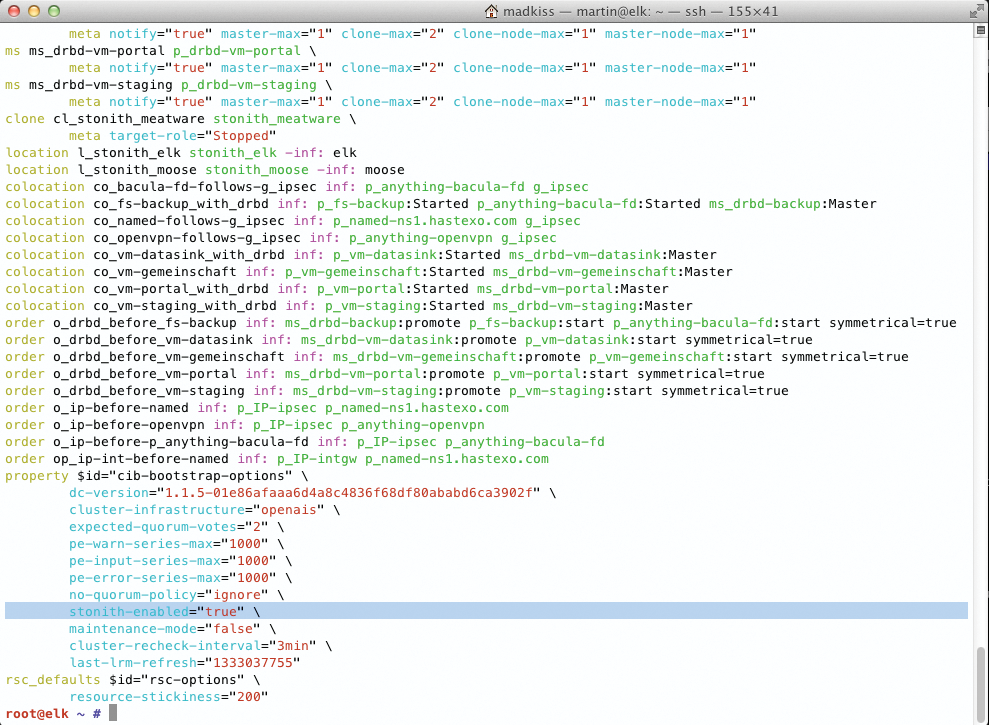
This should reboot the target system, assuming you type the correct password. If this works, you can integrate STONITH with Pacemaker's CIB. Previously, I assumed STONITH was disabled, wherein the stonith-enabled=false entry is set in the Property section of the CIB. To arm STONITH, you need to replace false with true (Figure 5) – of course, the STONITH entries should be in place in the cluster configuration before you do this.

stonith-enabled=true property flag should be set.A STONITH entry in Pacemaker follows the syntax shown in Listing 1. Each cluster should have the same number of STONITH entries as nodes – that is, one entry for each node in the cluster. A complete setup for a two-node cluster comprising alice and bob might look like Listing 2.
Listing 1: STONITH Syntax
01 primitive stonith_hostname stonith:external/ipmi
02    params hostname="hostname"
03    ipaddr="address" userid="<I>login<I>"
04    passwd="password" interface="lanplus"
05    op start interval="0" timeout="60"
06    op stop interval="0" timeout="60"
07    op monitor start-delay="0" interval="1200"
08    meta resource-stickiness="0" failure-timeout="180"
Listing 2: STONITH for alice and bob
01 primitive stonith_alice stonith:external/ipmi
02    params hostname="alice" ipaddr="192.168.122.111"
03    userid="4STONITHonly" passwd="topsecret" interface="lanplus"
04    op start interval="0" timeout="60"
05    op stop interval="0" timeout="60"
06    op monitor start-delay="0" interval="1200"
07    meta resource-stickiness="0" failure-timeout="180"
08
09 primitive stonith_bob stonith:external/ipmi
10    params hostname="bob" ipaddr="192.168.122.111"
11    userid="4STONITHonly" passwd="evenmoresecret" interface="lanplus"
12    op start interval="0" timeout="60"
13    op stop interval="0" timeout="60"
14    op monitor start-delay="0" interval="1200"
15    meta resource-stickiness="0" failure-timeout="180"
16
17 location l_stonith_alice stonith_alice -inf: alice
18 location l_stonith_bob stonith_bob -inf: bob
The location constraints in this example mean that Alice would only reboot Bob, and Bob would only reboot Alice via STONITH. "Self-Fencing" (i.e., a scenario in which a server reboots itself) is thus ruled out.
Once these entries have found their way into the CIB and STONITH has been enabled with the property entry, the feature becomes available. A test in which a kill -9 sends Pacemaker on one of the two nodes off to the happy hunting grounds should cause the target node to reboot immediately.
Avoiding a STONITH Death Match
STONITH via IPMI relies on a working network connection, which means you should have at least two independent network connections in a cluster that is set up responsibly.
It makes sense to use one of these connections for STONITH, rather than setting up a third connection. If all of the rings are down, but the STONITH link is still working, the two cluster nodes would shoot each other down in flames to the end of days, resulting in a STONITH death match.
Conclusions
The STONITH approach is hugely important in clusters to restore calm when problems occur. The example used here based on the Internet Messaging Program is the classic solution and thus possible with more or less any server available in the wild. However, STONITH via IPMI (or some other method that relies on the network connection being up) does not provide any protection in scenarios in which all the communication paths between the nodes in a cluster fail.
Other options are available here, however. One option to consider is storage-based death (SBD), which reboots a node if it loses access to its own storage [1]. Also, the meatware client [2] will stop a cluster action when worse comes to worst; it then waits for administrative interaction. For a useful overview of available STONITH mechanisms, you can visit the ClusterLabs website [3].
