
Your own AWS-compatible cloud with Eucalyptus
Cloud in a Box
Eucalyptus originated as a research project at the University of California [1]. In 2009, the spinoff Eucalyptus Systems Inc. took over further development and commercialization. The software has been available ever since in two flavors: a free open source version, which is completely under the GPLv3 license, and the commercial Eucalyptus Enterprise Edition, which supports the integration of SANs and VMware infrastructure.
Homegrown Amazon
Eucalyptus builds a cloud from several computers in which you can start virtual machines and access storage – much like what Amazon offers with its AWS services. However, with Eucalyptus, you are the operator of the cloud. Administrators not only have complete control, the servers, and thus the data, remain within your own company walls. A Eucalyptus cloud can even be set up quickly on one computer (see the "All on One" box).
To start a cloud with Eucalyptus, you need physical computers that have processor support for the Intel VT or AMD-V virtualization feature. A test installation on VirtualBox or VMware is therefore not possible, but a workaround exists for KVM [2]. The computers should have at least 4GB of RAM and a 250GB hard disk – the more memory, the more virtual machines can be started in the cloud. Additionally, you need an extra set of free IP addresses that Eucalyptus can assign to the systems running in the cloud later on.
Kickstart
In terms of supported operating systems, Eucalyptus is extremely picky. Officially, the developers only support 64-bit versions of two Linux distributions: CentOS 6 and Red Hat Enterprise Linux 6. Briefly, Eucalyptus was also an official part of Ubuntu, but Canonical replaced it in Ubuntu 11.10 (Oneiric) by competitor OpenStack. As of Eucalyptus 3.2, the Eucalyptus developers stopped providing prebuilt Ubuntu packages.
Installing a Eucalyptus cloud on RHEL or CentOS from the provided packages is quite time consuming; the underlying Linux systems need to fulfill many conditions – this is reflected by a massive 96 pages of installation guide. Luckily, the Eucalyptus developers provide special installation media, so administrators can set up a small Eucalyptus cloud in a few mouse clicks.
This FastStart installation method can also serve as a starting point for a larger cloud. Because Eucalyptus wants to have the cloud computers all to itself, admins can avoid the time-consuming setup simply by deleting the hard disks of the computers involved and leaving it to the FastStart image to set up a Eucalyptus system. This approach has the pleasant side effect of giving you a working basic configuration so you can start right away.
Access to and management of the current cloud is handled on client computers with any operating system – either conveniently with the mouse in a web interface or via the official command-line tools known as Euca2ools. The latter can also be found in the repositories of most major distributions. See the "Command-Line Tools" box for more information.
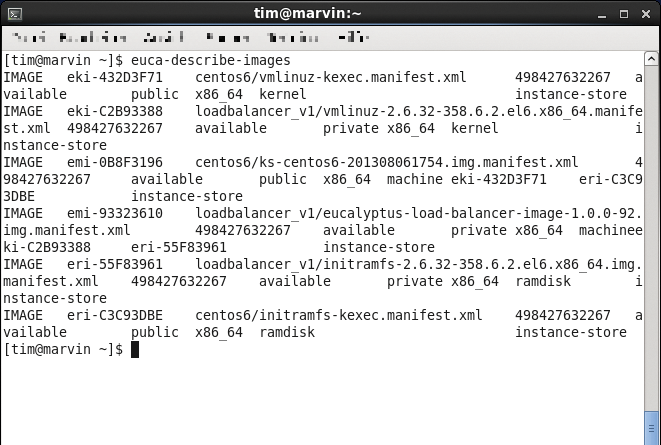
euca-describe-images.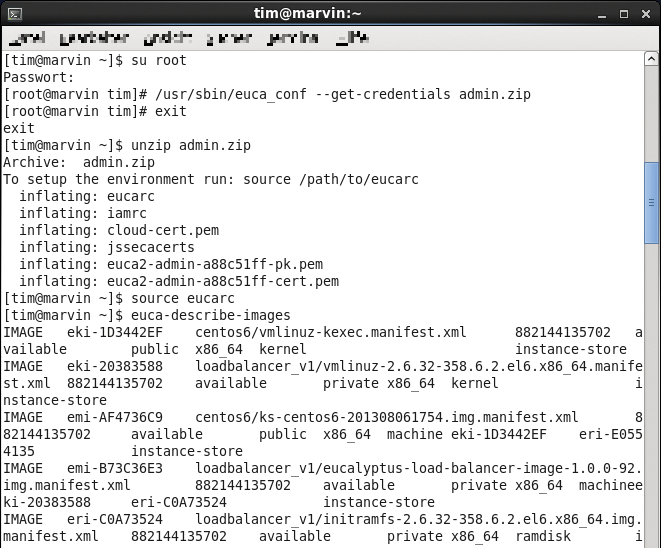
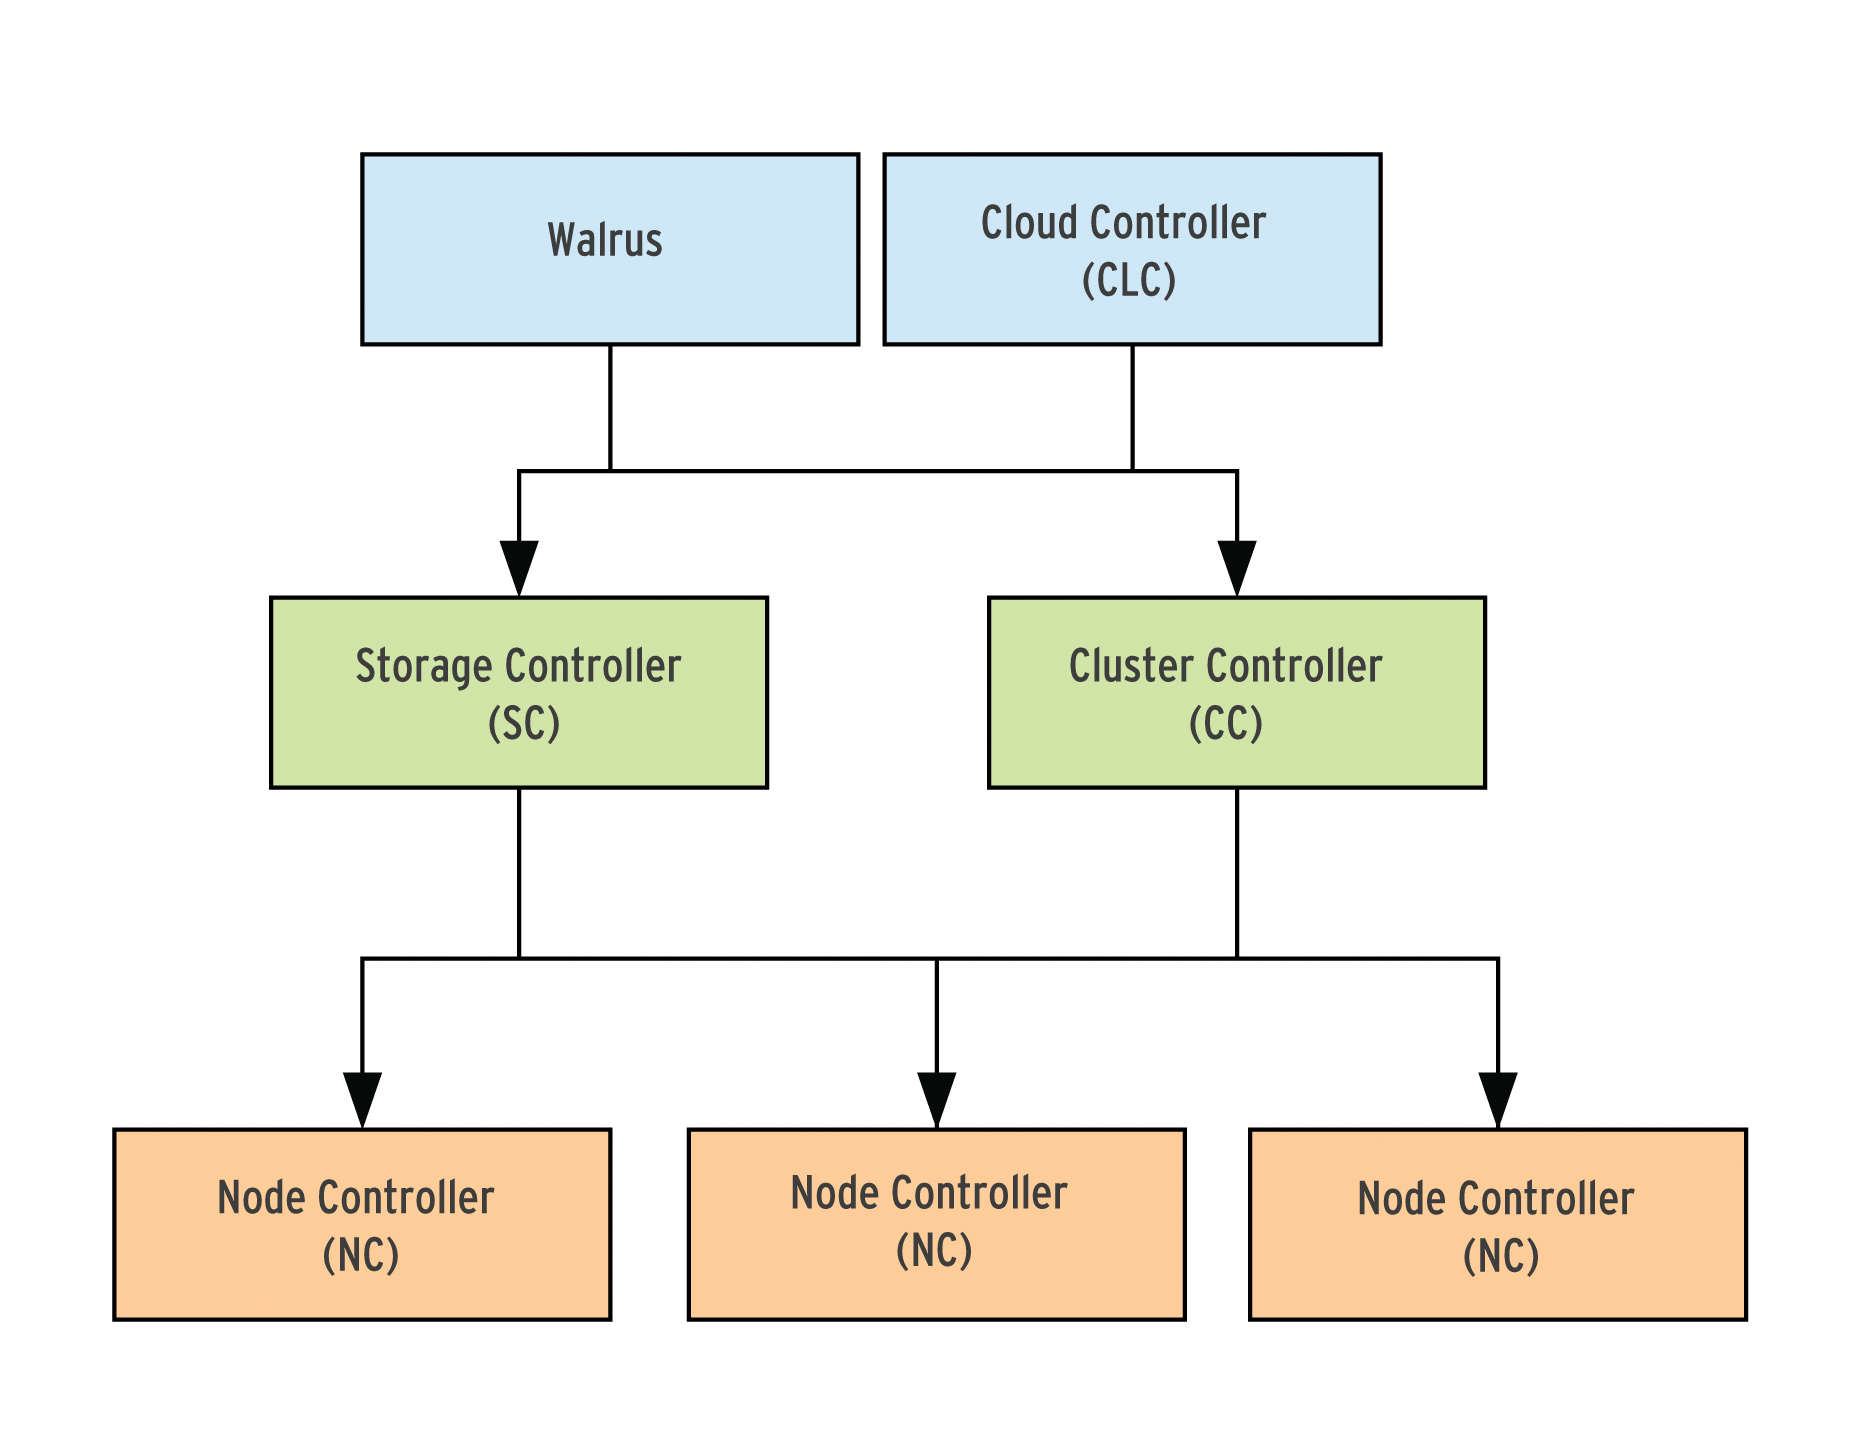
Eucalyptus itself consists of several components (Figure 3), each of which plays a specific task. To begin, you need one or more computers on which the virtual machines can later run and which store the data. A node controller (or NC for short) runs on each of these nodes. The NC essentially starts, stops, and manages the virtual machines running on its hardware.
Services
The front end decides which nodes run on which machines. It also provides the web interface and responds to management commands. Under the hood, the front end comprises several individual services discussed in the "Five Is the Key" box. The front end should also run on a separate computer. An initial, small cloud thus consists of two or more node controllers that do the actual work and another computer that acts as the front end (Figure 4). Thanks to the separation of the components, you can gradually grow the cloud, for example, by adding more node controllers.

Gordian Knot
The FastStart installation media is available for download in the form of a small ISO image [3]. The ISO image is only used as the boot medium and downloads both a complete CentOS 6 and the Eucalyptus packages off the Internet. The computers that will later form the cloud must therefore be connected to the Internet.
Next, you can launch the FastStart image on the computers that will operate as node controllers later. In Figure 4, you would start the image on the computers with the IP addresses 192.168.100.11 and 192.168.100.12. In the boot menu, select Install CentOS 6 with Eucalyptus Node Controller. You can decline the offer to check the installation medium by pressing Skip. Then select Next to choose the language, followed by the keyboard layout.
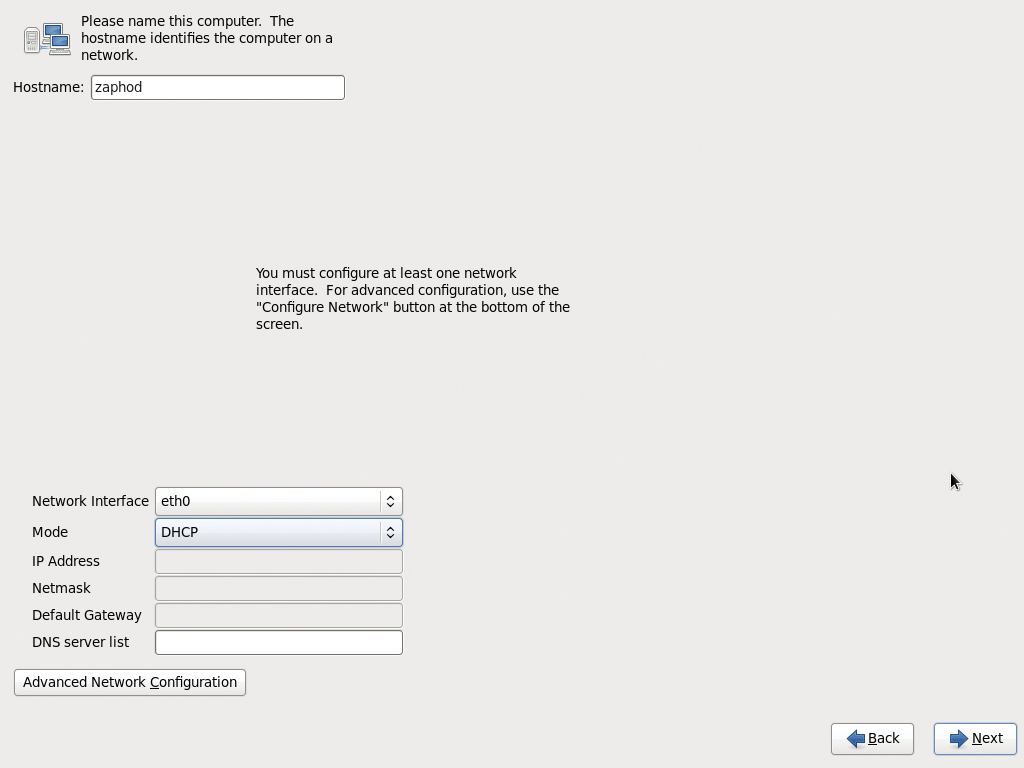
You can then set up a network card (Figure 5). If you use DHCP to assign IP addresses to the computers in your cloud, you must ensure that they always receive the same address; Eucalyptus does not support dynamic assignments. Next takes you to the time settings, which is followed by the password for the root user and the hard disk layout. Because the node controller requires a fair amount of memory, you will want to tell the wizard to use the entire space, which also completely erases the hard disk.
After confirming the security prompt, Eucalyptus partitions the hard disk to suit its needs, downloads the system from the Internet, and sets it up. Your mileage can vary depending on how fast your computer is. Finally, reboot the system without the FastStart medium and log in as the root user.
The configuration script that now launches first wants to know on which network interface the computer with the front end can be reached (Figure 6). Pressing Enter accepts the proposal. In the subsequent setup, the script creates a network bridge (usually br0) with which all virtual machines connect to communicate with the outside world.

You can run ifconfig after the event to check whether the network interfaces have been identified and assigned correctly. If you accidentally pick the wrong network interface, the setup script can be restarted at any time by calling /usr/local/sbin/eucalyptus-nc-config.sh. The computers with the node controllers can continue running.
Front End
After setting up all the load controllers in this way (in Figure 4, the hosts 192.168.100.11 and 192.168.100.12), you can continue with the computer that runs all the other components. Again, you boot from the FastStart medium but then, in the boot menu, select Install CentOS 6 with Eucalyptus Frontend. The installation of the system is now completely analogous to that of the node controllers: press Skip to avoid the media check, select the language and keyboard layout, configure the network interface cards, set the time zone, and assign a root password.
Next, you have assign a free IP address range to Eucalyptus. Eucalyptus will use this range later to assign IP addresses to the virtual machines. The addresses must be on same subnet as the host for the front end. For the example in Figure 3, you could select the IP addresses 192.168.100.100 through 192.168.100.200. You need to enter this range below Public IP range/list using a hyphen as the separator character; in the example, this is 192.168.100.100-192.168.100.200 (Figure 7).
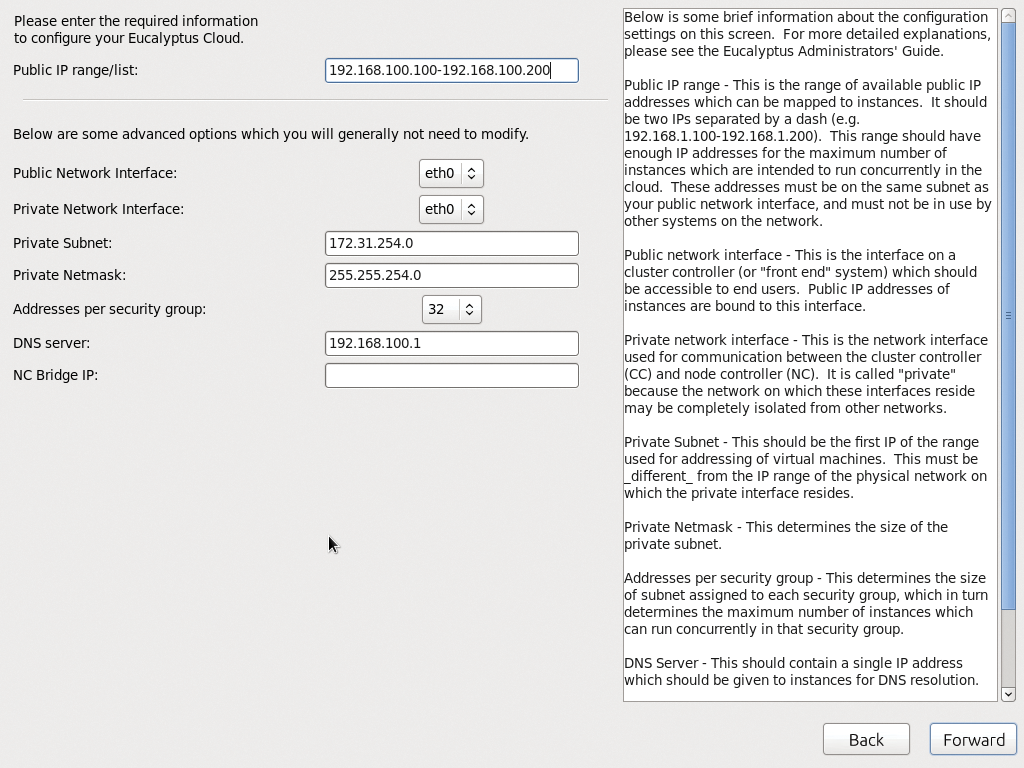
For all other settings, you can simply accept the defaults and then press Next to partition the hard disk. Again, you will want to use all the space on the disk and thus delete the original content. During the subsequent installation, the wizard creates a small image with a small CentOS 6 system, which you can run immediately and directly in your cloud.
The first restart of the front end takes a while, and you might think that the system is hanging. Simply pay attention to the hard disk activity. Sometime later, a graphical wizard appears prompting you to confirm the license. In the next step, type the IP addresses of all your node controllers, each separated by a space character. In the example, that would be 192.168.100.11 192.168.100.12 (Figure 8). If the IP address is not known, you can issue the ifconfig on the node controller to discover it. After you press Next, the wizard will prompt you for the root password for the node controller.
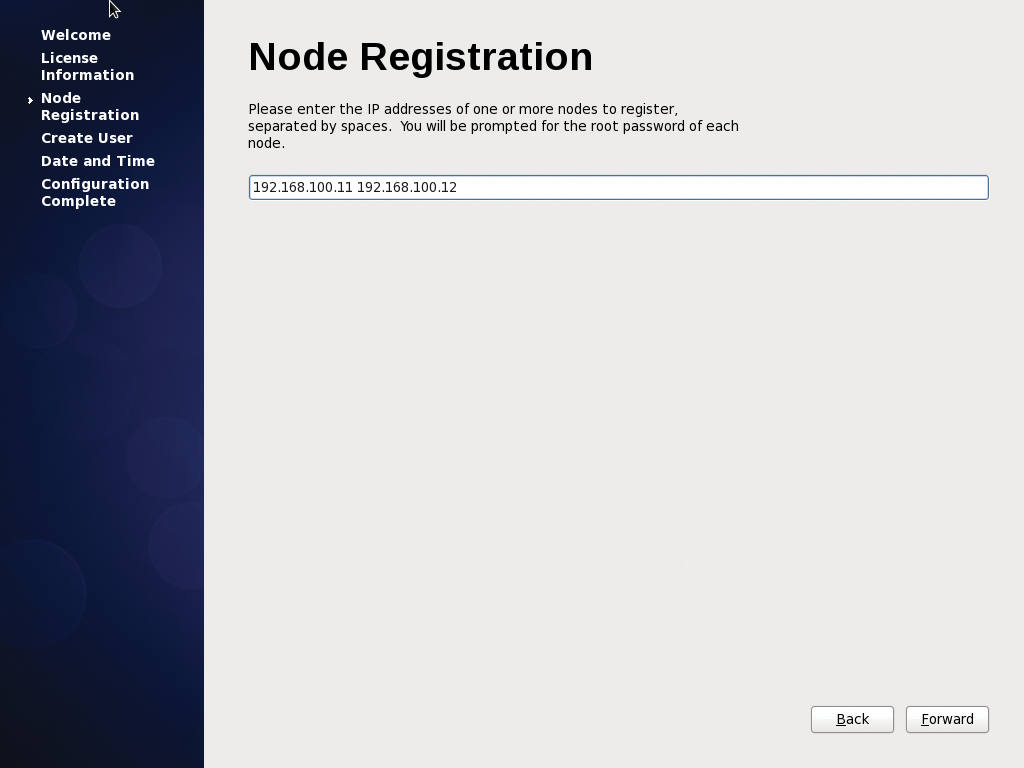
You also need to create a regular user for the computer with the front end. In contrast to the node controllers, the FastStart medium installs a complete graphical user interface on the front-end computer. Eucalyptus requires the clocks to be perfectly synchronized on all computers. To ensure this, Eucalyptus installs an NTP server from the FastStart medium. In the next step, you can thus simply confirm or, if necessary, Add another NTP time server.
Be sure to note the data on the final screen. It gives you access to two web interfaces offered by Eucalyptus. The User Console lets users start new virtual machines and handle other tasks. The Admin Console lets administrators manage the cloud and, in particular, set up new user accounts for the user console.
Point and Click
To start the first virtual machine in the newly established cloud, go to the User Console at the address you noted in your browser. The two web interfaces only allow secure connections, so use the HTTPS protocol when entering the Internet address. The complete address follows the scheme https://<frontend-computer>:8888. You can access this address from any client machine; however, in an emergency, you can also log in directly on the computer with the front end from its Firefox browser. The browser complains about an untrusted certificate, which you can accept or add as an exception before arriving at the login screen. Immediately after installation, you can use the demo account, with a username of admin and a password of demo. The dashboard appears showing all the active virtual machines. Eucalyptus refers to them as instances, and you can start multiple independent instances from one operating system image.
Clicking Launch new instance starts a new virtual machine. The web interface now shows you which OS images are ready to start in the cloud. For a first test, the FastStart medium includes a small CentOS 6 system. To launch it, just click on the image, and the background turns green. Continue by pressing Next: Select Type.
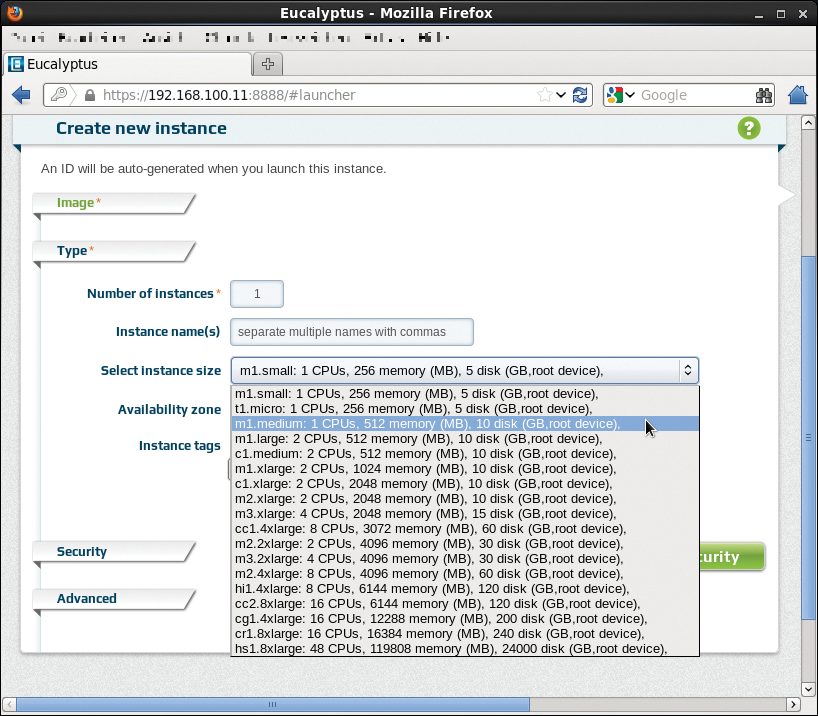
In the drop-down menu, choose Select instance size to define the virtual machine hardware. The small CentOS 6 system requires only one CPU and 256MB of RAM, so the suggested machine type, m1.small is sufficient (Figure 9). You can keep the defaults for the other settings. Continue by pressing Next: Select security.
Key Exchange
To maintain the virtual machine later on, you will need to log on to the machine via SSH. Authentication is handled by a key pair – if you have ever worked with SSH, you will be familiar with the principle. To generate the key pair, click on the green link Create new key pair and enter a name, such as test. Create and Download generates the key pair and offers to download the private key in the test.pem file in this example. Eucalyptus keeps the public key. In the Key name drop-down box, select the previously assigned key name (test, in this example). It may take some time for the matching entry to appear.
Launch instance(s) now finally lets you start the virtual machine. However, the virtual machine takes a little while to get on its feet and appear in the list (Figure 10). Clicking on the (green) cryptic names in the Instance column displays a register with more information. The Public IP column tells you the IP address on which the virtual machine can be reached using SSH, and the Private IP column is used for communication between the virtual machines.
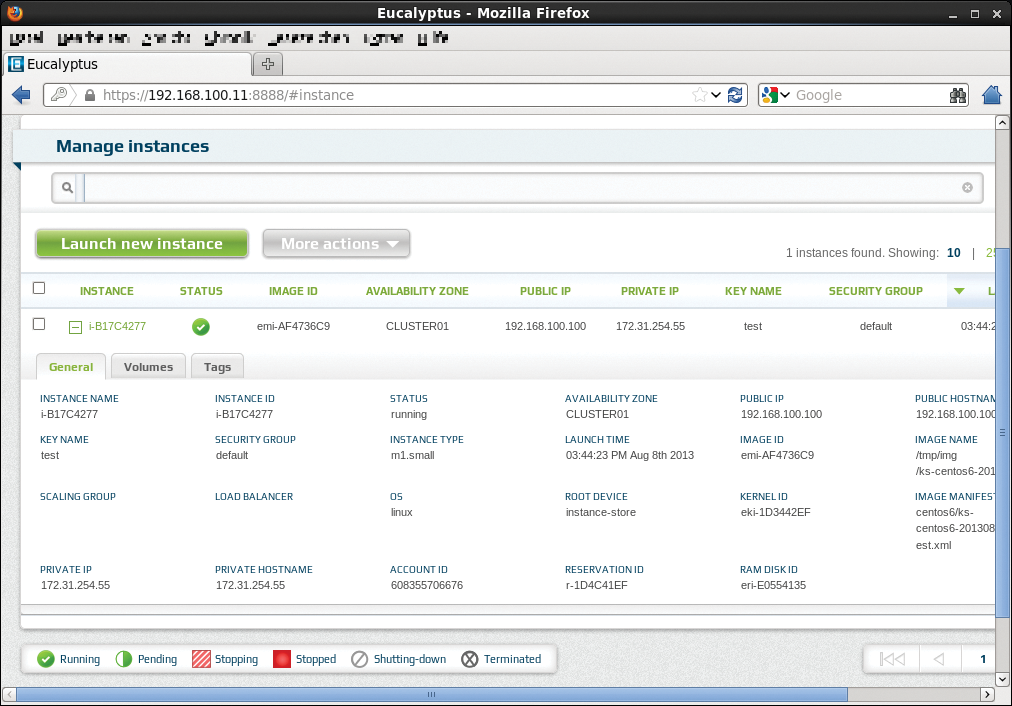
If the list still shows you the IP addresses as 0.0.0.0, some troubleshooting needs to be done. Before you can log in to the virtual machine via SSH, you need to restrict the access rights to the file containing the private key, for example, by typing:
chmod 0600 test.pem
Next, you can log in to the virtual machine with the SSH command
ssh -i test.pem ec2-user@192.168.100.100
where test.pem stands for the file containing the private key, and the address 192.168.100.100 is the Public IP of the virtual machine (Figure 11). The user ec2-user already exists in the mini CentOS system; otherwise, the root username should do the trick.

To stop the virtual machine in the web interface, uncheck the little box in the first column and then select the desired action below More actions, which is Terminate in this case.
Future
The default user account is only suitable for your first steps. To delete it and set up other users who can start virtual machines with their own accounts, you need to access the Admin Console. It can be reached on https://<frontend-computer>:8448. Again, you need to add the certificate as an exception. Log in with the eucalyptus account, a username of admin, and a password of admin. A wizard prompts you to enter an email address and change the password for security reasons; then, you can manage your user accounts under Accounts.
For more details of using the two web interfaces, check out the Eucalyptus Console User Guide [4]. If you want to store your own operating system images in the cloud, you will need to study the extremely comprehensive Administration Guide. These guides also explain how to assign the virtual machines to security groups, create Amazon-style availability groups, and provide cloud storage space.
