
A TurnKey Linux software evaluation platform
One Good Turn
Administrators are happy in everyday life if they can finish their work with relative ease. Then comes an order from the powers that be to find time on the side to check whether some new application offers the desired functionality and whether it can be integrated seamlessly into the existing architecture.
What decision makers without an appropriate technical background often do not understand is that it is not possible to carry out a careful evaluation "on the side." Setting up such an environment is often associated with considerable effort. You can minimize this effort by using TurnKey Linux.
Rapid development in the IT sector makes it more and more difficult for experts to stay up to date. Evaluating new system versions or business software proves to be particularly difficult and time consuming.
With TurnKey Linux, you can evaluate more than 100 of the most important free enterprise applications on a local test system and operate the environment on a virtual machine or in the cloud. According to the developers, only open source tools are provided to ensure no license problems or restrictions.
TurnKey Linux (TKL) is based on Debian 7.2 and thus provides business applications and security updates for more than 37,500 packages. It is a virtual appliance platform with pre-installed, pre-configured, and immediately deployable applications and software solutions that are compiled with the Linux operating system in a virtual machine. An overview of the pre-installed applications on the homepage of the project website [1] can be limited to content management, web development, issue tracking, and messaging.
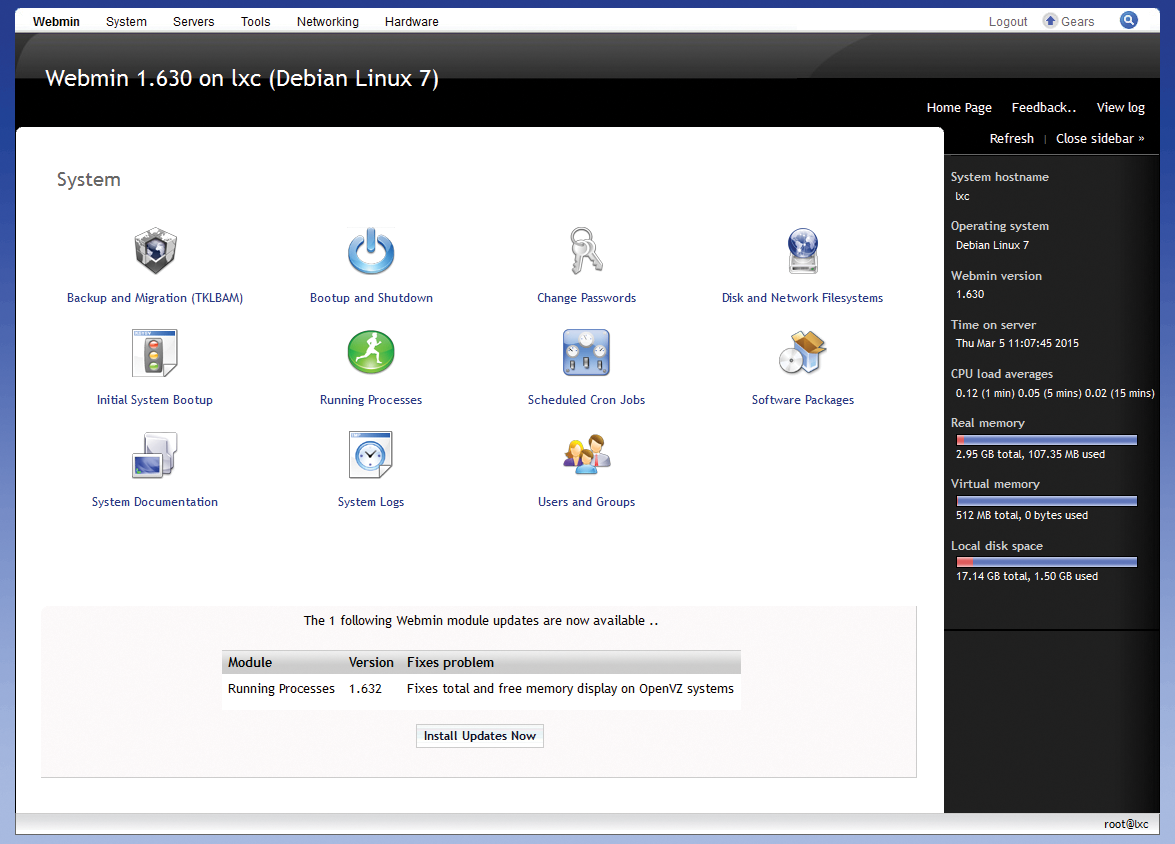
TurnKey Linux is managed with the Webmin web-based management interface [2], which provides the essential administrative tools (Figure 1). Webmin also provides backup software that allows you to back up encrypted copies of data, databases, and configuration files, so you can use them elsewhere.
The Linux distribution is also very lightweight. The basic system starts at about 150MB and only includes the most important components for operating the environment.
Starting Out with TurnKey Linux
TurnKey Linux version 13.0 has been available since August 2014. All TKL appliances have been based on Debian since version 12.0; whereas previous versions were based on Ubuntu. The predefined applications are, except for a few exceptions, based on the Debian repositories. This means the applications install easily and perform solidly.
Various download packages are available via the project website, and you can use these to run TurnKey Linux on a standalone system or as a VM under a common virtualization solution, such as VirtualBox, KVM, and so on. Installing the various TKL distributions should not pose any major challenges.
After installation, you have various ways to administer the system, to access the TKL appliances, or to install new applications. The easiest way is to access the TKL system using a standard browser from any computer by entering https://<IP-Address>:12320; the Webmin interface is at https://<IP-Address>:12321. In addition to the admin interface, a Java-based file browser is available for editing, uploading, and downloading files.
If you have set up an appliance with MySQL or PostgreSQL support, web-based access to these database systems is also possible at https://<IP-Address>:12322. To access the TKL system from a Linux or Mac OS X system, you can set up an SSH connection in the terminal with the following command:
ssh root@<IP-Address>
On Windows, you can use PuTTy. Access via SFTP is also possible from a Unix-based operating system with:
sftp root@<IP-Address>
Alternatively, a graphical client such as FileZilla is available for all relevant platforms. TurnKey Linux automatically installs a Samba server and can thus be integrated easily into an existing Windows network.
System Installation
If you have decided to use a virtual appliance, download the appropriate package from the project page [3]. The selection menu lets you switch to different application categories. In addition to the ISO and VM images, you will find packages for other supported platforms.
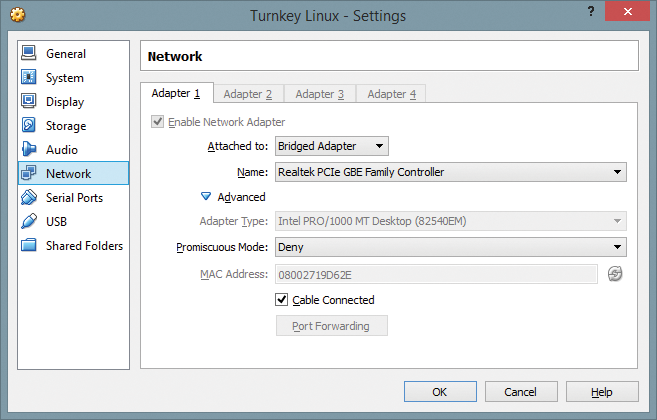
For example, you can use the ISO image to install a new fully functional Linux system with a desired software set. If you want to use an image under VirtualBox or other virtualization environment, you need to consider a few peculiarities (see the "Using a Virtual Environment" box).
Regardless of the image you ultimately use, the TKL installer, which is based on the Debian installer offers a Guided or Manual installation. To simplify matters, you should choose the guided method, accept the suggested disk partitioning, and confirm further actions such as the system installation and restart. When a success message is sent informing you that the system setup is complete, the appliance installation is complete as well. With the TLK Configuration Console, you can remove the URLs that access the Web interface, Webmin, SSH, and possibly phpMyAdmin access. To access the advanced TKL settings, click Advanced Menu.
To access Webmin, SSH, MySQL, and phpMyAdmin, use the username root without a password. Of course, you should change your username and password later. The access codes for the various applications are different. The username is usually admin or root, and you usually choose the password while installing the appliance. You will find the corresponding information on the application's summary page on the TurnKey project site. For example, if you want to evaluate the NoSQL database system CouchDB, the user name for Webmin and SSH is root and the CouchDB user name is admin. You determine the password when you start it the first time.
Once you have set up a basic TurnKey system with the desired test environment, you can now turn to customizing the environment.
Advanced Appliance Settings
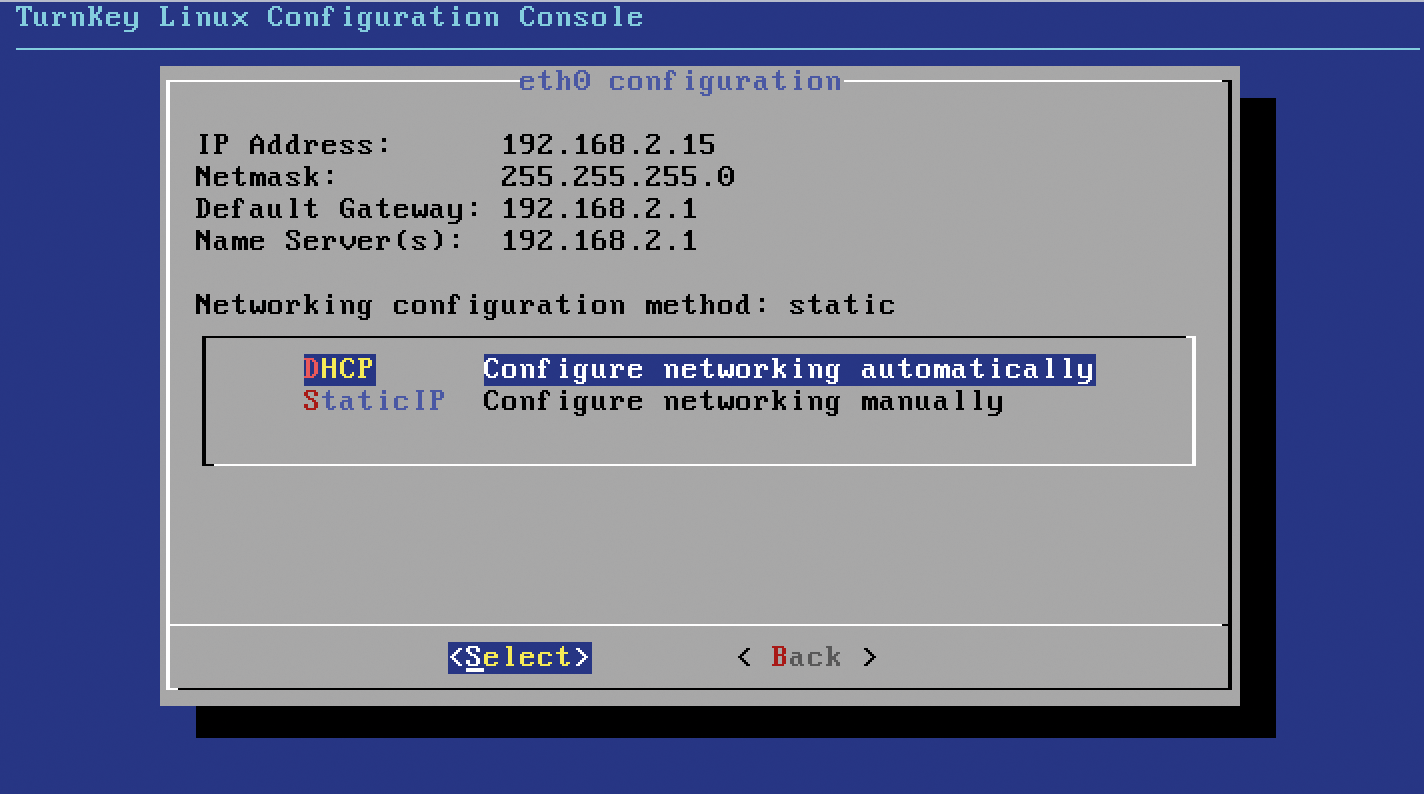
Clicking Advanced Menu in the Configuration Console accesses the advanced TKL settings. In particular, this allows you to customize the network configuration. To do so, choose the Networking console entry, where you can choose whether you want to assign a dynamic or a static IP address to the Linux system. TurnKey Linux uses a dynamic address by default. To assign a static IP address, select StaticIP (Figure 3) and define the IP address, network mask, gateway, and name server.
If you made any changes to the network configuration, reboot the environment via the console with Reboot in the Advanced Menu. The Configuration Console also allows you to Quit or Shutdown the system. If you have closed the console and want to access it again, run the command:
/usr/bin/confconsole
Because The TurnKey Linux environment is web-based, so you need to be familiar with the paths to the web-specific configuration files and executables for your experiments (Table 1).
Tabelle 1: Paths to Important Files
|
File |
Path |
|---|---|
|
Configuration Files |
|
|
|
|
|
|
|
|
|
|
|
|
|
|
|
|
|
|
|
|
Executable Files |
|
|
Apache |
|
|
Memcached |
|
|
MySQL |
|
|
MySQL |
|
|
PHP CLI |
|
|
PHP 5 CLI |
|
|
Apache logfiles |
|
Accessing the Virtual Appliance
Assume you are tasked with evaluating the company's internal use of the CouchDB database system. To begin, pick up the corresponding package from the TurnKey website and set it up as previously described.
Once the environment is set up and you have made any changes to the network configuration, access the environment via the specified URL. The associated web interface is basically the same for all virtual environments: You will find the name of the appliance in the header area (TurnKey CouchDB in this example) and two tabs underneath: the application Control Panel and the About info dialog (Figure 4).
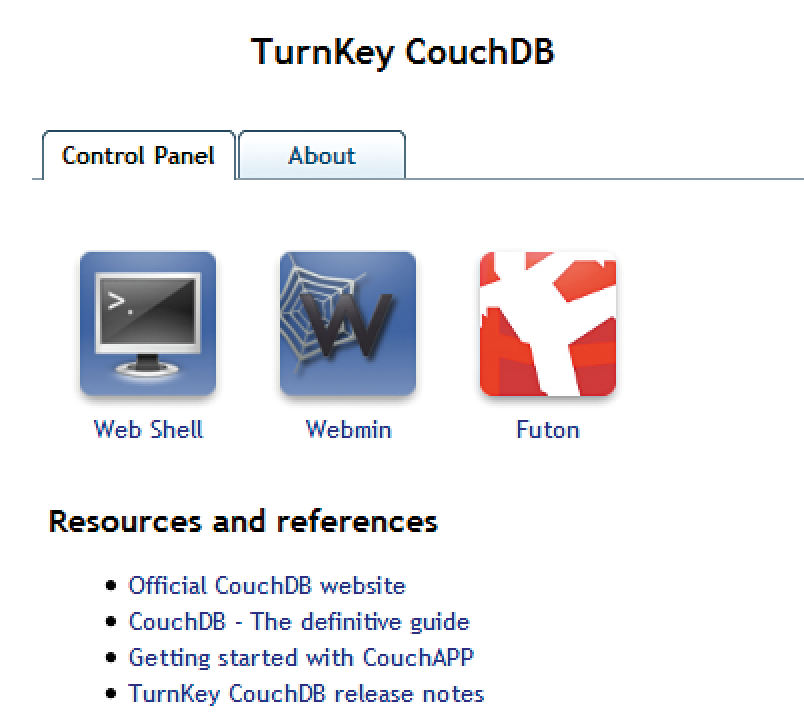
The Web Shell and Webmin modules are represented in the dialog, with a third application-specific button that provides access to all the appliance features. For the CouchDB appliance, this is Futon; for the XAMPP version, it is the phpMyAdmin function.
You can find the relevant links to the application concerned and to information about using the TurnKey app below the icons. The Web Shell link leads to a web-based console that allows you to interact with the TurnKey system.
You can access the virtual appliance's web-based Webmin environment by clicking on the Webmin icon. Access is secured by SSL by default. TurnKey Linux then presents the typical Webmin environment, which you can use to run any required actions on the system, including the backup and migration module (TKLBAM).
If you decide to use the CouchDB appliance, you can access the database functions by clicking on the Futon icon. Here, you can, for example, create new or open pre-existing databases. Via the Tools menubar, you can view the configuration of the CouchDB environment, use the replicator to create duplicates, and view the database status. When using other virtual appliance environments, the functions of the respective environment are available, which naturally differ greatly.
Managing the TurnKey Environment
A customized Webmin module for your TurnKey environment provides all the tools you need to manage the operating system and the desired virtual appliance. When accessing the module, you automatically land on the System page where you can find the backup module, package and user/group management, and functions for shutting down and creating cron jobs. The cron job management lists all the jobs already created in a clear table format. By clicking on a job entry, you open its settings and can view and edit the specific command. You can also suspend cron jobs or change timings.
The system overview page also tells you which processes are currently being run and which filesystems are being created and used by the TurnKey operating system. The system logfiles are available from this site as well. Below the system icons, you will find an update function that tells you whether Webmin has any updates available, so you can update the environment as required.
The Servers menu sends you to another TurnKey system area, where you will find an overview of the installed sever. If you are using CouchDB, you will only find the SSH server here. By clicking on the SSH Server icon, you open its settings where you can, for example, find the authentication configuration and the access control setting. Here, you can also manage SSH keys for users and hosts.
The Tools menu has several useful tools you can use to create and edit custom commands or text files, for example. You will also find the Java-based file manager here. A flexible form is available in the Upload and Download function; you can use it to transfer files from HTTP and FTP URLs to the TurnKey system.
You can view and, if necessary, change your TurnKey system's network configuration from the Networking menu. Here, you will find the firewall and network configuration in this menu. The firewall is configured by default to allow TCP connections to ports 22, 80, 443, 12320, and 12321, so nothing is preventing external access to the TurnKey system. You can prevent unsecured connections to ports 80 and 12320.
If you want to change the system's IP address, open the Network Interfaces settings under Network Configuration. The corresponding page lists the available interfaces, including type and IP address. To edit the configuration of an interface, open it by clicking on the interface name.
Individual Customization
If you want to use the TurnKey platform intensively and give other administrators an opportunity to evaluate it, you will want to use the customization options offered by the Webmin module. For example, you can adjust the language version and create additional evaluation users. These customizations are available through the Webmin menu.
The administration center has special themes for mobile access hidden behind the Webmin Mobile Device Option configuration menu item. Choose the appropriate template via the Design for mobile browsers display menu. You should enforce authentication regardless of the design choice.
With the Webmin server module, you can change the port, the default login and password for accessing the system. The TurnKey system's Webmin module only has a root user after installation, so to grant other users access to the system, open the user settings.
You can create other users here by clicking on Create a new Webmin user. The creation of other Webmin user groups works accordingly, and you can manage MySQL users via user administration as well.
Backup and Migration
TurnKey Linux has a simple but very practical tool that allows you to back up and migrate application and server configurations: TKLBAM (TurnKey Linux Backup and Migration).
This tool lets you save changes to files, databases, package settings, and more; then, you can restore them on a different system. You only have to set up a TurnKey cloud server to save your backups. The tool is so powerful that you can move or copy fully executable environments within a few minutes. The installation status of the appliances is stored in the backup profiles. TKL takes advantage of the TurnKey Hub, a web service with a front end for backup management. The user links an appliance with a specific Hub account, which in turn is identified by an API key. To avoid fiddling with complicated commands at the console level, the backup mechanism makes use of the Webmin module, so performing backups is possible from any web browser.
The backup mechanism also creates a delta record where changes to files, users, and package management information are stored. The data is calculated for backup time by comparing the current profile status with the backup profile. Whether the backup is stored locally or elsewhere is of secondary importance in terms of processing, but the backup mechanism always uses encryption, and the Hub handles key management. Backups can be saved in the Amazon S3 cloud service and are always available for download via the GeoIP tag to the nearest data center. This ensures optimal performance.
Each TKLBAM-enabled appliance has a corresponding backup profile which comprises the installation status, including an appliance-specific list of files and directories for the backup comparison. However, no files or directories managed by the package management system are included in this list. The delta record data relates to the differences between the installation and the current status. Only the incremental changes are saved and can be restored – with one exception.
Databases are fully backed up unless you configure them differently.
User and group settings are also stored in the Hub services during the backup process. You will find the Backup and Migration module in the Webmin System menu. Before you can use the backup mechanism, you need to create a TurnKey Hub account [4]. Once you have done this, the API key is available via the user profile.
To begin, open the TKLBAM module and enter the user name and key. You can then connect to the TurnKey Hub. You will need a paid account for Amazon S3 to use the cloud-based backup. After registration, the Hub dashboard presents you with the installed TurnKey components (TurnKey Core VM, TurnKey LAMP, TurnKey CouchDB, and so on) that you backed up with the help of the backup function. Use the TKLBAM module functions to execute the backup.
You can set the encryption passphrase by clicking the Passphrase button (Figure 5), which provides additional protection for your backup. If you do not want to bother with encryption, simply leave the fields blank. Clicking the Download Escrow Key icon lets you download a kind of security key that you can use to restore backups again if you have forgotten the encryption passphrase.
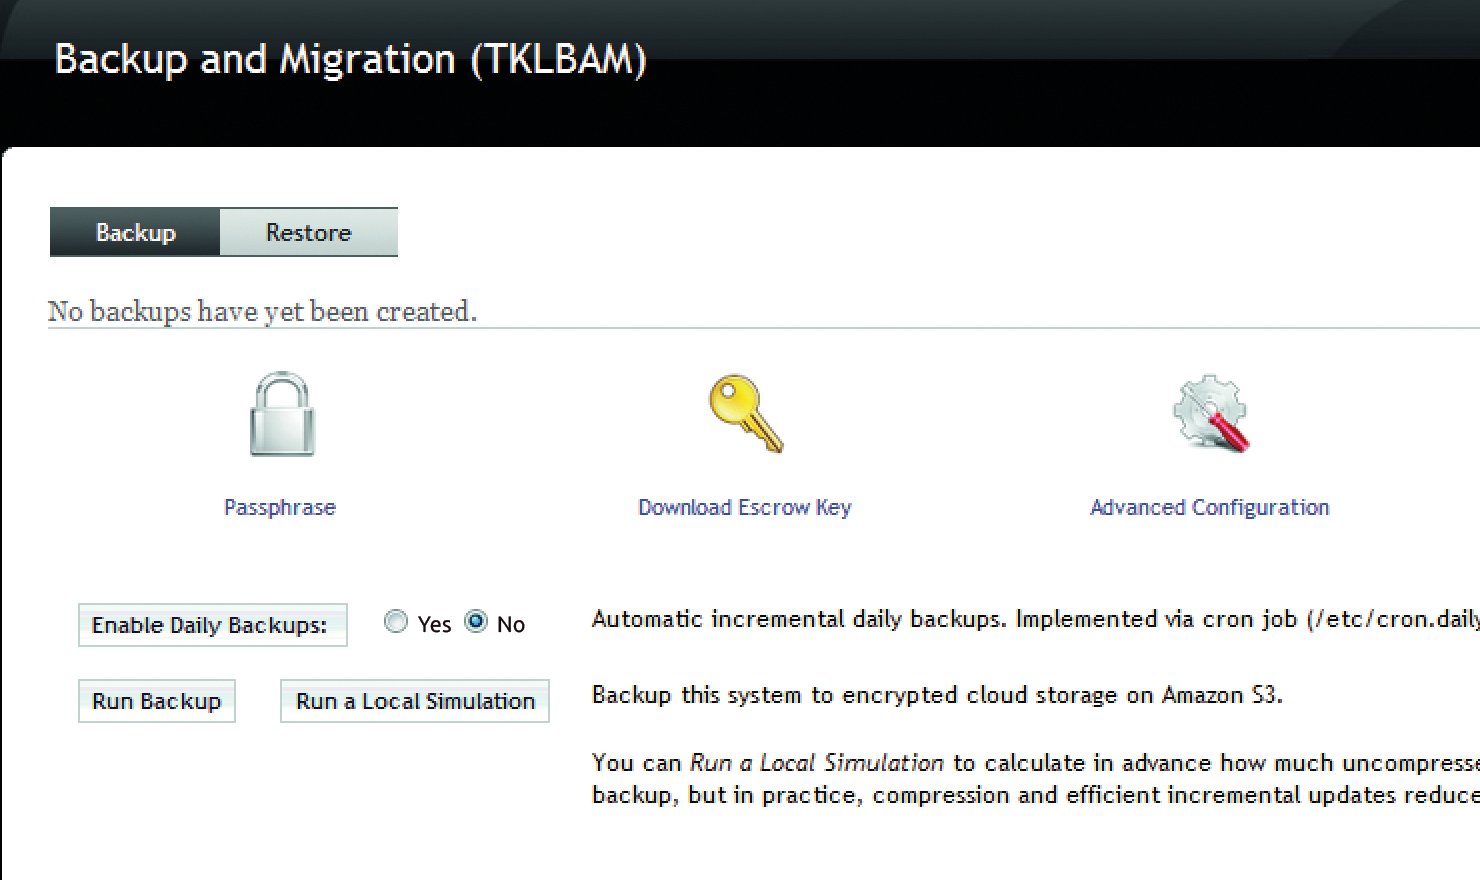
You can determine the size of the backup volume and the frequency of full and incremental backups in the advanced backup settings (Advanced Configuration), and you can enable daily backups on the TKLBAM overview page by selecting Enable Daily Backups. This page also provides a test function if you select Run a Local Simulation that calculates the required storage space and verifies its availability – in online storage, in particular. The actual backup starts after you click Run Backup.
Conclusions
TurnKey Linux is a must for all administrators who want to evaluate a particular business application with comparatively little effort. The focus is on typical web-based environments such as content management systems and web applications. The amount of infrastructure and the traditional administration tools are unfortunately quite limited. Nevertheless, TurnKey is difficult to beat when it comes to virtual appliances, although it would be useful to be able to post-install other applications.
