Working with Microsoft Azure RemoteApp
Terminal Server
Microsoft uses the in-house Remote Desktop Services with Azure RemoteApp to provide Windows applications as a cloud service. It supports both Microsoft Office and applications of your choice that are compatible with Terminal Server. In this workshop, we show you what options are provided by the apps from the cloud and how to set them up with ease.
Terminal Server has been well known for a long time, but although it has become significantly easier to handle, many administrators still keep clear because, they argue, the technology and the licensing model are too complicated. Microsoft is now using the technology in the form of Azure RemoteApp [1] to host applications as software-as-a-service. The complexity of the required infrastructure remains largely hidden from users and administrators. I'll take a look at the range of functions before addressing the specific setup.
Cloud or Hybrid
The technical basis is the Remote Desktop Session Host role service from Windows Server 2012 R2. Users access the applications in the cloud via Microsoft's Remote Desktop Protocol (RDP). All operating systems for which Microsoft offers RDP clients therefore come into play on the end devices. This applies to Apple's iOS and Mac OS X, as well as for Android, and of course various versions of Windows. In addition to Windows 7 and 8.x, Windows RT, Phone, ThinPC, and multiple versions of Windows Embedded for thin clients are included.
Microsoft offers cloud and hybrid deployments on the server side. The former include terminal servers that run independently in the cloud. You can log in using Microsoft accounts or using your own Active Directory accounts, if you pair it with the cloud using Azure AD. The typical use is a ready-made image from Microsoft using Office Professional Plus 2013. Neither the users nor the administrators have to worry about the back end. Microsoft takes over operation, patch management, and infrastructure safeguarding.
You can also create your own Windows Server 2012 R2 image and upload it to the Azure cloud. You can then install and operate all applications that are suitable for a Remote Desktop Session Host yourself. In this case, however, you do have to look after the patch management for both the operating system and the applications. A hybrid deployment is recommended for this approach. Because you establish a VPN connection to your local infrastructure with the Azure cloud in hybrid mode, you can integrate the Terminal Server in the cloud into your local Active Directory domain and thus also supply your own group policies. You can also use file and application servers directly in your local network in this way.
App Collections According to Plan
You can decide which of the two operating models you want to use when you create a new RemoteApp collection. A collection is a logical grouping of applications for a specific group of users. Microsoft takes care of scaling the Remote Desktop Session Host for both operating models. You do not have to worry about how many processors or gigabytes of main memory the Terminal Servers are equipped with. In fact, you can neither influence nor see the specific server features in the Azure front end. You only have the choice between two performance categories, which Microsoft calls plans. A user has 50GB of persistent storage on the server side for both plans.
According to Microsoft, the "Basic" plan is targeted primarily at office staff with lower performance demands, and the "Standard" plan focuses on users with higher requirements. Microsoft sadly does not reveal any more about the technical background, meaning a test is needed. If it turns out that the performance of a RemoteApp collection is too low in the Basic plan, you can simply switch to the Standard plan via the Azure front end and back again.
You can currently create only two app collections. As soon as you try to generate a third, the front end suggests you contact support if you need further collections. The same applies to the maximum number of users. In the Basic plan, you can assign a maximum of 400 users to a collection; the limit is 250 in the Standard plan. Here, too, Microsoft points you toward support if you want to exceed the maximum limit.
Trying Out RemoteApp
You will need a Microsoft account for a trial. To do this, sign up for a free 30-day trial of Azure [2]. The next step is to specify a phone number that Microsoft verifies by calling or sending a code via text message (Figure 1). Even though the test is free, you still need to specify a credit card at this point. You can then use the Azure front end.

Quick Start in the Cloud
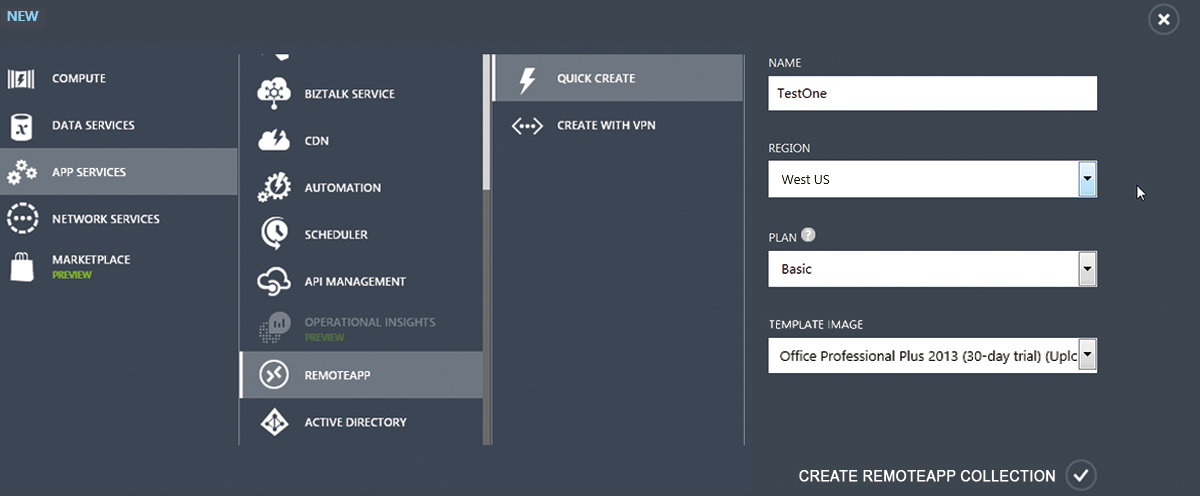
Access App Services | RemoteApp at the bottom left of the screen via the +New button. There, you will find the options Quick Create and Create with VPN, which each stand for cloud or hybrid deployment. Choose the former and give the collection a name; then, select one of the 13 Azure data centers.
Next, you can opt for one of the two plans and determine which image to use as a template for the collection. The Office Professional Plus 2013 Image is a good start (Figure 2). Alternatively, Microsoft provides an image for Office 365 subscribers. You complete the process by clicking on Create RemoteApp Collection. The wizard now starts to create a Terminal Server from the template – this can take up to an hour. To access you collection, click RemoteApp in the left toolbar. The Status will change to Active when the collection is ready.

If you click on the collection, you can access the Quick Start view, from which you can perform the additional configuration. The items Publish RemoteApp Programs and Configure User Access should be highlighted in green and checked. The wizard automatically displays a selection of programs including Excel, Outlook, PowerPoint, and Word. These programs are also already enabled for your account under which you created the collection. Now, there is nothing standing in the way of a first RemoteApp session.
Accessing Collections
You will find the Remote Desktop client download URL in the Quick Start view. However, for Windows computers, the RDP client itself is not there because Windows already has RDP support on board – in the form of the Remote Desktop connection. The native Windows RDP client, however, cannot yet access the Azure RemoteApp independently; it needs a mediator to do so. To this end, access the link and click Install Client. You can then download the app rdclientLauncher.application. You can install it in both Windows 7 and 8.x in the user context without needing administrator rights to do so.
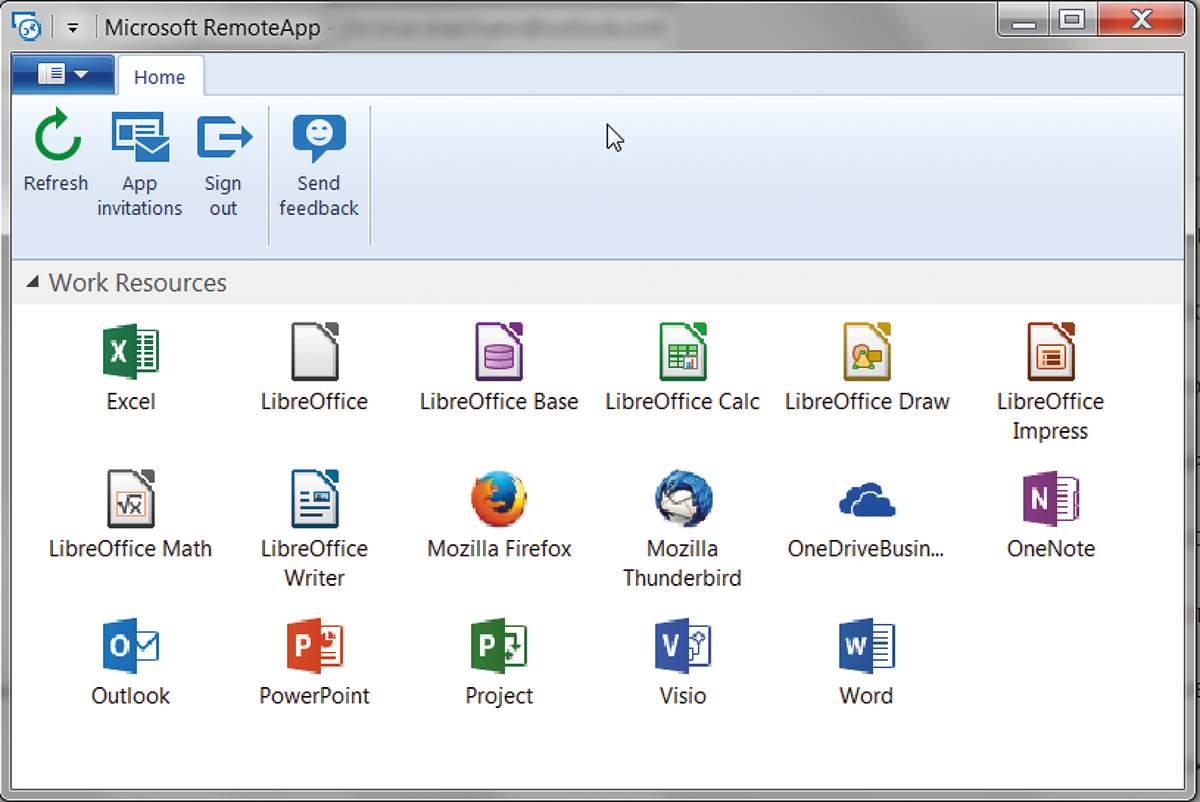
Next, start the new application Microsoft RemoteApp from the Start section and sign in with your Microsoft account. You will then see the available apps and can start them immediately. The Remote Desktop connection then takes over and opens a session on the Terminal Server in the Azure cloud via RDP.
The desired application launches in a separate window and can, at first view, hardly be distinguished from your local applications. Note that the office applications from Microsoft's standard image are currently only available with an English user interface.
The user memory is implemented as user profile disks within the session. Data that you store in a RemoteApp session in user profile folders, such as Desktop or Documents, remain after logging off the sessions and also survive a server image update and a change to the user plan. However, it is in the nature of user profile disks that they belong exclusively to a collection. Thus, if you store a file in the Documents folder in a RemoteApp from collection A, you will not find it again in a RemoteApp from collection B. The applications from Office 2013 work around this issue by providing native support for the cloud store OneDrive. If you log on to OneDrive within the RemoteApp, you can exchange data between collections and with your local client.
Costs of Azure RemoteApp
Microsoft invoices Azure RemoteApp per collection, user, and month; the price depends on the desired plan and the operating hours [3]. Whether a collection is created as a cloud or hybrid deployment does not, however, play a role in pricing. This means that a user with a Basic collection currently pays at least $10 per month. Microsoft demands at least $15 per month for a Standard user. In both cases, this is a starting price that includes 40 hours of operation per month.
Once a user works for more than 40 hours in a month with these applications from the respective collections, Microsoft calculates the additional hours at $0.175 per hour in the Basic plan or $0.20 per hour in the Standard plan. However, Microsoft also has a fixed upper limit for both plans which is of benefit to intensive users. Going over the 40 hours in the Basic plan only has variable costs up to a maximum of $17 per user per month; $23 is the limit for the Standard plan. Finally, you must consider that Microsoft defines a minimum of 20 users as a basis for the offer. In practice, this means that you will always have to pay for at least 20 users, even if only 13 users actually use RemoteApp.
All costs are thus paid with regard to Windows. You do not need any additional licenses to operate the virtual terminal server in the Azure cloud – either for the operating system or for Client Access Licenses (CALs) or even Remote Desktop Services (RDS) CALs. The preconfigured office applications for cloud deployment are also included. You do, however, obviously still ensure you have the correct licensing for all applications that you install in your own image.
Azure RemoteApp does not currently automatically support the ability to connect local client-side drives that you may be familiar with from conventional terminal servers. If you want to pass through drives and USB or serial ports, Microsoft again suggests requesting support [4]. Nevertheless, a remote session will connect a clipboard and a printer without further action – meaning that you can print tasks from RemoteApp both to printers connected locally and network printers.
Using RemoteApp While Mobile
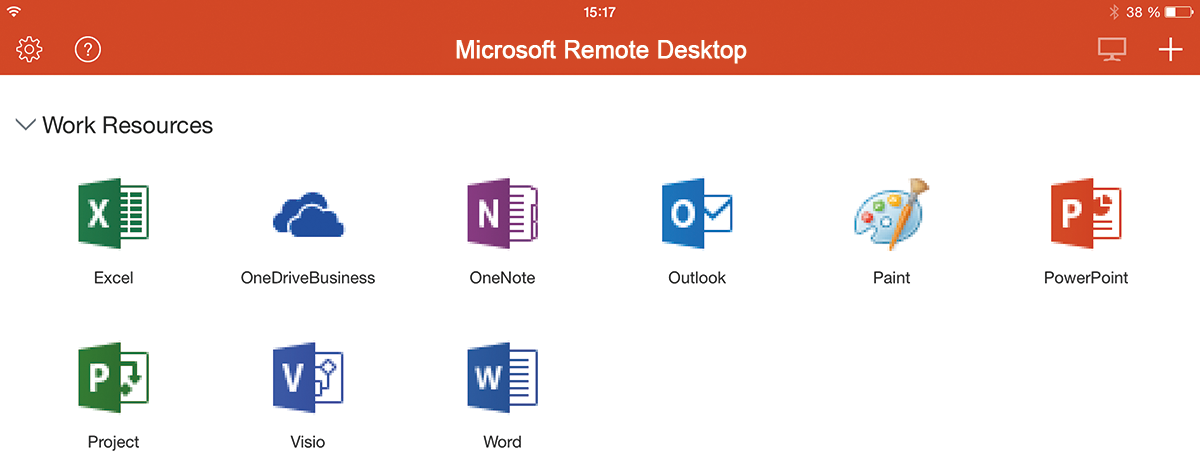
If you visit the RemoteApp website from a tablet or smartphone, the link Install Client automatically refers you to the appropriate app in the respective app store; in the case of Apple iOS, it connects to the Microsoft Remote Desktop [5]. The app has built-in support for Azure RemoteApp. After installing, click the + symbol at the top right of the screen in the app, select Add Microsoft RemoteApp, and log in. You can then also access your applications from the mobile client (Figure 3).

Fine Tuning
Back on the Azure website, you will see an overview about the use of your RemoteApp collections. Access the detailed view of a collection and then the Dashboard. There, you will see how your users are coping with the quota of hours and what the bill is for the current month. You can grant other Microsoft accounts, or even accounts from your own Active Directory, access on the User Access page.
On the Publishing page, you can control what apps the collection contains. You will find the Publish button at the bottom of the screen. Here, you have the choice either to enter a path to the desired app specifically or to choose from the apps linked in the image's start menu. In the first case, however, you need to know the path because you cannot browse in the image's filesystem. You can use the Edit option to transmit command-line parameters to an already published application. Finally, you can also Unpublish an app again.
On the Sessions page, you can see all the users currently connected with the collection. You can log off or disconnect from individual sessions or send a message to an individual user or all users. The well-known option from the classic Remote Desktop Services of mirroring a session for assistance and troubleshooting is unfortunately missing here. Likewise, it is not possible to start a desktop session as an administrator on the terminal server. On the Scale page, you can switch between the Basic and Standard plans, as required.
Creating Your Own Image
If you want to publish both Microsoft Office and your own applications, the way to do so this is through your own image. The Azure help contains a detailed guidebook [6]. To create an image, you will need the Hyper-V role from Windows 8.1 or Windows Server 2012 R2 as a host. Windows Server 2012 R2 only comes into question as a guest system.
Because Azure still does not understand the newer VHDX format for image files, the first step is to create a VHD file using Windows disk management. This can be dynamically expanding – which shortens the upload to the cloud later – and uses the MBR partition style.
Then, create a new VM in the Hyper-V manager that uses this virtual disk and boots from the Windows Server 2012 R2 image. Install the operating system and then the Remote Desktop Services. Do not use the option Remote Desktop Services installation in the wizard for installing role services; instead, use the conventional Role-based or feature-based installation. You only need the role service Remote Desktop Session Host and the feature Desktop Experience, including all dependencies that the wizard automatically resolves. Now, you can install all the applications you want to publish.
Don't Forget Updates
The VM does not need to be a member of your domain but should have a connection to the Internet or a local WSUS server so that you update it. Using an unpatched server would cause problems. The background is that Azure expects a specific version of the RDP Shell rdpinit.exe. The upload process will complain if this is not up to date.
Microsoft may provide the private Hotfix KB2977219, which updates the file, on request. However, the hotfix requires the patch collection KB2919355 from April 2014, which in turn depends on the patch package KB2919442. This will be a lot easier if you use automatic updates. The update rollup package KB2984006 from September 2014 comes up automatically and makes the image fit for the cloud.
Uploading the VHD File
Finally, you can disable filesystem encryption using the command
Fsutil behavior set disableencryption 1
and generalize the image using:
C:\Windows\System32\sysprep\sysprep.exe \
  /generalize /oobe /shutdown
Proceed to the apps overview in the Azure front end to view the apps and then go to the Template Images page. Upload your VHD file there. The wizard gets you to download the Azure PowerShell module [7], which you need to install on your host. You can then download a PowerShell script and run it in any directory. The script connects to the cloud and opens a graphical explorer window in which you can select your image and upload it.
If you now create a new collection, you can select your own image and then publish your applications. A user who is assigned two collections will see the apps from both collections in the client together.
Connecting Networks
You will need to configure a hybrid deployment to use resources on your local network from RemoteApp (Figure 4). The wizard and the Azure help [8], which is also easy to understand in this respect, will guide you through the necessary steps. First, configure a VPN in the RemoteApp overview. You will then receive a script either for multiple firewall or router types from Cisco and Juniper or the Microsoft RRAS service. In this way, you can set up the tunnel to the cloud; however, for this to work, you need a publicly accessible static IPv4 address. Then, you need to specify an account that has the right to add computers to your local AD domain to join with the virtual Terminal Server.

The final step is to synchronize your domains with Azure AD [9] so that users can also log in to the cloud with their internal accounts. For this, you will need a publicly known DNS domain in whose namespace you need to add an MX or TXT record to verify the domain against Microsoft. The Azure help explains how this works for various providers.
If your internal AD does not use this DNS namespace but instead uses a private domain ending in .local or .intern, you need to add the externally known domain to AD as an alternative. You can then log your users onto the Azure RemoteApp with their AD accounts instead of the Microsoft accounts.
Conclusions
Azure RemoteApp is a young service that does not yet have all the functions of a local Terminal Server on its own network. Nevertheless, in its current state, you can see the direction Microsoft is headed. Compared with a local installation, setting up the applications in the Azure cloud is very simple.
