Managing Ubuntu with Canonical Landscape
Landscape Gardener
Canonical implemented a management solution for its Ubuntu operating systems at an early stage and integrated it deeply within the system. After all, most Ubuntu devices run without direct intervention in data centers. However, the freely available Ubuntu desktop is also very popular. To manage all of your devices – whether servers or desktop systems – you need a solution that helps when patching the operating system and when updating software. Landscape [1] fits the bill.
As a Service
The Ubuntu Advantage packages, which target enterprise users, include Landscape, a proprietary Software-as-a-Service (SaaS) management solution from Canonical. You need an Ubuntu One account for the cloud service (i.e., a user account for access to all Ubuntu services).
For use in larger environments and, in particular, for provisioning, delivering, and setting up new machines, Canonical also offers a Metal-as-a-Service (MaaS) implementation, in which Landscape runs on a dedicated server that accesses the same network as the computers you need to set up.
In this article, I look at the SaaS solution. To create an account, you only need an email address, which is verified by the system. After registering with Ubuntu One, you can register your Ubuntu Advantage pack, which then gives you access to Landscape.
Safe Access with Access Keys
The next step is to set up and register the computers you want to manage. To safeguard logging in to your Landscape account with a computer, you first need to create an access key in your account settings. Without this key, any Landscape client that knows your account name could log in to your account. To begin, log into an Ubuntu Server, which needs an Internet connection, and update the packages (Listing 1). The next commands install and set up the client.
Listing 1: Setting Up Landscape
sudo apt-get update
sudo apt-get install landscape-client
sudo landscape-config --computer-title designation --account-name your_account_name
The value that follows the computer-title variable is the designation as you will see it in Landscape. To continue, confirm the prompt asking you whether you want the software to add the client to the boot process by saying Yes.
Further along the line, the setup script asks you for the access key you created previously. Without generating the key, the prompt would not occur. You can then enter an HTTP and HTTPS proxy, if needed.
The next prompt asks you to decide whether to allow scripts to run. This option is disabled as a general rule, but depending on your administrative tasks in Landscape, it might be necessary to enable running scripts (e.g., if you need to launch installation or configuration scripts). Your best bet is to allow the function.
The next setting lets you create local users who are allowed to run scripts. You can also define this restriction at the group level. Finally, you can add mnemonics for the server, which will let you assign, search for, or filter devices in Landscape. You can do this for server and desktop systems whether virtual or physical.
Dashboard
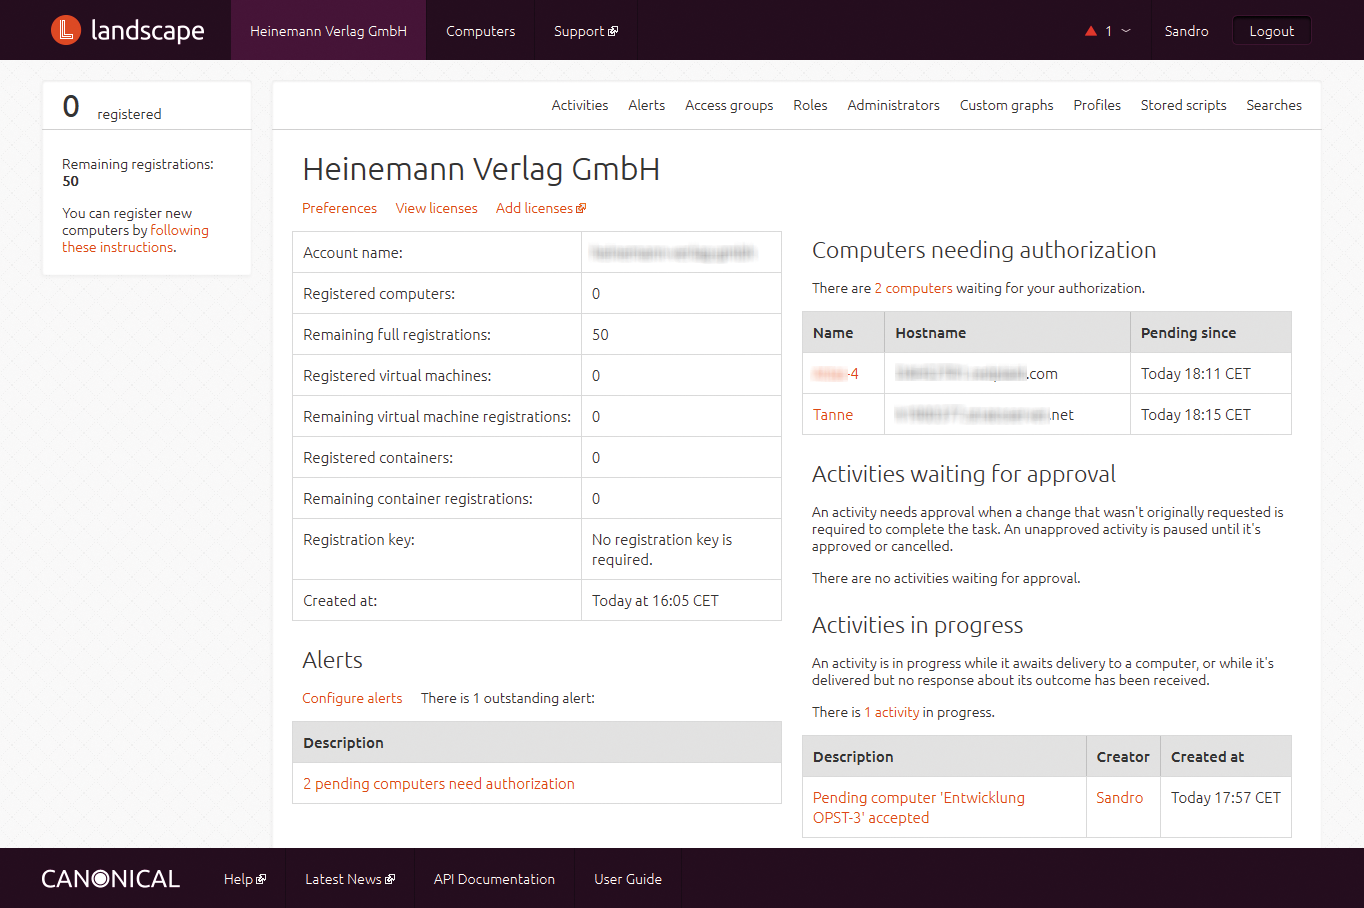
Back on the Landscape front end, the dashboard shows you that new computers have been registered and are waiting for authorization (Figure 1). Open the list of newly registered computers and select individual computers. You can now assign tags if you did not do this during the configuration and assign the computers to a group.

Of course, you will need to set up the group first under the Access groups menu item. Then, confirm the registration of each computer. Luckily, you can edit multiple computers at the same time and assign individual values to each. The Landscape client transfers all the required information to the host system after a few minutes.
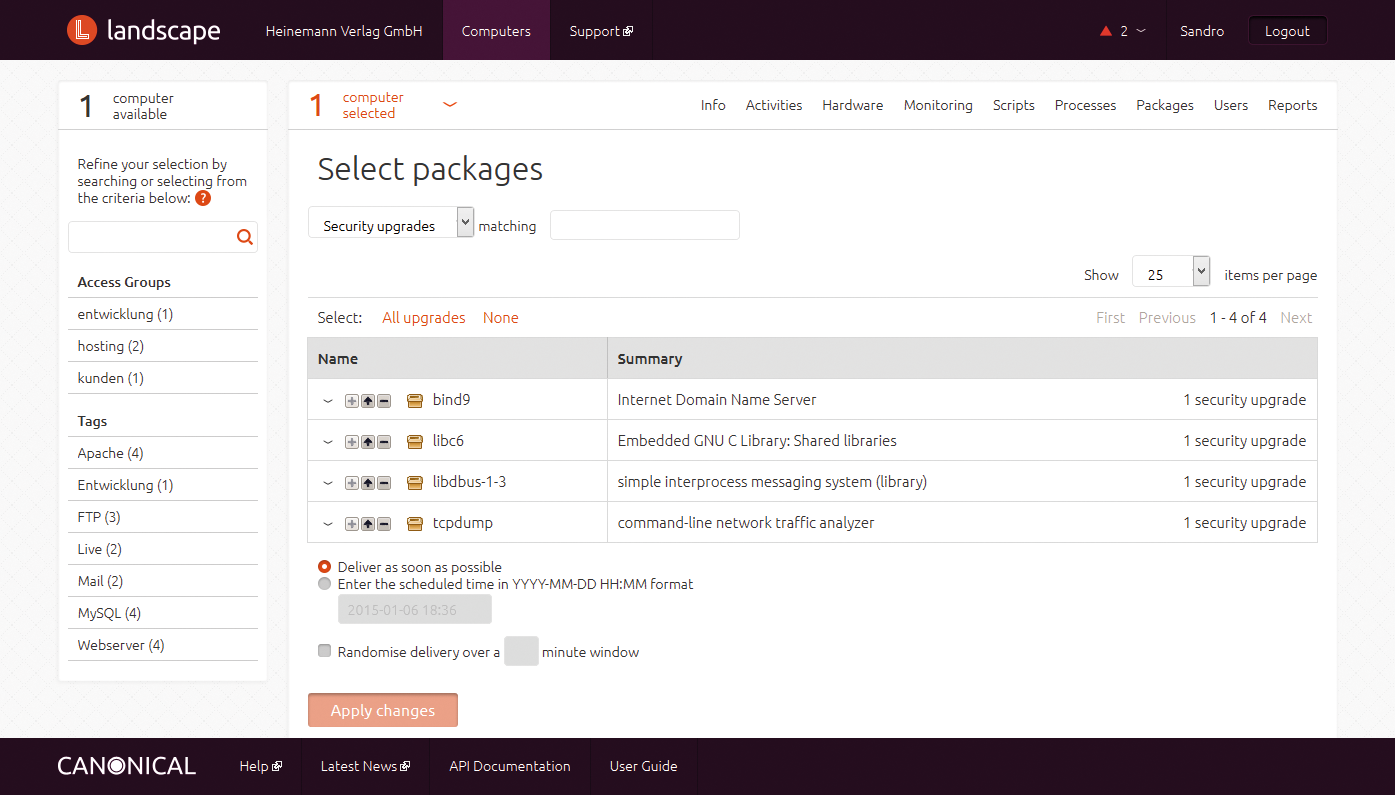
From this point on, the dashboard is your port of call. This is where the system shows you the required tasks. For example, after a couple of minutes you will see that the security updates have not been installed and that general package upgrades exist (Figure 2). Landscape identified this in our lab for all Ubuntu systems we used from 10.04, through 11.x and 12.x, to 14.04.

To install the updates on offer on your servers using Landscape, just click on the text of the message to open a window with a list of the packages to update. If you expand the individual lines, you will see the computers on which Landscape wants to update the package in question. You now have the option of selecting individual packages on specific computers or selecting all packages. If you only want to update individual computers, type the name in the search box to filter the list.
You can then define when to run the update. Confirm the details by pressing Apply changes. This queues the actions that perform the requested updates as per your schedule. The activity window shows the update progress. If an action is still in the queue, or not completed, you can cancel the pending update at this point, roll it back, or run it again.
Landscape output warning messages in the lab environment telling me that a computer needed to reboot. Again, you can do this remotely via Landscape. To do so, change to the computer list, which will show you the computer that needs to reboot. An info window shows the packages that necessitated the reboot. Select the computer and press the Reboot/Shutdown button.
A pop-up window asks whether you want to do this immediately or choose a date and time. For a timed restart, enter a time and press Restart; then, log out of Landscape and close the browser. A glance at the server that needed rebooting shows that it shutdown at the defined time. Beforehand, you will see a message on the computer's screen telling you how many minutes are left until the reboot.
Warnings by Email
To remove the need to continually log on to Landscape and check for updates or upgrades, you can enable email notification, which is initially disabled. To enable this feature, go to the Alerts menu item, below which you will find a list of potential warning messages. Next, select the alerts you want to receive via email in the future and confirm the details by pressing the Subscribe button. You can use the same approach to disable the alerts if needed.
Once a message condition is true – for example, because updates exist or a computer has not been in touch with Landscape for an extended period of time – the system will notify the email address stored in the account. By the way, there are no other ways of notifying; Canonical might think about adding some messaging alternatives.
Automatic Updates
This manual management approach might work fine, if you only had a few computers. But, what if you need to manage hundreds or thousands of Ubuntu computers? To automate actions, Canonical has introduced profiles that cover three applications: Package, Removal, and Upgrade. The first of these automates the package configuration on computers, which mainly includes package dependencies and version numbers, and is designed to make sure that Landscape does not install any packages or software that could conflict with others.
To create a new Package Profile, you need to define a title and describe the package configurations. To do so, select a computer and decide whether to import a CSV file with the dependencies, enter them manually, or define them on the basis of the packages installed on the computer. If you choose the latter, Landscape will show you the list of installed packages and dependencies for the selected computer.
On the editing side, delete the entries that you do not want to restrict. In our lab, I also stipulated that Apache must not have a version number of 2 or greater, because the configuration files would need to be modified manually as of that version. I also defined restrictions for other packages in this Apache example, assuming that an in-house development needs specific package versions.
I then assigned the package profile to a group and associated it with the Apache tag, which I also set when registering the servers on which Apache was installed. At this point, Landscape knows that the Apache tag needs to be applied to all computers in the selected group.
Cleaning Up Removed Computers
To create a Removal application, click Removal Profile, where you define the automatic mechanism and conditions under which Landscape removes a computer from your account. This action is handled by reference to the amount of time that elapsed since a computer last contacted Landscape. In addition to the name, you thus need to configure the number of days after which the computer should be removed. You can also define the group to which to assign the profile, and whether a computer needs to have a specific tag assignment for this to apply.
The benefit here is that an enterprise can manage its field force's laptops via Landscape. When staff change devices or receive new ones from time to time, you would normally need to remove the obsolete devices manually from Landscape, because they use a license and are unnecessary ballast on your system. In the lab, I set this to three days and refrained from starting a virtual machine for that period of time. On the fourth day, Landscape removed the computer.
Unattended Software Update
Upgrade Profile automates updates and upgrades. The system differentiates between security updates and general software updates. To perform only security updates on customer servers, you first need to create a profile with an appropriate name, check Only security upgrades, then assign the profile to a computer group and specify the weekday and time at which to run the update.
Alternatively, you can set the schedule to hourly and set multiple weekdays or even choose random execution within a time window of x minutes before assigning the profile to all the computers in the group.
A second profile could define a weekly software upgrade for all your computers. In the lab, I unfortunately could not assign a tag-based profile to multiple or all computers; I would need to create the Upgrade Profile separately for each group in this case.
Not Full-Fledged Monitoring
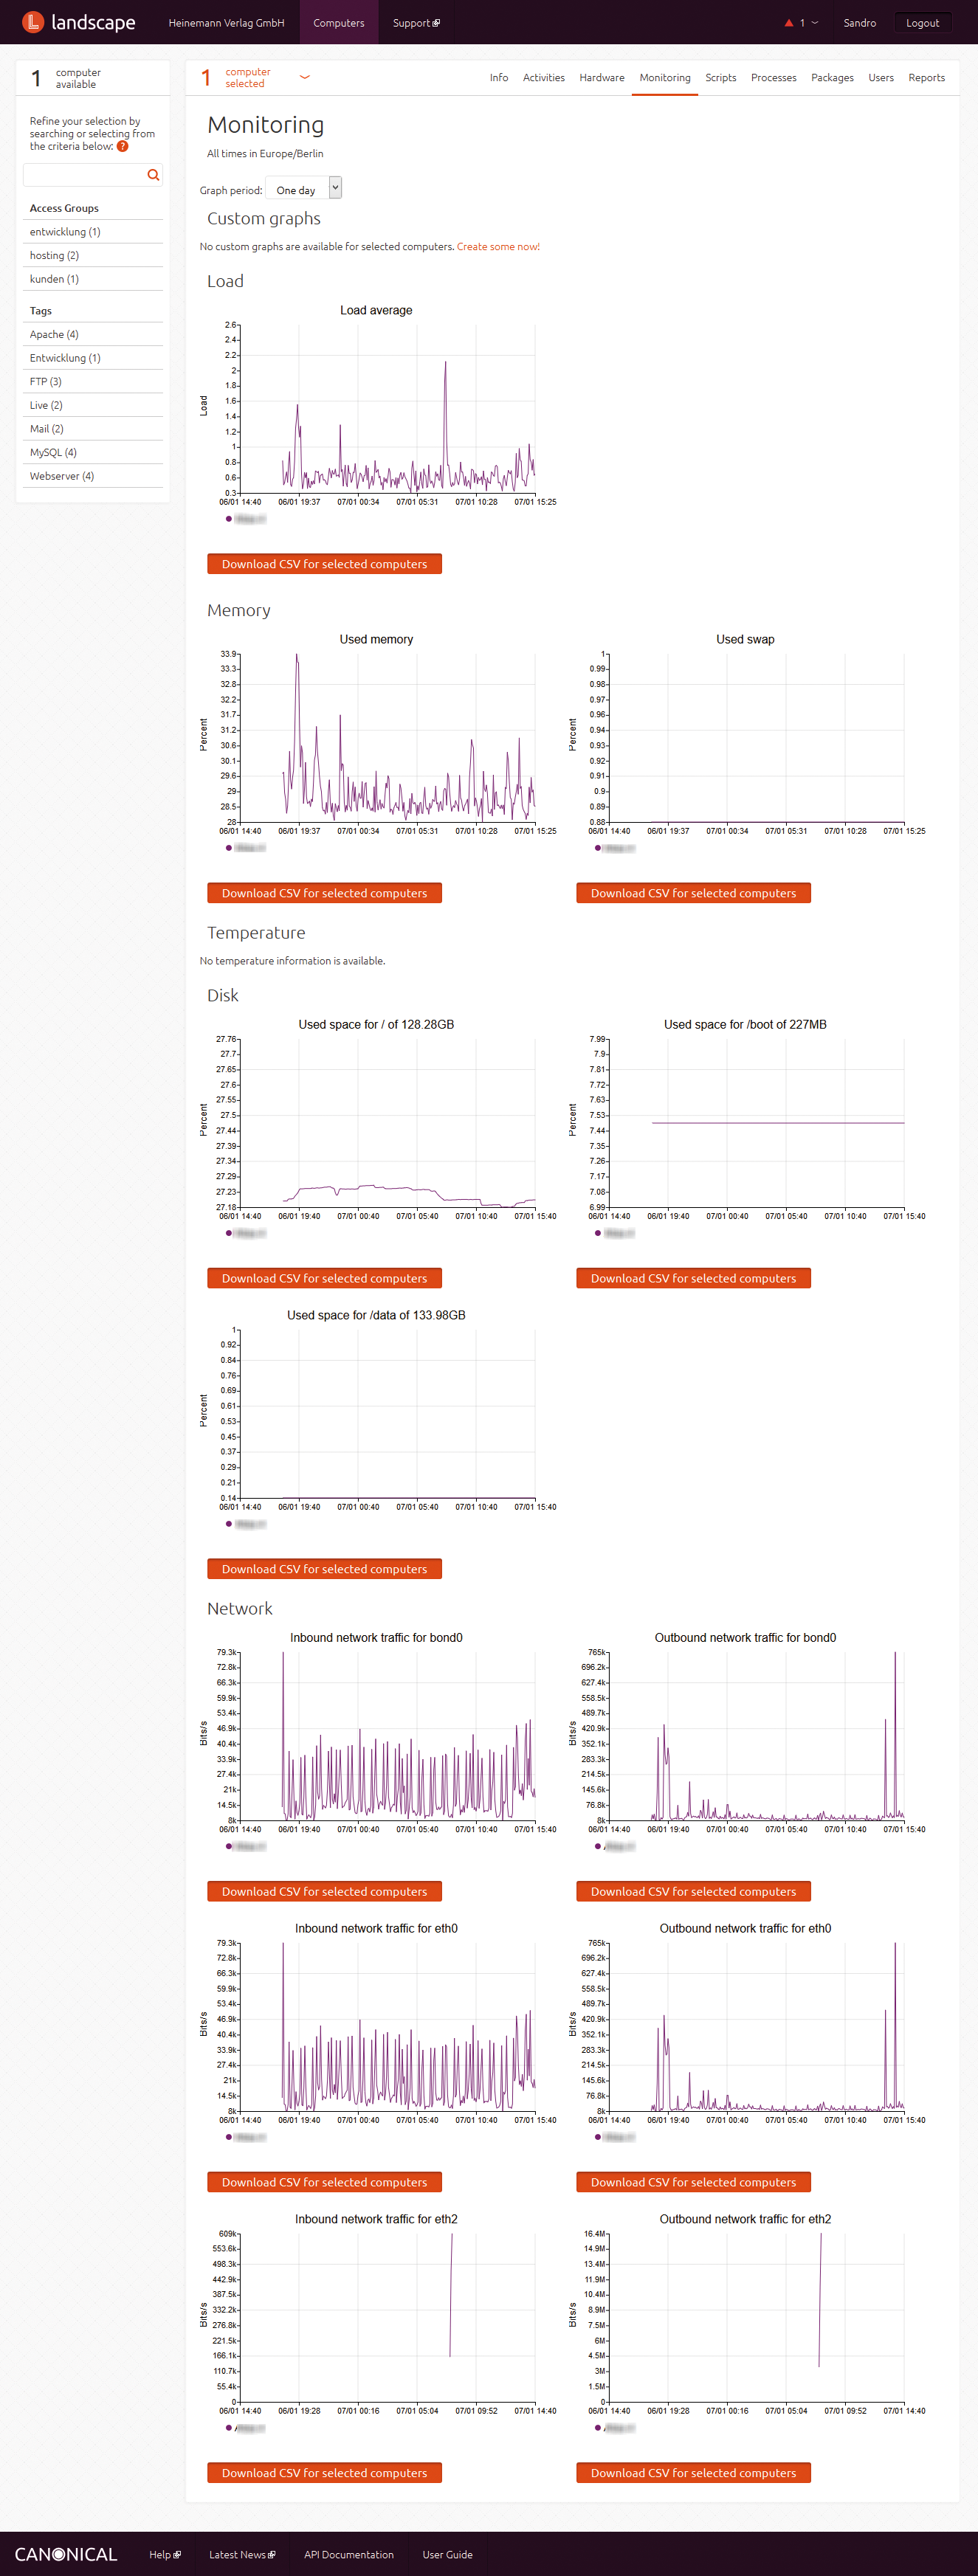
For details on your systems, go to the Computers tab and select the machines in which you are interested. Landscape then shows you a very exhaustive list of the installed hardware and, below Monitoring, the details of the selected machine's load, including the overall load, memory, hard disks, and network.
If you need more or different information about the system, you can create your own shell scripts and run them in Landscape; however, this approach does not replace a regular monitoring solution because the output is only in the form of charts and cannot be processed downstream to support alerting (Figure 3).

The Processes tab shows a list of currently running processes, which you can select for killing kill processes. The list contains the PID, the user, the CPU load, and the status. If you want to add new users to the computer, go to the Users menu item. You can also Lock, Unlock, and Delete users here.
Provisioning with MaaS Servers
On top of the features I tested, Landscape offers system Provisioning when run on a dedicated server. However, the SaaS version I used did not support this functionality because you need a MaaS server. The approach for a predefined installation of new physical computers is fairly simple.
Start by creating a profile in which you configure the software and settings you want on any new computer. The computer needs to be connected to the same network as your MaaS server. Then, simply tell Landscape the MAC address of the new computer. The system scans the network for the new device, which needs to support PXE boot, and starts to deliver and install Ubuntu.
Conclusions
Landscape is an excellent solution for managing large numbers of computers – whether servers, desktops, or OpenStack – that run on Ubuntu. It is unbeatable for patch management and upgrading many machines.
The ability to create profiles and thus improve the configuration for installing individual packages is particularly useful and well implemented and is a great way of avoiding incompatibilities up front. Monitoring is not comparable to a dedicated monitoring tool and only gives you a view of the acquired data.
The SaaS version used in our lab does exactly what is designed to do: manage software in large environments. The MaaS version offers fully automated installation and setup of new computers, but needs to run on a dedicated server to achieve this.
Currently, Landscape is only available as a management solution within the scope of Ubuntu's Advantage offerings. However, Canonical has announced that it will be freeing Landscape from the packages during the course of this year and offering Landscape as a standalone management solution.
