
Server distributions for small businesses tested
Are You Being Served?
Many an article has has been dedicated to subjects like scalability of services or enterprise capabilities of servers, but honestly, hardly a majority of people run their own data centers. However, a single server is all it takes to create a centralized infrastructure, and it doesn't need to offer a huge amount of computational power. What people do expect is more functionality. The server needs to act as a file, print, and intranet server; support groupware; implement a permissions concept; and provide access to simple cloud services and the like.
In small businesses that do not have their own IT department and do not employ system or network administrators in particular, you will often find staff without specific IT skills maintaining and managing the company's computer systems. For this target group, specifically, various software enterprises have developed server distributions derived from different Linux variants that promise fast setup and easy operation.
For this article, our team put six of these distributions to the test: ClearOS [1], Collax Business Server [2], Koozali SME Server [3], NethServer [4], Univention Corporate Server [5], and Zentyal Server [6]. The seventh contestant was a pre-installed NAS system by QNAP [7], which represents a class of modern office network-attached storage that offers services comparable to Linux server distros.
In our lab, it was all about installation routines and hardware support, which are typically the biggest obstacles that inexperienced administrators need to overcome. The test team also looked at how distributions behaved when setting up their services and whether or not they help newcomers avoid incorrect configurations. Last but not least, any server distribution worth its oats should have a mature maintenance concept that includes both manufacturer support and regular updates.
ClearOS
The first candidate is ClearOS [1] from the New Zealand-based ClearFoundation. This server system, formerly known as ClarkConnect, is based on Red Hat Enterprise Linux. The current 7.1 version is available in three variants. In addition to the free Community version, the vendor also offers Home and Business versions.
The two commercial versions are available by subscription for between $36 and $60 for ClearOS Home or between $110 and $590 annually for ClearOS Business Edition [8]. Vendor support is available for all three variants, varying from simple forum access and the online document, to an advanced Knowledge Base, to personal customer support.
Our lab team looked at version 7.1 on a 64-bit machine. The ISO image weighed in around 800MB. Users who still have legacy 32-bit hardware will find the slightly older version 6.6 on the website. ClearOS 7.1 supports filesystems such as XFS and Btrfs for the first time and acts as a virtual machine. The Business server has fairly moderate hardware requirements: 1GB of RAM and 10GB of disk space are all you need according to the vendor, which means that the system can be deployed on older hardware. With no Live version to try out, users need to install the distribution directly and are given support with an easy-to-use graphical wizard (Figure 1).
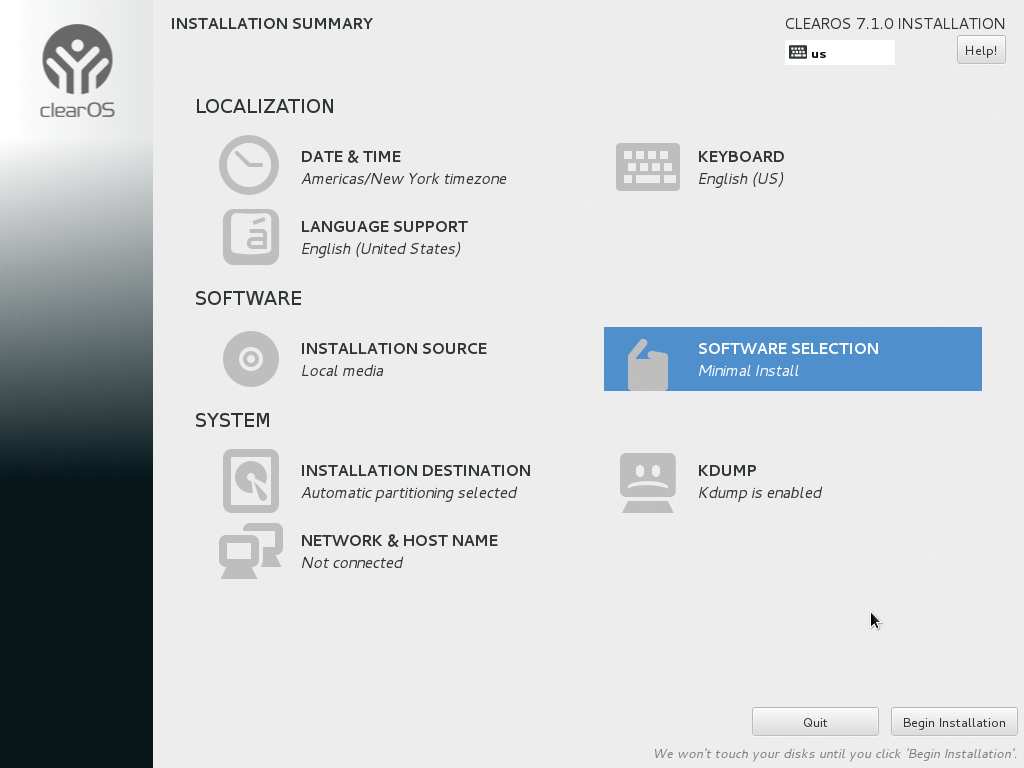
The wizard prompts you for some localization information, then asks about the target disk, the network, and how you want to authenticate as the administrator. When you press Begin Installation the wizard loads the distribution onto your disk. After rebooting the computer, you can configure the ClearOS server in a web browser on the local network; you need to enter the HTTPS-protected IP address followed by port number 81 in the address bar. In the web interface, set the server's network mode. You have three choices: Private Server Mode (for a server used on your intranet without a firewall), Public Server Mode (for a publicly accessible computer with the firewall activated), and Gateway Mode, in which the ClearOS computer acts as a gateway for other clients. This variant assumes that the computer has two network cards.
Everything OK?
ClearOS performs a DNS lookup and then you need to register the server. After doing so, you are given access to updates from the manufacturer for your choice of subscription. The interface shows you a detailed list of packages, and you can click to update; you can also assign a server and domain name. The setup routine then opens the Marketplace, which lists additional modules (Figure 2). Clicking installs the goodies on your system.
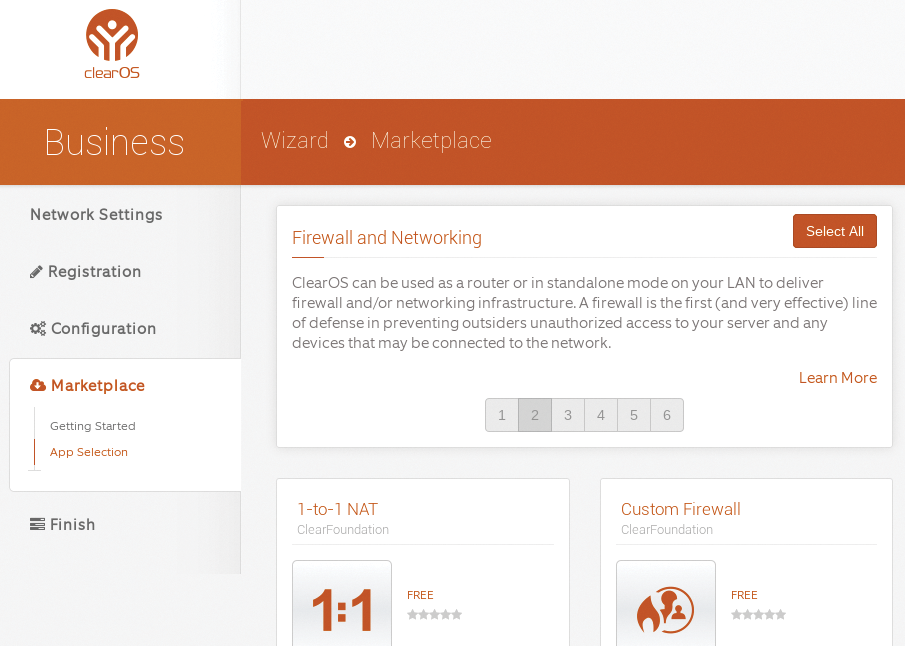
The ClearOS distribution includes popular services with packages for operation as a DHCP, DNS, file, print, Samba, mail, and web servers. In contrast to other commercial products, there is also a free anti-phishing solution and intrusion detection and prevention software. Some security solutions, such as antispam filters and anti-malware packages are available, with several firewalls based on iptables. Be sure to take a close look at the description before installing a package.
One of ClearOS's unique selling points is the various media servers and a photo management tool, which means the server can be recommended as a multimedia center on your intranet. Thanks to the integration of Zarafa groupware and content management systems (CMSs), ClearOS also offers mature packages for commercial usage. Solutions such as OpenERP are available from additional repositories, as well.
User accounts and groups are easily set up using the dashboard; you need to go to the System | Accounts menu to do this. The system first expects you to define services, for which it then creates groups. As soon as groups exist, you can create accounts and assign them to one or multiple groups.
Maintenance
ClearOS automatically keeps the system up to date. For this to happen, you need to install the Software Updates app from the Marketplace, then set up the feature by selecting Configure, which means enabling or disabling automatic updates. If manual updates are enabled, you can manually trigger an update of all available packages by clicking on Update All; however, you cannot select individual packages for updating. If you want to (re-)configure the update function at a later time, you can do so in the Cloud | Updates menu.
When it comes to maintaining the distribution, apps from the Marketplace can help you do so. They include blog viewers, bandwidth managers, backup and restore solutions, and synchronization services for syncing data between remote locations. Many of the packages are available free of charge, and the configuration wizard helps you set up the components.
Although popular services such as the firewall can be set up graphically in a short time – even by less experienced administrators – the support subscriptions offer several options in case of problems, ranging from simple telephone support through remote maintenance. Additional online documentation and forums round off the offering.
Collax Business Server
The second candidate to enter the ring is the Business Server by the German company Collax GmbH [2], which was originally based on Debian. This holistic solution for small to medium-sized enterprises and freelancers offers all the popular services that you need for a secure IT infrastructure and is also suitable as a full-fledged collaboration solution.
The manufacturer's homepage offers two ISO images: one with a free 30-day test license and another with a license for one year, in which the user can also test up to five workplaces free of charge. Collax GmbH offers commercial subscription-based licenses from EUR400 per year for the Basic license up to EUR2,000 per year for the Unlimited license.
We installed version 5.8.2. The manufacturer cites the following as the minimum hardware requirements: 64-bit processor, 1GB of RAM and 8GB of hard disk capacity. A VGA-compatible graphics card is required for the installation.
The vendor has given its distribution a graphical installation routine; although it looks pretty frugal, it does offer all the functionality you need. When partitioning, note that parallel operations with any other system are not intended – the setup wizard thus asks twice before hogging the whole disk. During the network connection configuration, the Collax server reliably identifies existing Ethernet cards; WiFi is not intended. By default, the computer is given an IP address of 192.168.9.9, which you may need to modify to match your environment.
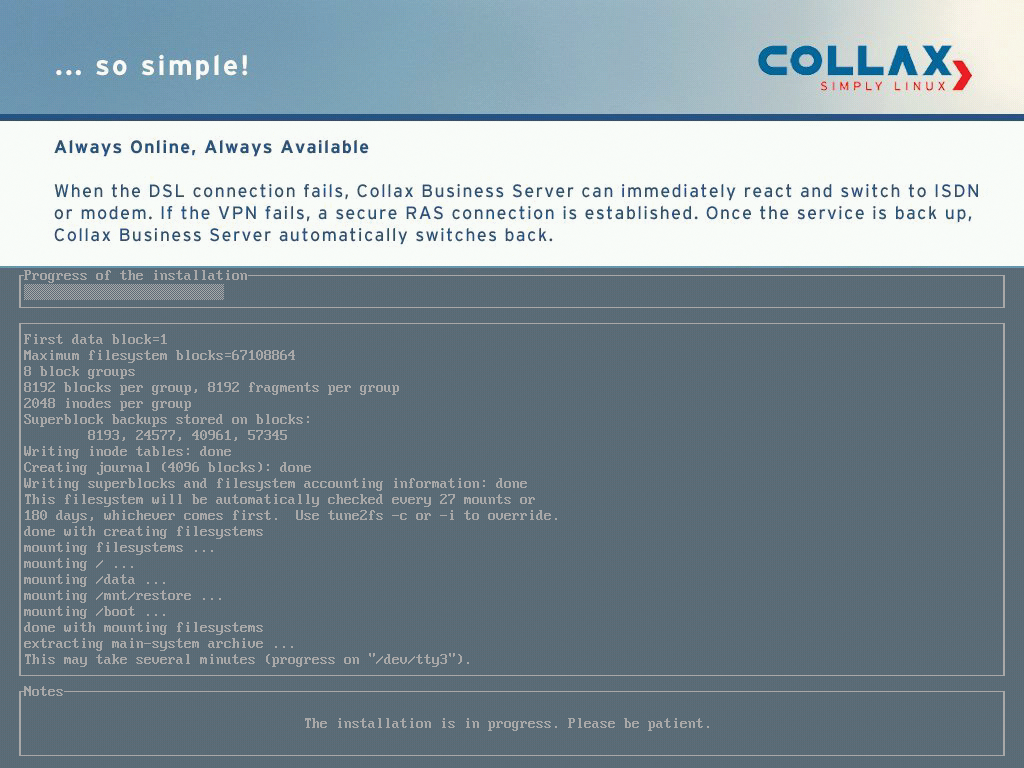
After selecting the time zone, you are shown a summary of the settings and can then press Start to install the system. A progress indicator shows how far along you have progressed, and status messages in the main window let you know what exactly is going on (Figure 3).
The Right Connection
After restarting and selecting the System option in GRUB, the server then boots. It does not have a graphical user interface. As with ClearOS, you can connect to the server from a web browser. Enter the server IP, followed by port number 8001 in your browser's address bar to go to the administration interface. The interface initially prompts you to set a root password. After logging in, a wizard starts that prompts you for your company's master data and other settings.
If you want the Business Server to act as a DHCP server, you also need to set it up here. Finally, the system generates an X.509 certificate for secure communication between the server and the clients. Using the Dashboard and the Menu button, you can reach an overview of all available services (Figure 4). Clicking on an entry starts the configuration.
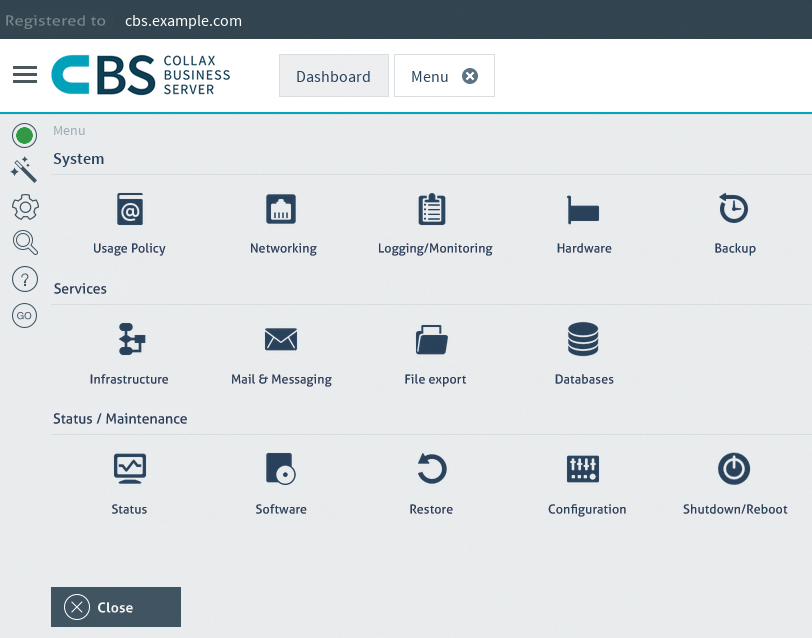
Before the server is ready for use, you still need to register it. To do so click on Wizards | Registration in the main window and enter the license number. After successfully registering, you are given access to the existing updates and add-on packages. Admins should note that they need to enable the modified settings in the web interface before they become operational. To do this, press the animated icon in the top bar and confirm the prompt.
Variable
User management in Collax Business Server takes a two-stage approach. The system supports users and groups but will also take individual IP addresses or whole networks into consideration if so desired, and you can assign individual rights to these. By default, the most frequent application scenarios already have several groups. It is not complicated to create more groups and assign individual rights to them with Usage Policy | Groups | Add. For new user accounts (Users | Add, you need to enter at least a username and password. All other details are optional. You can then use Group membership tab to grant access to the existing groups. Again, to activate new or changed items, you must press the blinking Go icon at top left.
In addition to basic network services such as DHCP, DNS, and a firewall, the Collax system offers a number of groupware solutions. They include a mail server and fax server as well as a short message service. As an additional module, you can also purchase Zarafa Suite, which lets you integrate mobile clients into your enterprise IT infrastructure. For the mail server and web proxy services ClamAV and Kaspersky are available as antivirus programs. The offering is rounded off by network-capable backup systems.
All services are managed via the standardized web interface, so even inexperienced administrators will feel at home straight away.
Clicking Software | System Update under Status/Maintenance lets administrators automate the process of updating their Collax Business Server. In this menu you will also find an entry for updating the antivirus scanner. If you are looking for more information about the server, you will find it under Logging/Monitoring in the System section of the Menu. The same menu section has a Backup entry that lets administrators configure and schedule backups, which can be sent to a variety of media, such as state-of-the-art external mass storage devices as well as tape drives. The server supports popular backup strategies, with full or file-based restores. The Hardware item in the System section even lets you set up and monitor an uninterrupted power supply (UPS).
Koozali SME Server
SME Server, which has been continuously maintained and developed since 1999, is one of the two completely free tests candidates – NethServer being the other. The Koozali Foundation [3], from the US, has been responsible for the software, which was released under the GPL, since 2013. Weighing in at just 640MB for the 64-bit version and just under 600MB for the 32-bit version, the project offers two extremely lean ISO images. Our test team took a look at version 9.0, which is based on the now obsolete CentOS 6.5. The current version 9.1 is based on CentOS 6.7.
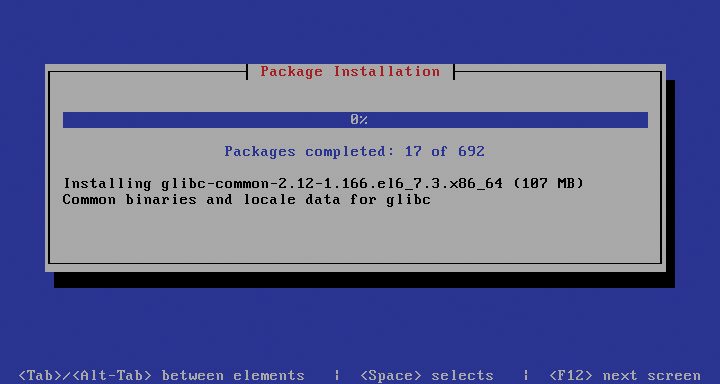
Even support is free from Koozali – users can access the wiki from the support section on the project home page as well as several forums, comprehensive documentation, various how-tos, and a bug tracker. The guide cites a 1.5GHz CPU or better, 512MB of RAM, and 30GB of hard disk space as the minimum requirements. For a small installation for up to 10 users, you could even get away with 256MB if RAM, 20GB of hard disk, and a 400MHz CPU. The Koozali SME Server does not offer a graphical installation wizard. Instead, the setup is based on ncurses (Figure 5). In terms of localization, the routine only asks about partitioning; everything else happens automatically.
Modus Operandi
After rebooting the server, another visually restrained wizard guides you through basic configuration. You need to enter a password, define the system and domain names, and choose an IP address. Pay attention when selecting the operating mode: the three options Server and gateway, Private server and gateway, and Server-only all have different objectives.
Full functionality, including mail and web servers, is only provided if you choose Server and gateway. Private server and gateway gives clients on the intranet access to the Internet but prevents all incoming requests at the firewall. You need two Ethernet connections for these operating mode because of the gateway functionality.
The Server-only option is designed for life on an intranet (e.g., as a file or print server), with no firewall; you can enable Internet access for clients via an additional server or router that acts as a gateway. Otherwise, DHCP or DNS and directory services are fully implemented. Detailed help is available in several languages thanks to the comprehensive documentation on the website.
You have two options for configuring the Koozali SME Server in more detail: at the command line, which also offers ncurses menu control, and via a web browser. To get to the GUI, you need to enter the server address and add server-manager (e.g., https://192.168.2.2/server-manager). After logging in, you are taken to a very plain, uncluttered menu.
Well Structured
The left-hand side of the Koozali dashboard groups the most important options and their subcategories. Even though the list is long, administrators should have no trouble finding their way around. To set up Users and Groups, you need to visit the Collaboration section. In addition to the usual setup options, the software lets you limit the storage space available to users by defining Quotas.
The Configuration and Security sections let administrators manage the installed packages and make changes to the network configuration. Configuration | Software installer can be used to extend the functional scope and install add-on modules. Although this candidate does not offer an app store, point-and-click installation is supported.
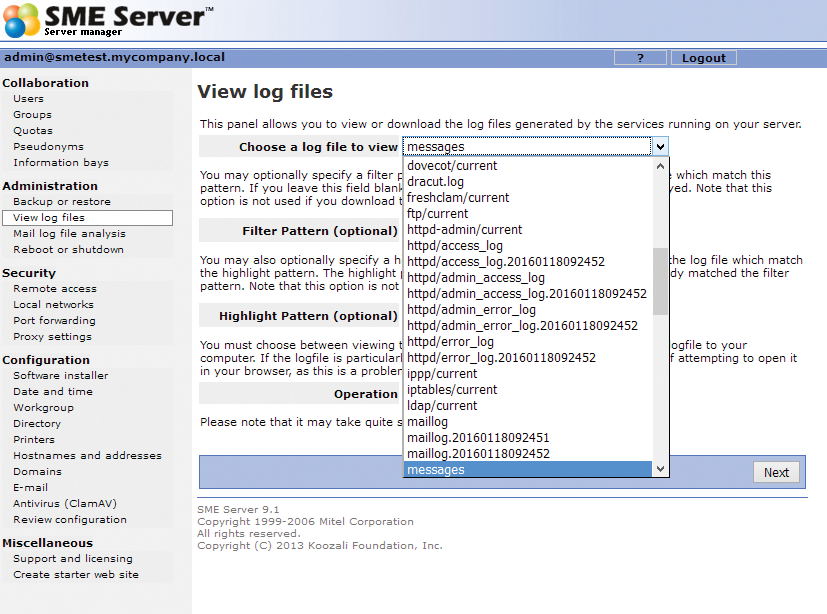
Automatic software updates are also possible; as the system administrator, you can optionally define intervals for regular updates below Configuration | Software Installer. The Koozali server has many tools that help you analyze and troubleshoot problems. For example, backup routines support backups to USB storage devices at the console. The Administration section of the web interface gives you further options for creating backups on various storage media and viewing logfiles (Figure 6).
NethServer
The fourth candidate is relatively unknown in the SME server system universe. NethServer [4], by the Italian company of the same name, is released under a free license and is also free of charge for use. Support is provided by the community; in addition to a forum, the project page has links to guides in English and Italian.
The current version 6.7 is based on CentOS 6.7, available as a 500MB ISO image and only available for 64-bit architectures. The makers cite 1GB of RAM and 8GB of free disk space as the minimum requirements.
In addition to an interactive and an automatic installation mode, the GRUB boot manager also offers to set up a legacy CentOS system. Interactive mode launches the Anaconda routine, which is well-known from Red Hat and takes you to a plain ncurses interface. The localization options offer you a choice between Italian and English, and the partitioning wizard always wants to use the entire disk. After setting up the network connection, the installation program creates a root account and password before launching the GUI, which installs the operating system.
All Systems Go
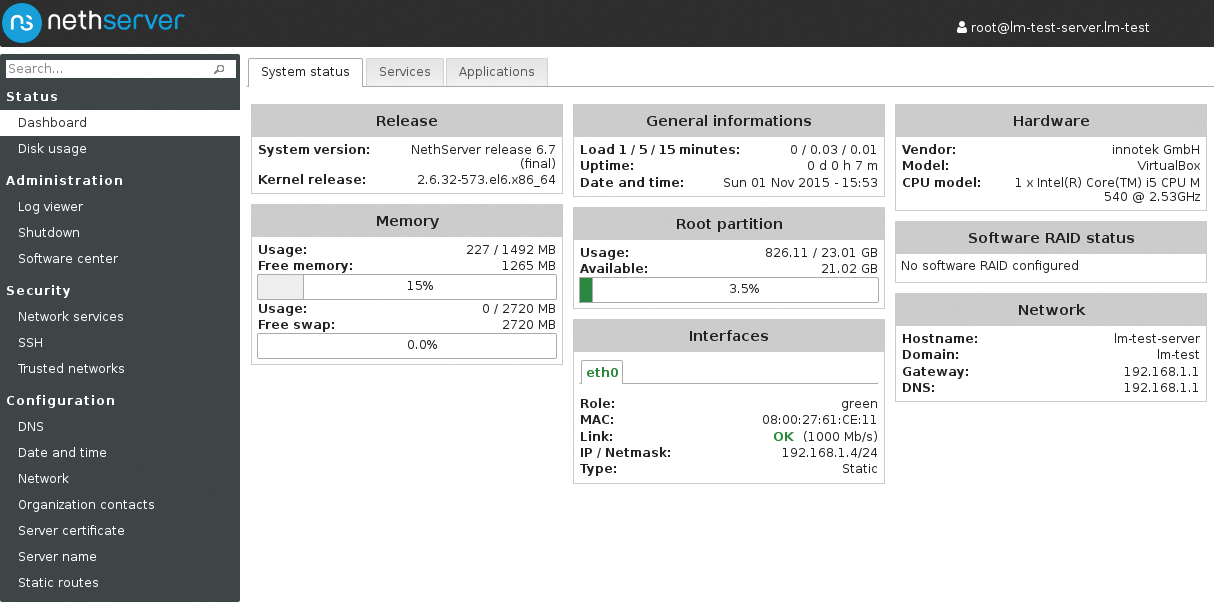
After rebooting, you can either log in at the console or access the management interface in your browser at https://<IP address>:980. The first tasks in the server manager are to change the root password, the hostname, and domain name. After this you are taken to a plain interface that organizes the configuration options in groups on the left (Figure 7).
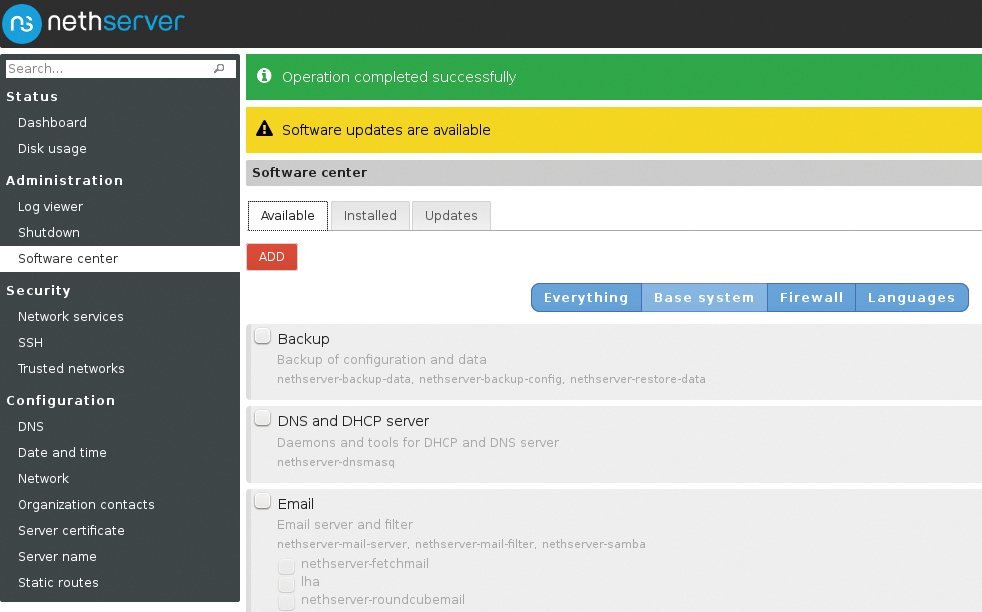
When it comes to network configuration, NethServer scores points by additionally detecting WiFi hardware, assuming that this can use nonproprietary firmware. The Software center collects services and apps that users install by clicking ADD in the Available tab (Figure 8). The offerings include the standard network services, supplemented mail and fax servers, databases, monitoring tools, an ownCloud server, and groupware solutions.
Various filter systems with blacklists and content filters and an IPS are also available. You can also use the software center to load language packages retroactively if you need to change the locale.
Maintenance
You will not find user and group management. If you want to set up and manage accounts and groups, you first need to install the file server via the software center; then, the Dashboard comes up with a new Management section containing the Groups, Users, and Shared folders entries. User and group management is extremely intuitive and met with the approval of the test team.
NethServer also assists system administrators with installing software updates and maintaining the computer. In the software center, the updates are available in the Updates tab. The distribution also shows a yellow bar in the Dashboard to indicate packages that need updating. Clicking on the DOWNLOAD AND INSTALL button installs the new software.
The logfile viewer is also exemplary – you will find it under Log viewer in the Administration section. In addition to the ability to select and display the logs directly, you will also find a search function that could help when troubleshooting.
Univention Corporate Server
The next candidate comes from software vendors Univention GmbH from Bremen, Germany. The Corporate Server [5] is based on Debian; we had access to version 4.0 for our lab. If you visit the project website, you will also find a 4.1 release candidate.
Univention Corporate Server (UCS) is available in a number of editions. The free UCS Core Edition is accompanied by three subscription versions (Base, Standard, and Premium), for which the vendor asks for between $349 and $2,049 per year [9]. The vendor has different support packages for the three editions.
An ISO image of UCS is available from the download section and as a preinstalled virtual machine image for VMware and VirtualBox. Both variants are designed exclusively for 64-bit architectures. The vendor cites 512MB of RAM and 8GB of free disk space as the minimum hardware requirements.
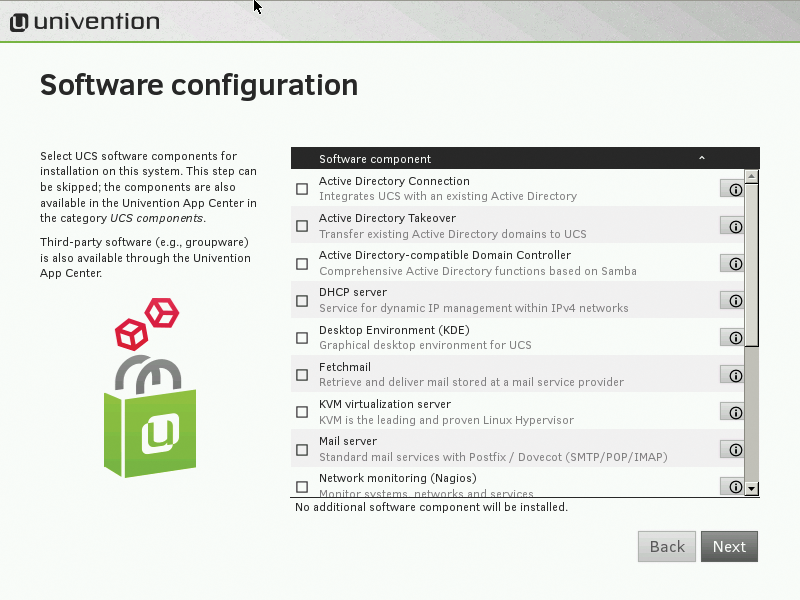
A GUI-based wizard guides you through an uncomplicated approach to installing the distribution on your mass storage medium. After rebooting, a setup wizard asks for your language preferences and helps set up the network. In another dialog, you can decide which services to install (Figure 9). A summary shows the selected settings; clicking on Configure system in the bottom right then installs the services; this can take a while depending on your choice of packages.
Ready for Operation
Admins can use a web interface to manage the server, which is accessible in the browser via the previously defined IP address. The connection uses HTTPS. In the Administration tab, open the Management Console by clicking System and domain settings. After authenticating, you will see a plain overview with colorful icons for managing the server.
The management console organizes the system settings in subgroups. In the App Center, you can select additional services and programs; the choices here mainly consist of groupware solutions and backup programs. On the left side in the window, categories help you search for specific applications.
The Groups and Users tiles give you access to account and group management. It makes sense to set up your users first because they can be assigned to their respective groups in the Groups dialog later on. Note that the administrative password must comprise at least eight characters. The Options item on the left lets you decide which services to enable for your users. You can also share directories under Account.
Univention Corporate Server comes with a number of default groups; you can add more by pressing the Add button. You can also incorporate existing groups into new groups.
Comprehensive
UCS Server is the test candidate with the largest number of third-party groupware solutions, typically commercial. Administrators will find countless packages for handling email (servers, archiving), backup solutions, document management systems, enterprise resource planning (ERP) software, CMS programs for websites, customer relationship management (CRM) packages, cloud services, and even project management software in the App Center.
The distribution also makes it easy for system administrators to handle software updates. Directly after logging in, a Software update tile appears in the Dash, showing you whether updates are available in the various program groups. You can then click a button to trigger the upgrade in question.
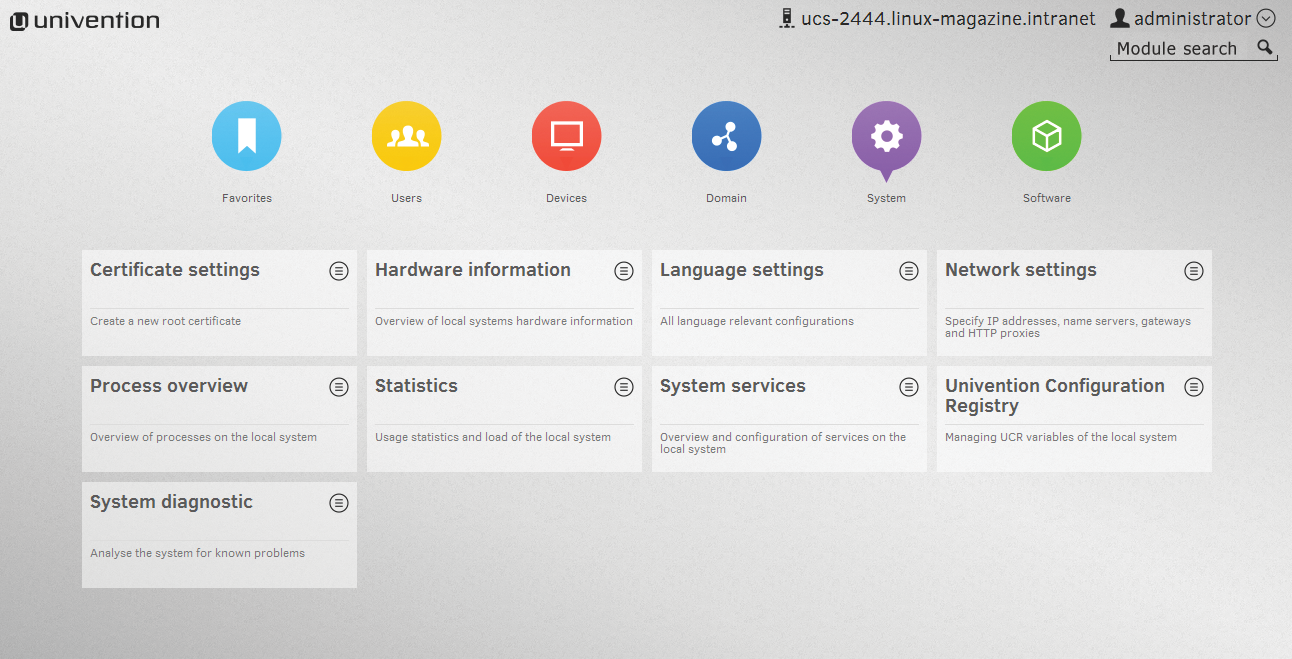
The distribution scores points with its many diagnostics and monitoring tools that facilitate server management (Figure 10). One feature worthy of particular note is the System diagnostic tile, which searches for known problems. Usage statistics, and several overviews of running processes and services facilitate system management. Administrators can easily kill rogue processes in the clear-cut performance monitor.
Zentyal Server
The last server software to enter the ring is the Ubuntu LTS-based Zentyal Server [6]. This distribution by a Spanish manufacturer mainly sees itself as a replacement for Microsoft Exchange and Outlook infrastructures and offers the kind of directory services common in heterogeneous environments. Additionally, the server is useful as a gateway, DNS, DHCP, and VPN server or as a firewall. The current version 4.2 offers no support for graphical management of the Apache web server in, contrast to earlier versions; the makers also removed the IDS and IPS programs.
Zentyal is available as a free Development Edition, or you can get a 30-day version of the Commercial Edition without any restrictions to the feature set. If you want to carry on using the distribution, you then need to contact the manufacturer to discuss a price. The project website links to the wiki and the forum. Training is available at a price (~EUR500), or you can buy a print (~EUR45) or e-book (~EUR25) version of the Zentyal Server book.
Zentyal Server is exclusively available for 64-bit architectures and comes in the form of a 600MB ISO image. Like the other test candidates, the distribution has a graphical configuration interface and useful wizards. The minimum hardware requirements cited by the vendor are a Pentium 4 CPU, and 1GB of RAM. Because the server is also useful in a RAID array, you might need two or more storage media.
Installation
Zentyal Server requires the entire disk as the installation medium, and the boot manager warns you of this. The ncurses-based dialog helps you set up an administrator account and configure the basics of the software. During installation, the commercial version ask for the license issued by the vendor. Without a valid license key, the installer refuses to continue.
After a reboot and installing more packages, the Openbox window manager comes up, automatically opening the administration web interface in Firefox. Alternatively, you can access the interface from any browser on the network after typing the server IP address followed by port number 8443 in the address bar.
You first need to decide on a server role. The choice is Domain controller, Additional domain controller and Use external Active Directory server. Zentyal offers services for DHCP, DNS, firewall, CUPS print server, ClamAV antivirus, SpamAssassin, Amavis mail filter, VPN server, and certification authority, as well.
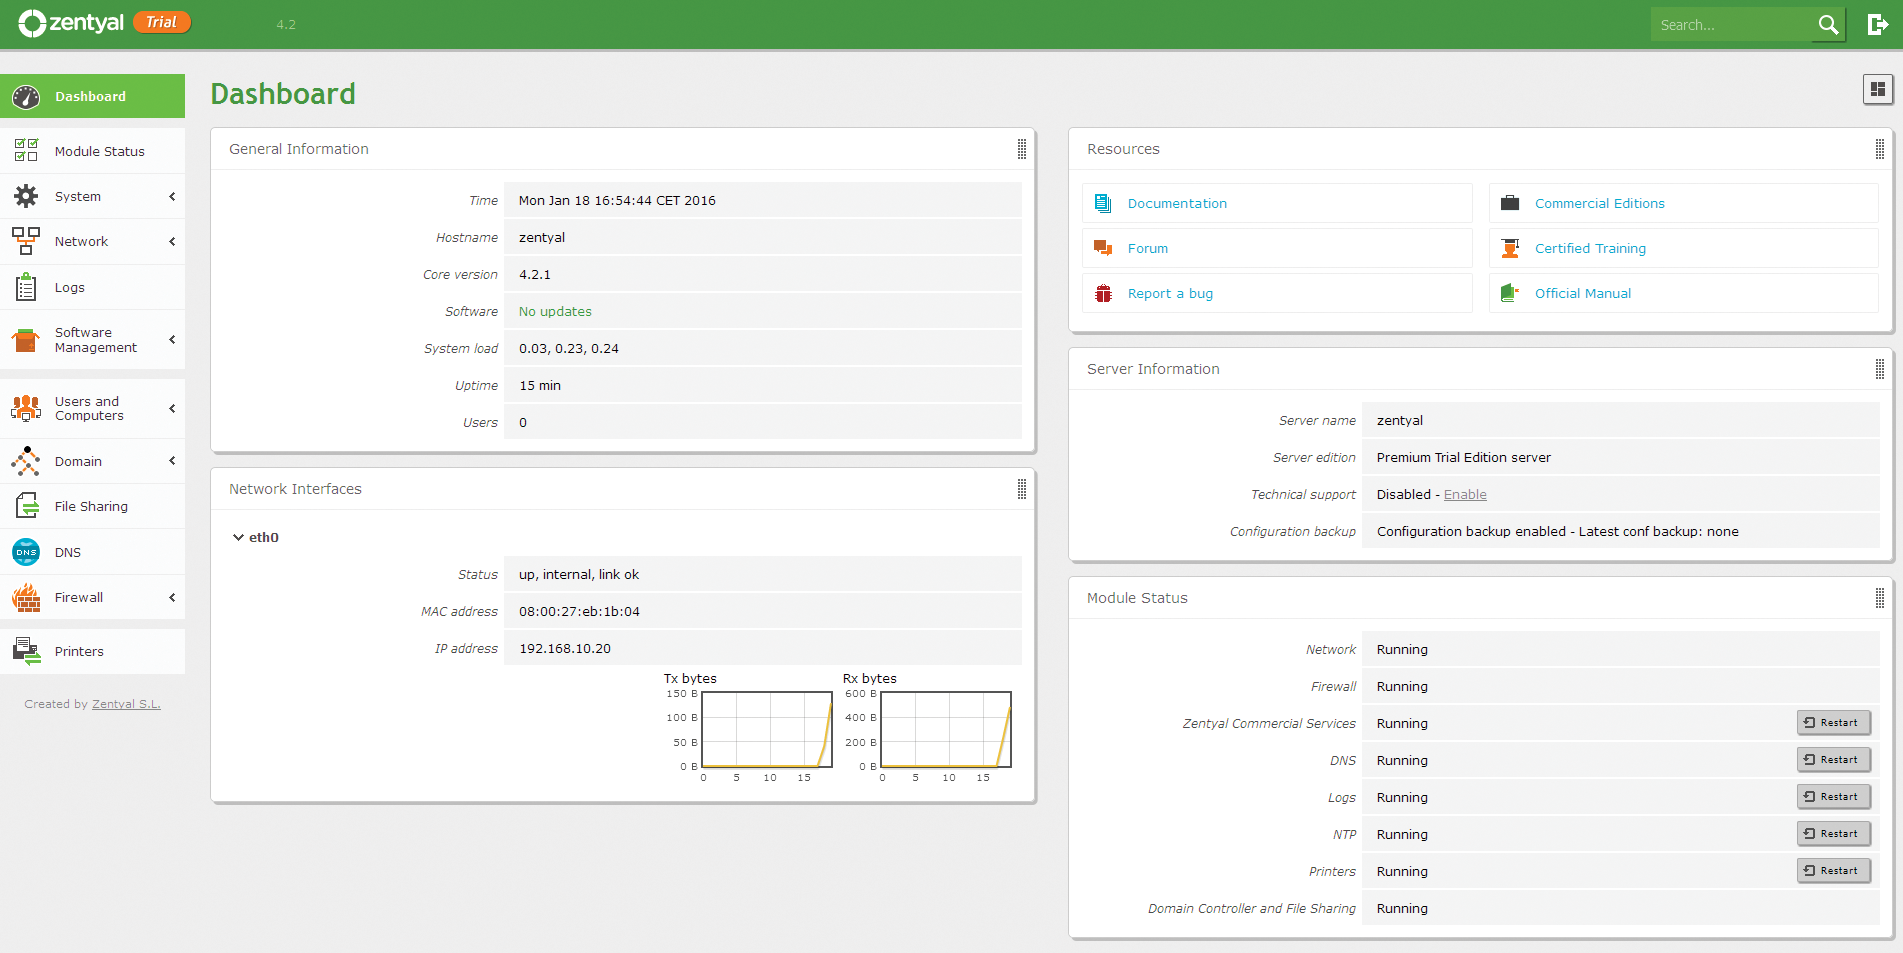
Once you have installed all the packages, it is time to set up network access. Finally, you see an overview summarizing the most important information on the active system (Figure 11).
Services
The menu on the left lets system administrators make changes to the server. For account management and account setup, click Users and Computers | Manage. A domain tree displays to the right of the menu showing all the domain members (including those created by Zentyal). Clicking the plus sign in the list beside Computers, Groups, or Users opens a dialog for creating new accounts, where you can then assign the domain members to one or multiple groups for granular, group-specific rights assignments.
To enable more services retroactively, you need to go to the Software Management | Zentyal Components section and select the desired services. Then press Install to access the system. Zentyal automatically completes all the settings after downloading the packages, although you will be able to add users or groups manually for some services. When installing CUPS, the wizard also asks you about any existing network printers.
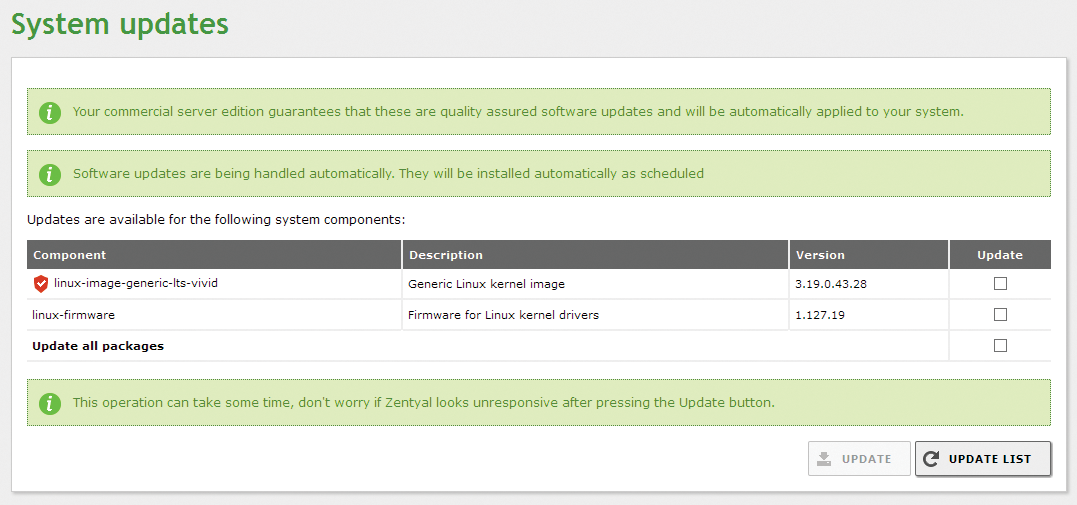
Zentyal automatically takes care of software updates. If you go to Software Management | System Updates, you will also see the automatically installed updates, and you can check the box to trigger a manual update if needed (Figure 12). This means that the Zentyal Server keeps itself up to date at all times.
The Logs entry in the menu list lets you view the system logs. In addition to viewing the complete logs, you can click the Configure Logs tab to configure the intervals at which the system deletes the logs (default value is one week) as a function of system load and related log sizes.
QNAP NAS System
As an alternative to server solutions, the test team also took a closer look at the TVS-471 NAS system by QNAP [7]; you can purchase this from popular online stores for less than $1,000 without storage media, which can be any commercially available SATA SSDs and hard disks; however, you do need to purchase them separately.
Because the computational performance of professional NAS systems is now similar to dedicated computer systems, many vendors offer firmware variants that also provide typical server-based services, as the test candidate did.
The box – equipped with four slots for storage devices – is factory-equipped with a Pentium G3250 or Core i3 CPU. Both variants have 4GB of RAM, which you can expand to 16GB. The operating system is the Linux-based QTS 4.2 with an optimized kernel.
The distribution, maintained by QNAP, offers a visually appealing, clear-cut management interface (Figure 13) and an App Center that lets users install server-based services retroactively. Thanks to a modular collection of software, the QNAP TVS-471 can also be used as a home movie, music, and photo center.
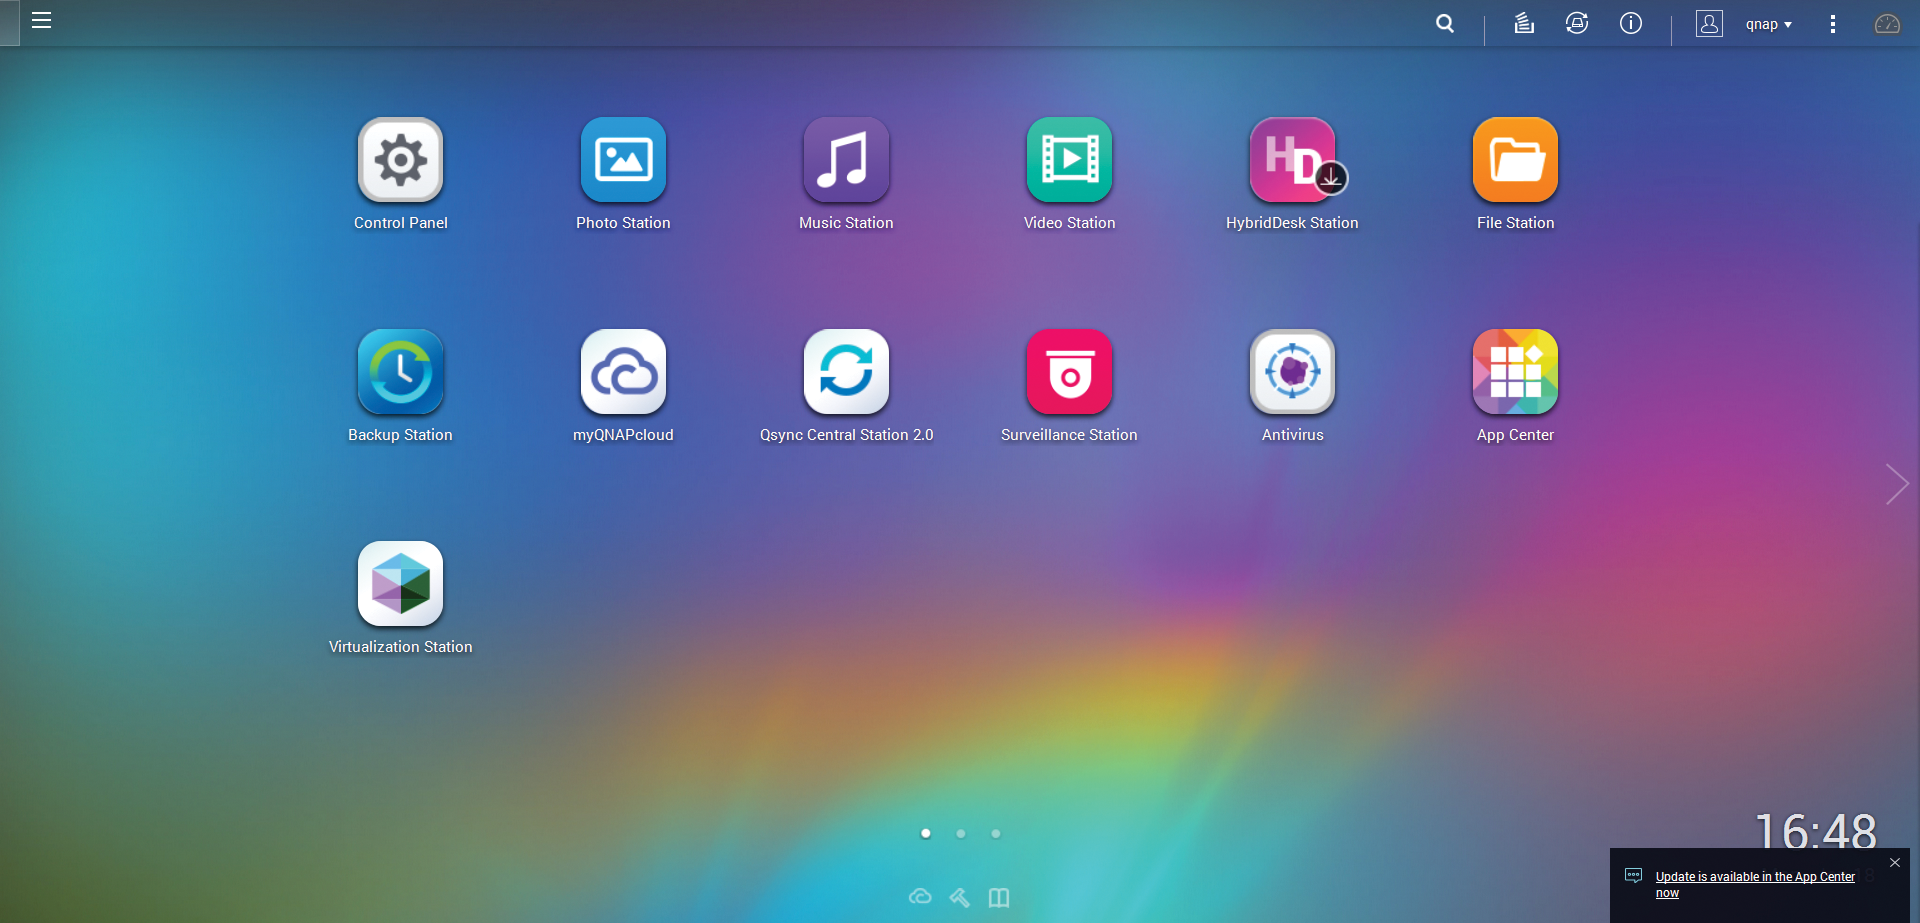
To access the web interface in the browser, type the IP address of the NAS system followed by the port number 8080. When you first login, type admin as a username and password. You want to change these access credentials immediately using the menu system at the top.
External Helpers
The System Settings menu is where you can configure the most important elements, including network connections, security settings, and hardware parameters. If you want to use the device's uninterruptible power supply and eSATA interfaces to connect external mass storage devices, printers, or a UPS, you need to go to the External Device option.
The NAS system is preconfigured out of the box to a great extent; administrators typically only need to create users, groups, and shares. You can handle all of these tasks conveniently in the Privilege Settings menu item, where you also assign rights to users and groups or explicitly share directories and files. A number of apps extend the NAS. In the integrated store, you will notice the categories Education, Home Automation, Surveillance, and Entertainment, which the other test candidates do not offer. Additionally, you will find popular server-based services (mail, web, etc.), as well as virtualization solutions.
The vendor groups many additional offerings, from ERP systems through an e-commerce solution up to presentation apps in the Business section. Because all of the applications are web based, no additional software installation is required on the client side.
Embedded
If you are looking for a way to update the existing software, you will find it in the Control Panel | System Settings group below Firmware Update. In the dialog that appears, administrators can specify that the system should look for updates automatically after login (Figure 14).
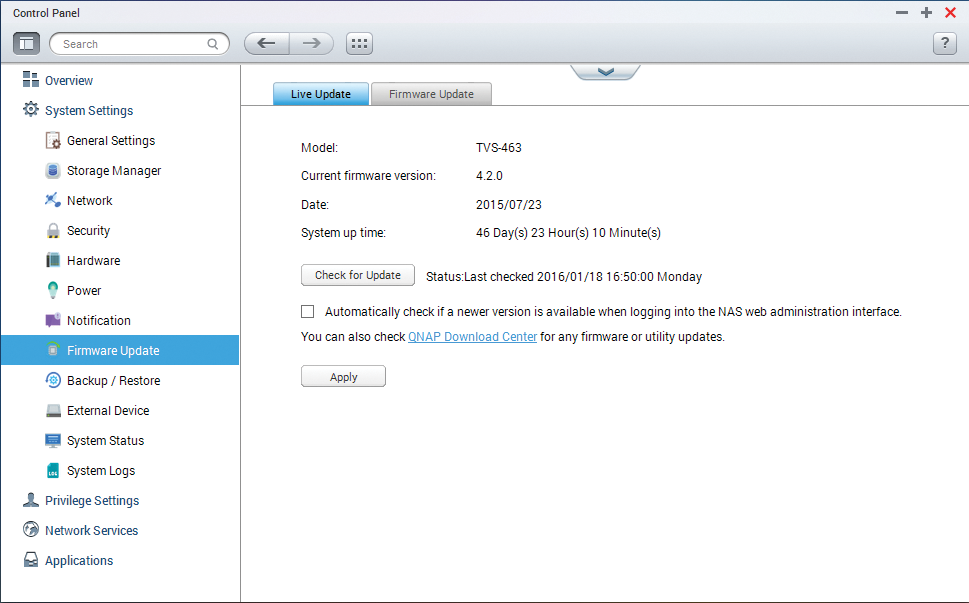
Additionally, you can trigger updates manually. If new firmware versions are available as ZIP archives, you do need to unpack them on a different computer first before installing them on the NAS with the aid of a shell script.
QNAP provides a number of proprietary tools for system maintenance. For example, admins can go to System Settings | System Logs to view various logfiles and thus identify potential sources of problems. And the General Settings | System Administration menu also offers a variety of details relating to the network status and system services. The Storage Manager not only shows the load but also tests connected mass media capable of using self-monitoring analysis and reporting technology (S.M.A.R.T.) to deliver details of mechanical hard disk wear.
The Backup Station offers backup functions, including NAS-to-NAS backups, network backups on remote storage media, and backups on storage devices connected to the NAS. If these options are not enough, you also get help creating backups in the Amazon cloud.
Conclusions
None of the test candidates have major weaknesses – in fact, we were pretty impressed with all of the server distributions. Where they mainly differ is in terms of the numbers and orientation of supported apps. Whereas Zentyal focuses on its role as a file and mail server in heterogeneous environments, UCS attempts to integrate commercial applications. Other candidates, such as NethServer or the Collax system, seek to impress as rock solid all-round solutions.
All of the servers tested offer popular network management services out of the box, including DHCP, DNS, and NTP servers along with a firewall. All of the candidates also offer a VPN server and NFS services. However, for deployment in heterogeneous environments with Windows clients and a domain structure, you need a Samba server – and not all of the candidates support the current 4.3 version. In some cases, beta versions are integrated.
As of Samba version 4.0, you can integrate appropriately prepared Linux server systems as Active Directory Domain Controllers (DCs) without any restrictions in heterogeneous Windows environments.
That said, this network topology is typically only worthwhile in large IT infrastructures because of the more complex management. The feature scope of Samba 3.x is normally absolutely fine to integrate Windows clients with an intranet that uses Linux servers, and because smaller IT environments typically only use the Samba server as a file and print server, all of the distributions tested here are fully capable of handling the job.
The test team had no complaints about update routines. All of the systems ensure that they are kept up to date at all times to eliminate any vulnerabilities. Access to the server logfiles is also pretty much uncomplicated; all of the candidates help admins troubleshoot any problems that occur.
All of the distributions are equally good choices for less experienced administrators and people moving from Windows servers. That said, the vendors are now seeing competition because of the growing feature set of today's NAS systems: The QNAP QTS operating system can easily hold sway with the Linux solutions tested here, with its collection of installation and configuration routines. The only weakness is the inability to extend the number of apps.
