
Automating development environments and deployment with Otto
Ottomatic
New web applications often work reliably on the developer's machine and everything looks great – until the developer deploys the web page on a public web server, that is. All of a sudden it fails to deliver images because of strict access permissions, while the app complains about missing PHP libraries. Why is it that the engine always starts to stall when the most important release deadline is just around the corner? A tool named Otto [1] promises an elegant solution to this dilemma.
Delivery Hero
Otto first sets up a tailored development environment on the programmer's system. When called upon to do so, it bundles the finished application onto a virtual machine and automatically launches it on a production system or in a cloud. Otto not only ensures that all the required libraries, frameworks, and services exist, it also protects the production system against attacks.
Does your project need a database? Again, this is no problem: Otto installs the database and automatically sets it up to meet your requirements. In everything it does, Otto orients its approach on trusted best practices. Otto is even smart enough to identify some of the required dependencies based on the source code.
After the developer has finished revising the application, all it takes is a single command at the command line to transfer the application to the production system. In this way, Otto actively supports the principles of continuous integration [2] or continuous delivery [3], allowing developers to extend their projects quickly, add new features, and deliver the goods. Because they handle classical administrative tasks in this process, they then naturally enter the realm of DevOps [4].
Old Friends
The company behind Otto is HashiCorp. This California company is mainly known for its Vagrant tool, which semi-automates the process of creating virtual machines [5], which sounds suspiciously like one of the tasks handled by Otto. In fact, Otto draws on Vagrant and many other HashiCorp tools in the background to do its work, and it all happens transparently for the user, who has no contact at all with the tools. Otto is released under Mozilla Public License Version 2.0, and development is an open process on GitHub [6].
Otto has one drawback: It is still very much at the start of its development path. When this article was written, the latest version was 0.1.2, and at the time of press, version 0.2.0 had been released. Version 0.1.2 contained only a small portion of the intended functionality. On a brighter note, Otto handled the functions that are implemented perfectly in our lab – with one minor exception.
Instant Web
HashiCorp delivers Otto as a prebuilt package for 32-bit, 64-bit, and ARM Linux, as well as 32- and 64-bit Mac OS X and Windows. If you want to deploy the tool, you only need to download the matching ZIP archive [1] and unpack to your hard disk, revealing the lightweight otto program, which weighs in at just 15MB. Although you can call it directly – there is no need to install – HashiCorp does recommend adding otto to your PATH.
In addition to Otto, you also need VirtualBox version 4.2.0 or newer, as well as the latest version of Vagrant. Some of the major distributions let you install the two tools through the package manager; if not, you can pick up the packages for VirtualBox [7] and Vagrant [8] online. Future versions of Otto will install all the required tools automatically, and the plan is for Otto eventually to replace Vagrant [9].
Setup Work
To help you get started with Otto, HashiCorp provides the source code of the simple web application shown in Figure 1. You can either download this directly from GitHub [10], or use git to check it out:
git clone https://github.com/hashicorp/ otto-getting-started.git
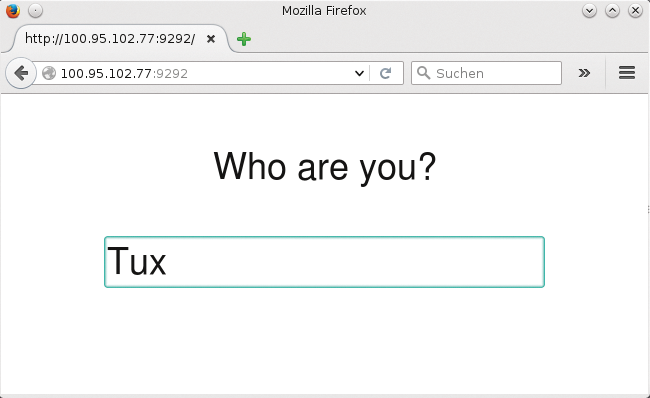
Because the web application is written in Ruby, developers would now normally fire up the package manager and install the complete Ruby system along with a web server and all the required dependencies. With Otto, however, you simply change to the web application's project directory and run two commands when you get there:
cd otto-getting-started
../otto compile
otto dev
The first command tells Otto to have a look at the source code and retrieve all the information necessary for setting up the development environment (Figure 2).
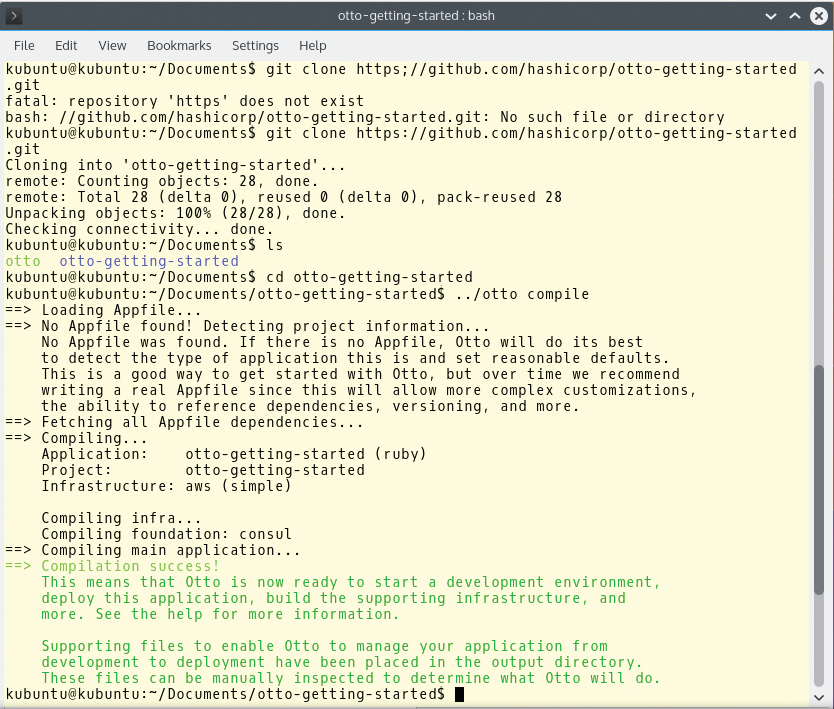
The tool autonomously discovers that it is a Ruby program and accesses the gemfile typical of Ruby applications to load all required libraries or dependencies. Otto stores the information retrieved in this way below the project directory in a hidden directory named .otto. It merely contains configuration files for the tools harnessed by Otto, which explains why normal Otto users are better off not making any changes here.
Everything In Place
Once Otto has collected the information it needs, the otto dev command creates the development environment. For this to happen, Otto tells Vagrant in the background to set up a matching virtual machine with VirtualBox (Figure 3). If Vagrant is not available, Otto offers to download the tool itself. This didn't work in version 0.1.2, even though the Otto documentation suggests that it should. As a result, budding Ottomans have no alternative but to install Vagrant manually, as mentioned earlier.
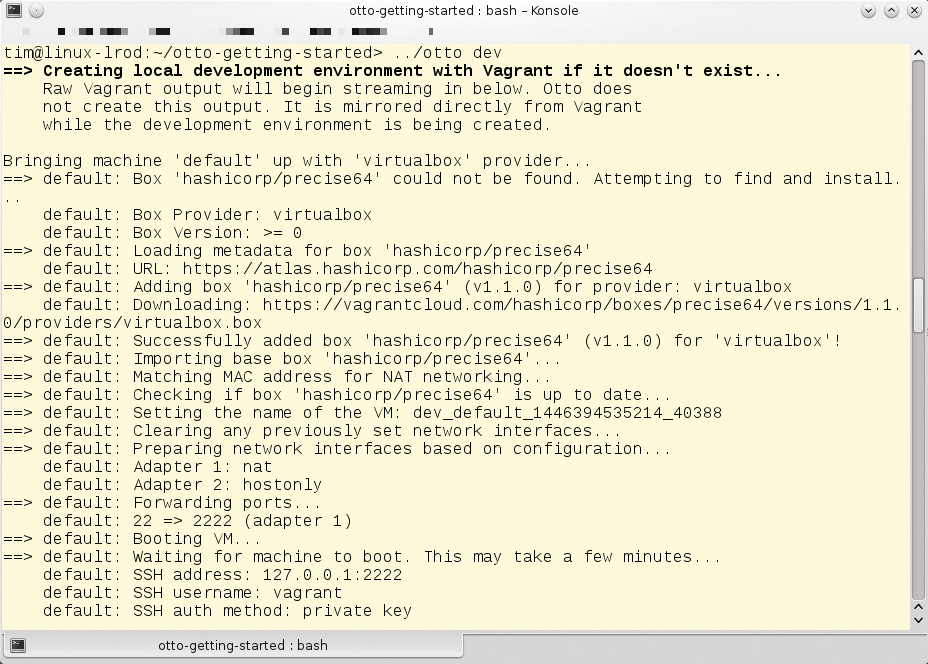
If Otto was able to launch Vagrant, Vagrant then downloads a basic image of approximately 350MB and uses this to create a complete virtual machine. The first call to otto dev can thus take a couple of minutes. In our lab, the basic image contained a minimal version of the more than three-year-old Ubuntu 12.04 LTS Precise Pangolin – although this version is still supported until April 2017.
To facilitate the process of sending data to the virtual machine, Otto then installs the VirtualBox Guest Additions, version 4.2.0. Although these tools are designed for collaborating with VirtualBox 4.2.0, they work perfectly with newer versions. Otto hides any error messages that occur under a heap of status messages, so it could be quite worthwhile to inspect the messages closely.
In the next step, Otto transparently mounts the project directory for the web application on a virtual machine. Any changes made to the web application are thus immediately available on the virtual machine and vice versa. After this, Otto installs the Consul [11] tool on the virtual machine, making it easier to find and address databases and other services. (More on that later.)
Otto now sets up the required programming tools; in this example, it installed Ruby, among other things. In the case of a PHP application, Otto would install both the Composer package manager and frequently used PHP modules (mcrypt, fpm, gd, readline, pgsq, and mysql, but only mysql, mind you, not the database).
Access All Areas
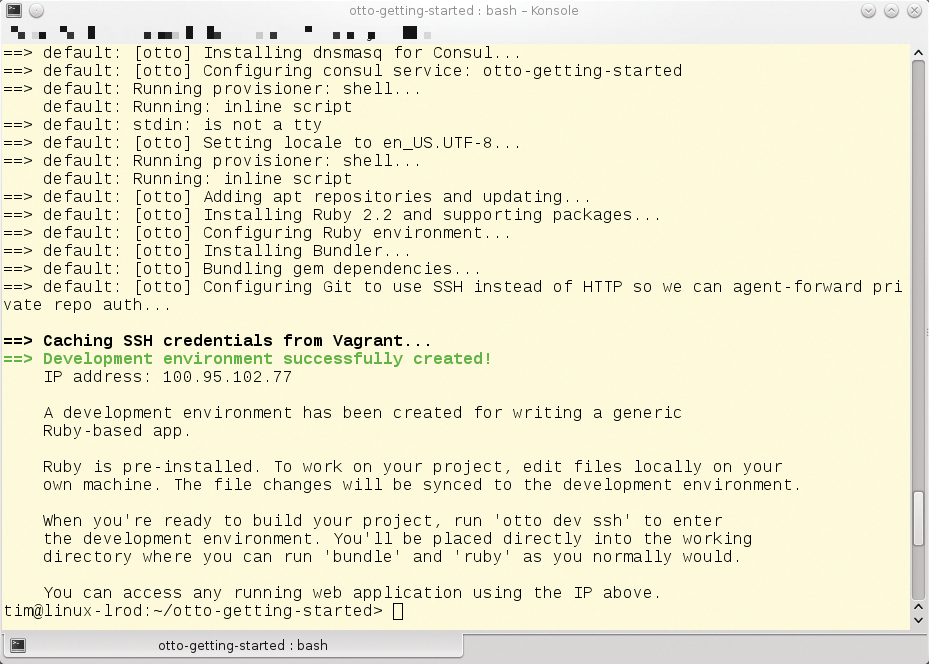
At the end of the installation process, you have a virtual machine running in the background with your development environment. In a final fling, Otto summarizes all the important information and possible restrictions (Figure 4). In the case of the Ruby application, the developer needs to install the Ruby gems manually, but at least Otto has completed all the required preparations. All you need to do is type
otto dev ssh
to change to the virtual developer environment. As the command would suggest, access is encrypted using SSH. Otto takes care of logging you in, after which you find yourself in the project directory (Figure 5).
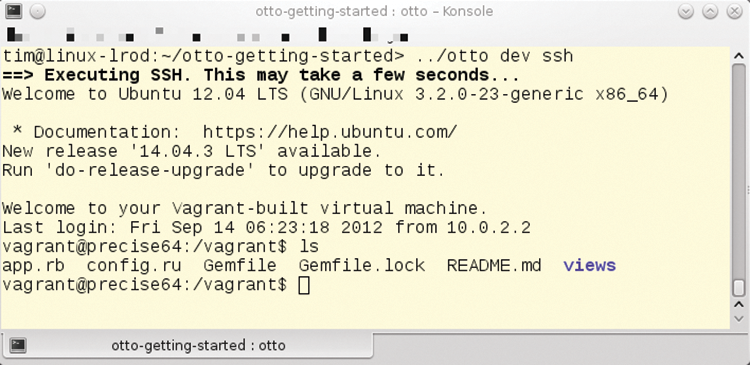
otto dev ssh, you are taken to the virtual machine, where Otto displays the project directory. You can then work there directly with the original source code instead of using copies.You now retroactively need to pick up the Ruby gems required by the application; you can use bundle to do this. After doing so, you can fire up Ruby's own web server on a virtual machine by typing:
rackup --host 0.0.0.0
The server listens on port 9292 by default. For the PHP program, the equivalent command would be:
php -S 0.0.0.0:5000
Port 5000 is used here. Each virtual machine (i.e., each development environment set up by Otto) has its own IP address. You can now use this address specifically to access the web application, which is now running. Otto tells you the IP address in the last lines when setting up the development environment (Figure 4). Forgetful users can also open a second terminal, change to the project directory and type:
otto dev address
In the case of the small example application, all you need to do is call the IP address shown in the browser with a port number of 9292. As shown in Figures 1 and 4, this would be http://100.95.102.77:9292.
You can now continue working on your web application in the normal way on your own machine. Because the project directory is passed through, changes take effect directly in the development environment, and you should be able to reload the page in the browser. If you need to interrupt your work in the evening, you can shut down the development environment gracefully by typing otto dev halt, and fire it up again the next day by typing otto dev.
Cloud Formations
Normally, to transfer a finished application to production operation, an admin would need to launch a virtual server in a cloud, set up an appropriate Ruby environment on the virtual server, and install the web application (deploy). Otto also handles these steps, although version 0.1.2 only supports Amazon's AWS Cloud. Other clouds and target systems will follow in later versions, and the plans also include publishing in Docker containers.
To launch your own application in the Amazon cloud, Otto first needs to set up your application. The command for doing this is simply:
otto infra
The tool first prompts you for your access and secret key (Figure 6). As an Amazon user, you are given both on registering with the service [12]. Next, click on your own name in the top right corner, select Security Credentials, and click on Access Keys and Create New Access Key.
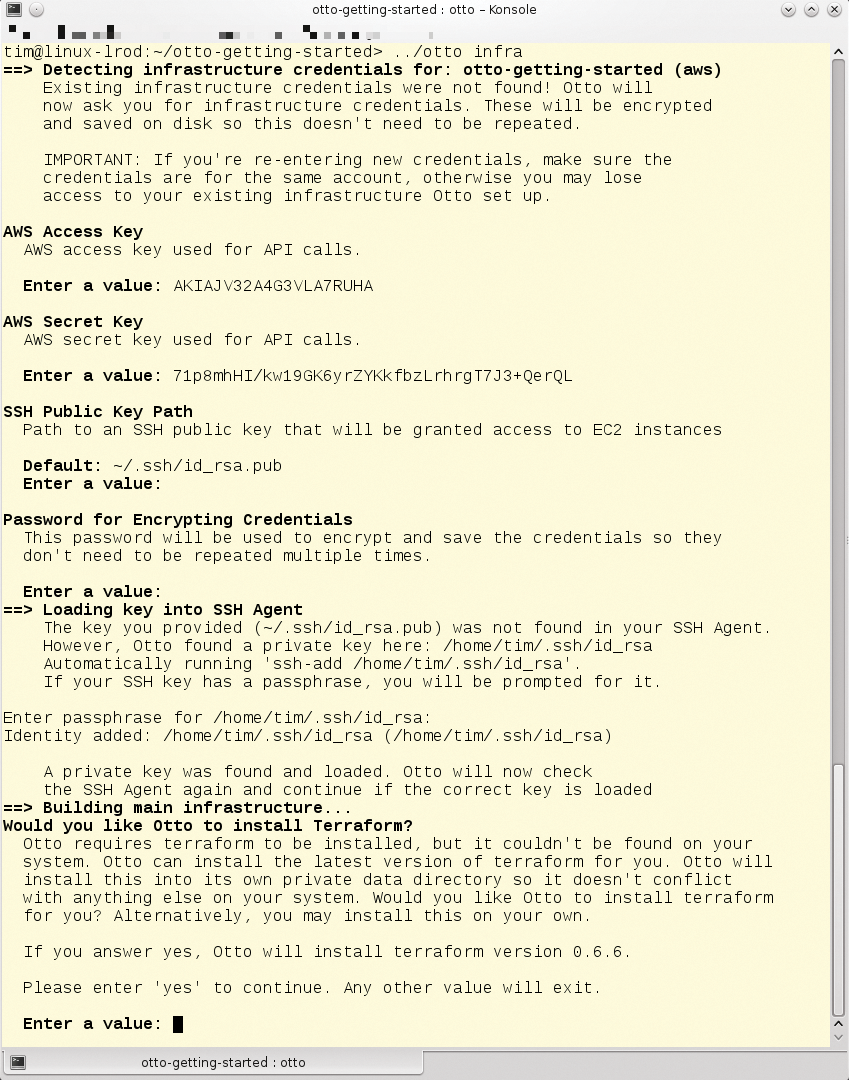
Later, Otto uses SSH to access a virtual machine in the Amazon cloud. To do this, the tool uses the key, which can you generate yourself, if needed, by entering ssh-keygen. You will need to tell Otto the path to the file with the public key – typically, ~/.ssh/id_rsa.pub.
To avoid having to retype all the data entered thus far, Otto saves the data in an encrypted file. The next step involves entering a password to protect the data. You need to know the password to be able to upload the web application to the cloud.
Finally, Otto tells its helper, Terraform [13], to prepare AWS for running a web application. If Terraform is not available on the system, Otto offers to install it. If you mistyped one of the details, you can delete the project file in the ~/.otto.d/cache/creds/ subdirectory (this is otto-getting-started in this example) and then call otto infra again. The ~/.otto.d file stores all the details about the cloud and its settings, so you should not make any changes here.
Cloud Cuckoo Land
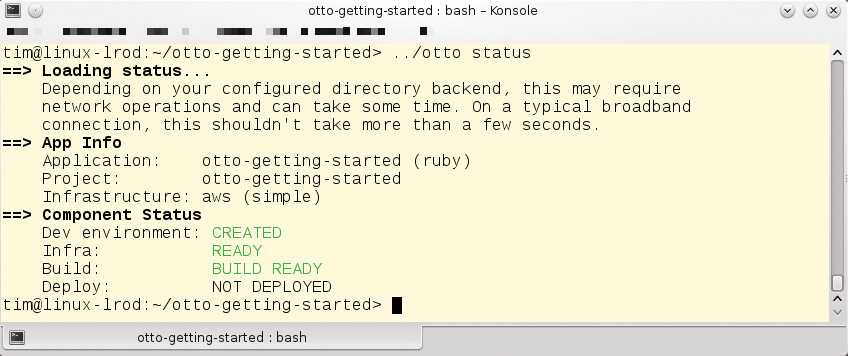
The otto status command shows details of the current deployment status. If the Infra line shows READY, as in Figure 7, then the cloud is set up to run your web application.
The next step is for the otto build command to prepare the web application for deployment. In the case of the AWS cloud, Otto packages a web application in an Amazon Machine Image (AMI) and thus in a virtual machine that can be started in the Amazon cloud. The image is created in the background by the Packer [14] tool, which HashiCorp developed for precisely this purpose. If the current Packer version is missing from your system, Otto will retrieve it.
The tool automatically installs a web application and the programs required to execute it on the AMI. For the sample application, this means the Ruby environment and an Nginx web server. The otto status command should then report BUILD READY, as the Build status shows in Figure 7.
This means that the web application is finally ready to enter the cloud, which is precisely what otto deploy initiates. At the end of the process, Otto reveals the URL for accessing the web application in a neon green font. And if you do forget the address, otto deploy info will remind you.
Setting up and deploying can take a while, even for small web applications; for several minutes, you might think that nothing is happening. In future Otto versions, the Nomad [15] tool will handle both composing the AMI and the deployment itself, drastically accelerating both of these processes.
The otto deploy destroy command lets you stop and destroy the virtual machine in the cloud; then, otto infra destroy destroys the infrastructure and releases the resources you reserved on Amazon. Finally, otto dev destroy removes the local development environment.
Manual
In the future, developers only need to type otto dev to fire up the development environment, and when done, to type otto build to create a virtual machine for production operation, which is then bundled off into the cloud by typing otto deploy. Otto takes care of everything else from now on – or at least if everything worked properly.
You might want to avoid automation in some cases. For example, the web application might need Ruby version 2.1. In this case, you could use the configuration file to manage Otto. The file is named Appfile and resides in the project directory for the web application.
Its structure follows the HashiCorp Configuration Language (HCL) [16], which in turn follows the JSON format. Listing 1 shows a simple Appfile example. Note that the Otto developers point out that the structure could change.
Listing 1: Example of an Appfile
01 application {
02         name = "otto-getting-started"
03         type = "ruby"
04         dependency {
05                 source = "github.com/hashicorp/otto/examples/mongodb"
06         }
07 }
08
09 project {
10         name = "my-project"
11         infrastructure = "my-infrastructure"
12 }
13
14 infrastructure "my-infrastructure" {
15         type = "aws"
16         flavor = "simple"
17 }
18
19 customization "ruby" {
20         ruby_version = "2.1"
21 }
The application section assigns a name – in Listing 1 this is otto-getting-started. The type line specifies the application type or the programming language. In addition to Ruby, Otto currently supports Go, PHP, and Node.js, with more languages to follow. Additionally, docker-external is a special type that simply launches a prebuilt Docker container, which can be useful to launch a service that has already been completed, such as an Apache web server.
Most web applications require a database. Dependencies of this kind are noted in the dependency block, where the source is a URL that points to the directory with the Appfile. The mongodb Appfile accessible in the Otto example directory shown in Listing 1 simply points to a Docker image with the MongoDB database, which Otto would pick up and launch. All you need to do is to pass in the URL for the required application; Otto resolves the dependencies for MongoDB itself.
The URL can also point to the application on the hard disk (with the syntax file:///home/tim/<myapp>/). In this way, you can easily integrate someone else's application. The makers of Otto are also planning a public directory with frequently required Appfiles.
Resolving and integrating dependencies still causes Otto v0.1.2 some problems. If you feed Listing 1 to Otto, the tool wants to set up a Docker container with MongoDB, but in this case, it reproducibly canceled the action, purportedly because of a lack of SSH access. That said, we were able to access the unfinished virtual machine manually by typing:
otto dev ssh
If installation of the dependencies is successful, the services in question should be given individual DNS names according to the Otto documentation. For example, you would be able to access the MongoDB database as mongodb.service.consul. In the background, the Consul tool set up in each virtual machine takes care of the name assignments.
Infrastructural Measures
The middle project section of Listing 1 uses the name setting to assign the application to a project. The idea is to allow developers to group applications according to a particular project in the future; however, Otto does not evaluate the setting in version 0.1.2.
Otto summarizes the desired cloud and the resources required in the cloud under the umbrella term infrastructure. The selection can be given an arbitrary name in this section by setting the infrastructure tag (e.g., my-infrastructure in Listing 1).
Whereas the type line defines the target system in the infrastructure section you just named in the project section, flavor selects the variant. Each infrastructure exists in various flavors. Otto v0.1.2 has two flavors for the AWS cloud: simple and vpc-public-private. By default, the tool uses the simple variant, which means the virtual machine makes do with the smallest possible resource set in the cloud.
In contrast, the vpc-public-private variant automatically sets up a private subnet, which makes the web application easier to scale, but also more costly to run. In Listing 1, the web application will run on a single virtual server (flavor = "simple") in the Amazon cloud (type = "aws").
Finally, a customization keyword lets you influence the development environment and follows the application type: in the example here, this is a Ruby application. The supported settings depend on the programming language. Listing 1, for example, stipulates that you need Ruby version 2.1.
Otto does not evaluate a modified or new Appfile until you call otto compile. You then may need to destroy the current development environment (otto dev destroy) and create a new one (otto dev). The developers are trying to sell this recompiling process as a feature; after all, members of a development team can make changes to the Appfile without it influencing the running development environment.
Turbocharger
Otto makes you want to come back for more: Just a handful of commands let you set up a development environment and deploy the finished application in the cloud. Under the hood, well-known and proven tools such as Vagrant handle the hard work.
Of course, you can tell that Otto is at a very early stage of development. The biggest problems in version 0.1.2 were faulty resolution of dependencies and restriction to the Amazon cloud. The good documentation contains many promises for future versions on the roadmap [1].
However, even if the current version of Otto is not production capable, friends of DevOps in particular will want to keep a close eye on the system and follow its future development – after all, Otto will be replacing Vagrant in the long term if everything goes to HashiCorp's plans.
