Multifactor authentication with Google Authenticator
Double Sure
Login security increases significantly when using a combination of factors to authenticate a user (i.e., multifactor authentication). In most situations, two-factor authentication is usually enough. The first authentication factor is usually a password or key, with various possibilities for the second factor, including hardware tokens owned by authorized users or one-time password (OTP) generators that provide OTP tokens. One-time passwords come in several varieties (e.g., hardware, software, grid card). A popular, free, and simple way to implement two-factor authentication (2FA) with OTP is Google Authenticator, which is available in the form of an app for iOS and Android and as source code [1] for the server side.
Better Protection
Google Authenticator provides time-based one-time passwords (TOTPs) as per RFC 6238, which means that a password is only valid for a certain amount of time. Time-based passwords, then, are virtually worthless to an attacker.
A variety of modules can integrate Google Authenticator into applications to secure logins for blogs, content management systems, OpenVPN, and other situations. Likewise, it is possible to use SSH with multifactor authentication to reduce the risk of password or passphrase theft, and Google Authenticator provides a PAM module that can be integrated easily into SSH authentication.
The PAM module installs easily on the SSH server by using the package managers of popular Linux distributions:
#Ubuntu systems
apt-get install libpam-google-authenticator
#CentOS and Red Hat Enterprise Linux
yum install google-authenticator
The qrencode program also must be installed so the tool can output the QR code used for app configuration. If this program isn't installed, the authenticator returns a link to a Google site that generates the code.
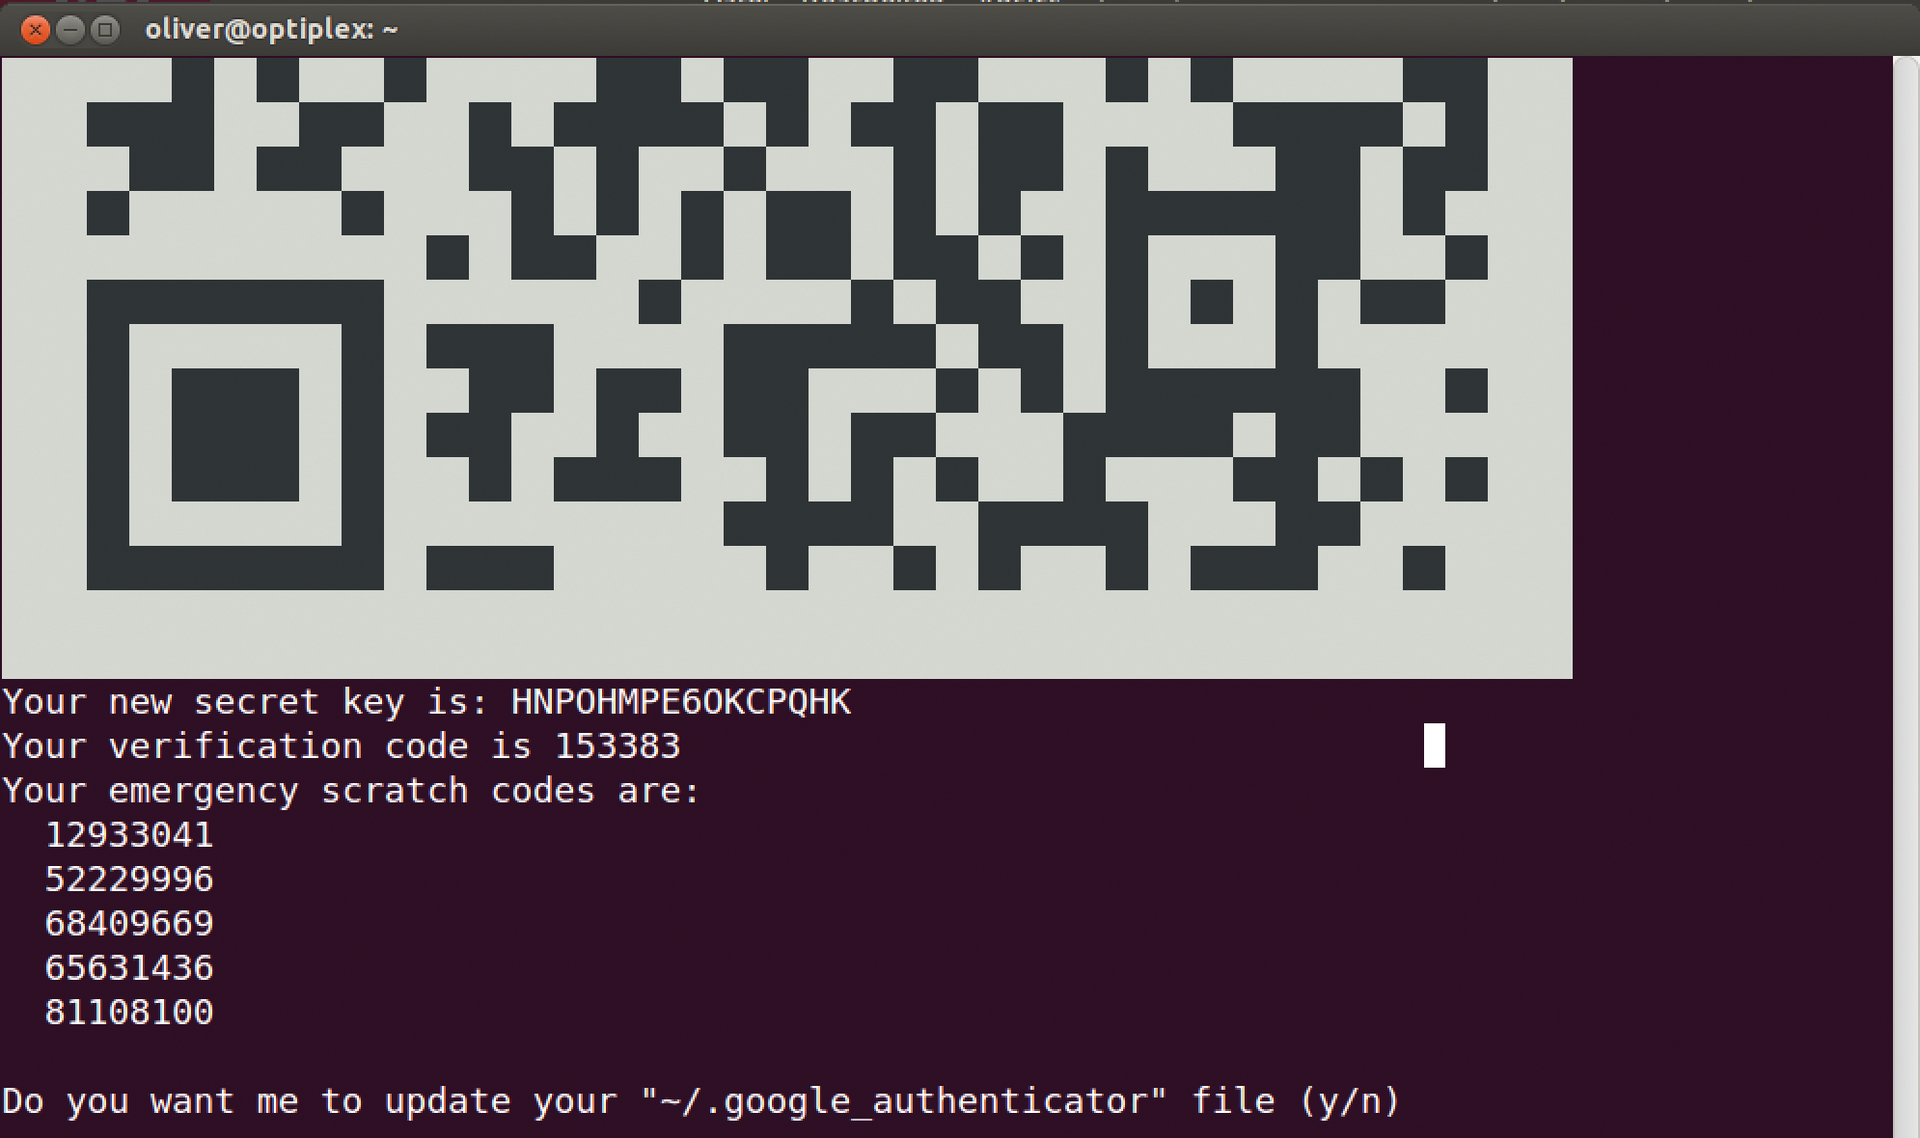
When you execute google-authenticator, the program immediately displays a QR code, a few numerical codes, and various questions (Figure 1). You should answer yes to Do you want me to update your "~/.google_authenticator" file?. You'll have to weigh the advantages and disadvantages between convenience and security requirements when you answer the other questions. For example, best practices recommend that tokens are only used once.

To compensate for server and mobile phone clocks that are not perfectly synchronized, the software can increase the window of response from the default of one and a half minutes to a maximum of four minutes. Finally, another security measure limits the number of login attempts allowed in a certain period (rate limiting). Using the mobile app, you add a corresponding login account by scanning the QR code in the terminal or manually entering the private key and verification code.
The PAM configuration of the SSH daemon occurs in /etc/pam.d/sshd by adding the following line to the beginning of the file:
auth required pam_google_authenticator.so
You need to add or appropriately modify the following two lines in the /etc/ssh/sshd_config SSH daemon configuration file:
UsePAM yes
ChallengeResponseAuthentication yes
If you now restart the SSH daemon (e.g., with service ssh restart, depending on your distribution), you will also be asked for a "Verification code" when logging in. You get this code from the app, which generates new OTPs at the configured interval (Figure 2).

SELinux Problems
If the login doesn't work, especially on CentOS, Red Hat, or Fedora, you might have a problem with SELinux that is preventing the SSH daemon from changing the authenticator's configuration file. A corresponding message can be found in the /var/log/secure logfile, with a corresponding message in the /var/log/audit/audit.log SELinux log. The best solution to the problem is to write an SELinux module that allows the SSH daemon to do what it wants. An alternative is to copy the Google configuration file into the $HOME/.ssh directory, where there SSH daemon is allowed to write anyway.
You need to make sure the directory has the right SELinux context, which happens automatically if you generate a key by entering ssh keygen. Otherwise, you can manually create the directory and set the attributes:
mkdir .ssh
chcon -t ssh_home_t -R .ssh
ls -Zd .ssh/
drwx------. oliver oliver unconfined_u:object_r:ssh_home_t:s0 .ssh/
Now you just need to inform the PAM Google Auth module that the configuration file is elsewhere:
auth required pam_google_authenticator.so secret=/home/${USER}/.ssh/.g
If you have configured SSH using key authentication, you need to add the following line to the /etc/pam.d/sshd SSH configuration file so you are prompted for the one-time password (from OpenSSH 6.2):
AuthenticationMethods publickey, keyboard-interactive
If SSH now also asks for a login password, you automatically benefit from three-factor authentication, although that might be overkill. To disable it, just remove the following line in the PAM configuration:
auth required pam_unix.so
or the corresponding include command:
@include common-auth
Anyone already working on a supposedly secure network might get tired of constantly looking at their mobile phone and therefore think that two-factor authentication is over the top. There's a remedy for that, too: Depending on the access IP address, you can disable authentication by changing the start of /etc/pam.d/sshd as follows:
auth [success=done default=ignore] pam_access.so accessfile=/etc/security/localnet.conf
In the file referenced in /etc/security/localnet.conf, you should write the local network address and two other lines that control access via localhost or prohibit all other access:
+ : ALL : 192.168.1.0/24
+ : ALL : LOCAL
- : ALL : ALL
Using this configuration, you will be prompted for a one-time password when logging on via the Internet, but you will be allowed to log on without authentication from the local network.
Conclusions
Google Authenticator is a simple and free solution for integrating two-factor authentication into your own applications. Using a PAM module, it is also possible to secure SSH access via two-factor authentication. The configuration is simple, and minor problems (e.g., with SELinux) can be solved quickly with the necessary background knowledge. Something that might be a bit of a headache is that the app source code isn't publicly available from version 2.21 onward. On the basis of the last free version, the FreeOTP project [2] continues to offer the program as an open source project that can be used as an alternative to Google Authenticator.
