Setting up Windows clients with Chef
Menu of the Day
Chef is one of the most powerful open source tools for automated configuration management. Little known, however, is that Chef also supports Windows. Like Puppet, Chef [1] extends classic configuration scripts to include a context. Whereas Puppet works with tree configurations, those created using Chef take the form of cookbooks. These are scripts that describe the resources you want to create. The Chef run time processes the resources linearly and applies any changes that are not in place on the target system. This approach offers advantages compared with transactions implemented in Puppet, because the process is easier to understand: Graph theory is not necessary to understand the operation flow.
Getting Started with Chef
Chef offers Chef Solo, a standalone version of the system configurator, but I will not be using it in the following steps. Instead, I will be relying on a classic client/server configuration. For the remainder of this article, I use VMware Workstation as the basis; however, you could also use VirtualBox. Start by setting up an Ubuntu-based virtual machine (VM). The Chef server is only available on Unix-style operating systems; the download page [2] offers a choice between 64-bit versions for Red Hat Enterprise and Ubuntu. After downloading the 500MB DEB file, install it in the usual way from the Ubuntu Software Center and acknowledge any errors relating to the package quality.
To reconfigure the server, use the command:
sudo chef-server-ctl reconfigure
This procedure can take a few minutes. After completing the work, a message telling you Chef Client finished, or something of that ilk, then appears. Now you have to create the user and organization – they are essential for managing the configuration data:
sudo chef-server-ctl user-create admin tam hanna tamhan@tamoggemon.com <My password> -f admin.pem
sudo chef-server-ctl org-create tmgn "tamoggemon holding" --association_user admin -f orgValidator.pem
The Chef server is limited to distributing configuration data. The config files are actually created on the workstations (which can be co-hosted along with the server). Chef provides a default configuration that you can download with the following Git command:
git clone https://github.com/chef/chef-repo.git
Chef supports the ability to create configuration files through the Chef Development Kit. Download the respective DEB file and install it from the Software Center. Check for success with the command chef verify.
The server and workstation only communicate if they both use the same key. Copy the two PEM files into chef-repo downloaded from GitHub (/.chef subdirectory) and then open the /chef-repo/.chef/knife.rb file (Listing 1). Some commands for testing the connection between client and server follow. The current Chef (version 12) comes with more stringent certificate testing than its predecessor. It is evident here that the server name called in knife.rb doesn't match the output value from hostname, which was used to create the certificate. You can remedy this by changing the hostname – don't forget to reconfigure the server afterward using sudo <hostname> <IP address>. Now only the input from knife ssl fetch and knife-client list is missing. The second command returns the list of clients connected to the server – at the moment it's only the workstation.
Listing 1: /chef-repo/.chef/knife.rb
current_dir = File.dirname(__FILE__)
log_level      :info
log_location   STDOUT
node_name      "admin"
client_key     "#{current_dir}/admin.pem"
validation_client_name "tmgn-validator"
validation_key         "#{current_dir}/orgValidator.pem"
chef_server_url        "https:/// organizations/tmgn"
cache_type     'BasicFile'
cache_options( :path => "#{ENV['HOME']} /.chef/checksums" )
cookbook_path  ["#{current_dir} /../cookbooks"]
Setting Up the Chef Client for Windows
On the client side, I decided to use Windows 8.1 and create another VM, which will – by and large – keep its plain vanilla state after the installation. Download the Chef client in the next step; it will run as of Windows 7.
Be sure also to install the Chef Client PowerShell Wrappers. Chef generates the files necessary on the client workstation after entering the knife command:
knife configure client ./
Creating client configuration
Writing client.rb
Writing validation.pem
Copy the client.rb and validation.pem to the C:\chef directory. Because Windows doesn't natively understand the SSL certificate generated by Ubuntu Server, you need to disable verification by editing client.rb:
log_level :info
log_location STDOUT
chef_server_url 'https://192.168.121.129/ organizations/tmgn'
validation_client_name 'tmgn-validator'
ssl_verify_mode :verify_none
node_name 'ChefSlave1'
Windows workstations have the unpleasant property of changing the hostname from time to time. The Chef server trips over this, because it uses the hostname to identify its clients. The property node_name lets you work around this problem in an elegant way.
Entering chef-client at the Windows command line familiarizes the client with its new working conditions. Successful registration of the client can be verified on the workstation by entering knife client list. The output shows your Windows machine under its hostname in the list.
Another tip: If you want to use Chef to manage large computer networks, you should automate the client deployment based on one of the methods featured in the Chef docs [3].
Automated Windows Configuration
As a first exercise, you want to provide your client with a recipe that influences the system configuration. Recipes and cookbooks are created using the knife tool configured on the workstation:
knife cookbook create adminbook
The recipes subfolder contains a file named default.rb. This is a blank recipe that serves as a template for your own configurations. Adapt this as shown in Listing 2.
Listing 2: Adapting the Configuration Template
# Cookbook Name::    adminbook
# Recipe::    default
#
# Copyright 2015,    YOUR_COMPANY_NAME
#
# All rights reserved - Do Not Redistribute
#
registry_key "HKLM\\Software\\MyApp\\MyConfig" do
    values [{
       :name => "NewRegistryKeyValue",
       :type => :dword,
       :data => 0,
    }]
    action :create
    recursive true
end
windows_service "BITS" do
    action :configure_startup
    startup_type :manual
end
Chef recipes consist of a sequence of resources, whose states are fully described. The file from Listing 2 declares a registry key and a Windows service. The key is generated, and the service launches after the script terminates. The knife administration tool is used to upload the newly created cookbook:
knife cookbook upload adminbook
export EDITOR=pico
knife node edit ChefSlave1
Entering node edit opens Pico. To enable the new cookbook, customize the run_list data structure as in Listing 3, then go to the client and run the chef-client command on it. This is quite a useful test, because the output from the process is sent directly to the command line.
Listing 3: Customizing run_list
{
    "name": "ChefSlave1",
    "chef_environment": "_default",
    "normal": {
      "tags": [
      ]
},
"run_list": [
            "recipe[adminbook]"
            ]
The first pass will fail because enabling a service requires administrative privileges. This can be solved by using an admin command line – further iterations of Chef will report that work has been done (Listing 4).
Listing 4: chef-client
C:\Windows\system32>chef-client
Starting Chef Client, version 12.4.0
[2015-06-29T11:17:24-07:00] INFO: *** Chef 12.4.0 ***
[2015-06-29T11:17:24-07:00] INFO: Chef-client pid: 3160
Chef Client finished, 0/2 resources updated in 18.855305 seconds
Chef offers a few dozen resources, which you can extend using cookbooks. The resource overview provided in the Chef docs [4] offers a list of modules included out of the box and presents some practical examples and links to more information.
Chef and PowerShell, Hand in Hand
In an ideal world, all resources of the target system can be addressed directly by Chef. Unfortunately, this never happens in practice, because – in addition to features not implemented in Chef – legacy code also needs attention. The developer team met this problem through the introduction of command-line resources – resources embedded in recipes that are executed directly by the respective shell.
The command sequence that follows starts dxdiag, which is pre-installed on most Windows machines and is used as an example. Ruby experts will see immediately that this is a classic piece of embedded PowerShell code:
powershell_script "run-dxdiag" do
    code <-EOH
    dxdiag
    EOH
end
Be sure to customize the node list. Several cookbooks can be entered as follows:
"run_list": [
    "recipe[adminbook]",
    "recipe[dxdiagbook]"
]
If you run the dxdiag cookbook several times in a row, you should not expect negative consequences; at worst, the assistant will train its multitasking capability by evaluating two configuration windows in parallel. Also, make sure that Chef is stopped until the dxdiag process is finished.
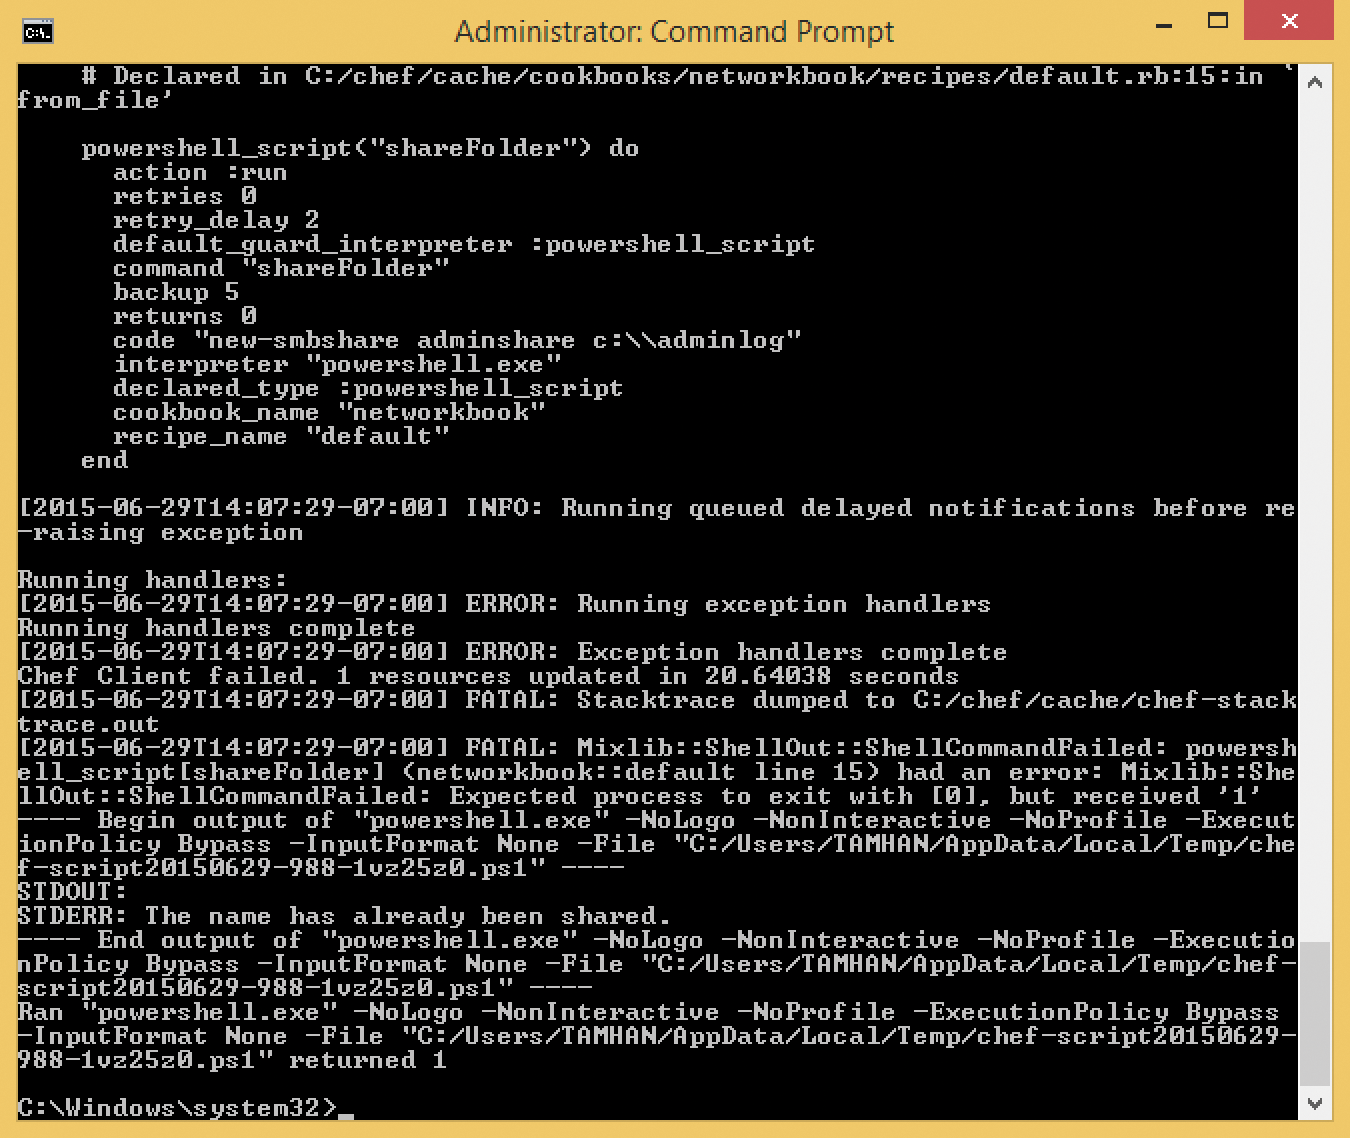
The situation is different if you consider, for example, creating a share (Listing 5). This is more critical, in that the PowerShell command invoked to create the folder returns an error if the share already exists (Figure 1). This error terminates script execution, which makes the subsequent node configurations impossible.
Listing 5: Creating a Share
directory 'c:\\adminlog' do
    action :create
    inherits true
end
powershell_script "shareFolder" do
    code 'new-smbshare adminshare c:\adminlog'
end

smbshare twice in a row, you will see these errors.Chef's popularity is attributable to, among other things, the fact that any configurations you create are idempotent: Applying the same resource multiple times will not cause problems, because the run time detects that the changes already exist.
In the case of an embedded PowerShell resource, this contextual information is missing. Chef gets around this problem by introducing "guards," a programming construct that is executed before the actual execution of the command. Its return value allows conditional execution of a payload. The simplest form of a guard uses a Ruby block or a classic command-line utility:
template '/tmp/myfile' do
    mode 00644
    source 'myfile.erb'
    not_if {File.exists?('/etc/passwd')}
end
In addition to the not_if guard shown here, you have only_if.
The share manager can be protected by a guard that checks the share list for the existence of the shares to be created. This is another PowerShell resource – all told, the cookbook looks like Listing 6.
Listing 6: The Cookbook
directory 'c:\\adminlog' do
    action :create
    inherits true
end
powershell_script "shareFolder" do
    guard_interpreter :powershell_script
    code 'new-smbshare adminshare c:\adminlog'
    not_if 'get-smbshare adminshare'
end
From now on, chef-client can be run as often as you like; the PowerShell transaction has become idempotent, as reflected in the command line by the statements:
INFO: Processing powershell_script[Guard resource] action run (dynamically defined)
INFO: powershell_script[Guard resource] ran successfully (skipped due to not_if)
Chef runs guards in several ways, which can sometimes return completely different results. The video recording of a lecture by Adam Edwards [5] is mandatory for anyone wanting to add guards to their Chef scripts.
Scripting the Client's Target State
Microsoft's PowerShell has supported scripting since time immemorial, and frequently used commands can thus be easily repeated. Scripts like this reach their limits when features are to be delivered incrementally. The Desired State Configuration (DSC) concept introduced in 2013 makes some serious changes here. A DSC-based installation script is not a linear sequence of commands, but a complete description of the target condition. The run time can compare the tree with the actual state to resolve differences through targeted transactions – similarities to Chef are purely coincidental.
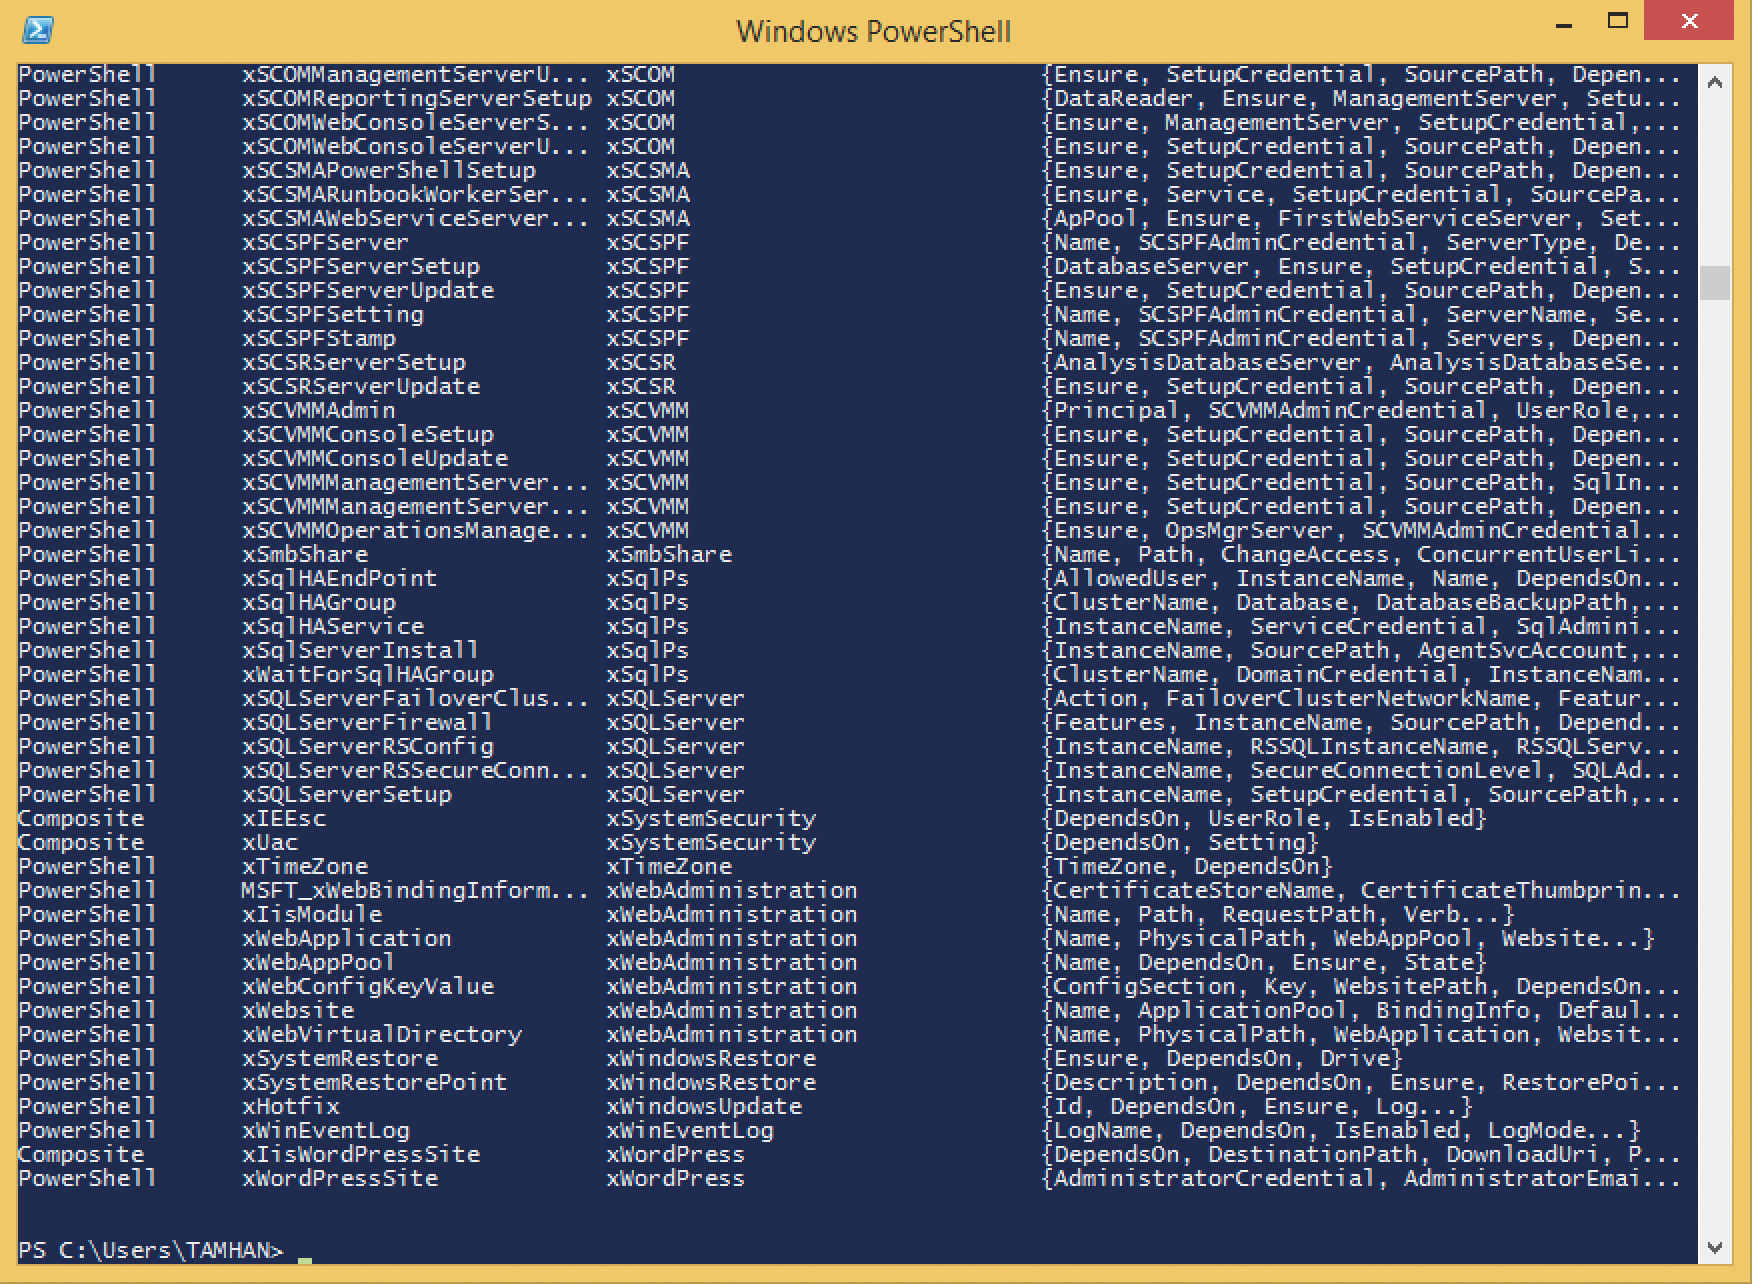
Windows 8.1 comes with PowerShell state providers, as shown in Table 1. To discover the list applicable to your server, just type get-dscresource in PowerShell. The Name and Properties columns are important for administrators. Name is used to select the provider to be addressed, whereas the attribute list describes the properties that are available. Microsoft offers an extension SDK [6]; once it is installed, more than 100 different state providers are available.
Tabelle 1: PowerShell State Providers in Windows 8.1
|
Implemented as |
Name |
Module |
Properties |
|---|---|---|---|
|
Binary |
|
|
|
|
PowerShell |
|
|
|
|
PowerShell |
|
|
|
|
PowerShell |
|
|
|
|
Binary |
|
|
|
|
PowerShell |
|
|
|
|
PowerShell |
|
|
|
|
PowerShell |
|
|
|
|
PowerShell |
|
|
|
|
PowerShell |
|
|
|
|
PowerShell |
|
|
|
|
PowerShell |
|
|
|
You can deliver the file with Chef – to do so, create a new cookbook called powershell-extender. knife then create the following folder structure:
tamhan@ubuntu:~/Desktop/chefHaus/chef-repo/cookbooks/powershellextender$ ls
attributes definitions libraries providers recipes templates
CHANGELOG.md files metadata.rb README.md resources
The previously unused file directory becomes relevant at this point. Files deployed there are transferred to the nodes on request. Download the ZIP file from the Microsoft website and store the file in /files/default; then, customize default.rb as in Listing 7.
Listing 7: Changes to default.rb
cookbook_file 'C:\\sdkfile.zip' do
    source 'sdk.zip'
    action :create
end
dsc_resource 'unpackextender' do
    resource_name :archive
    property :ensure, 'Present'
    property :path, 'C:\\sdkfile.zip'
    property :destination, 'C:\\Program Files\\WindowsPowerShell\\ Modules'
end
The resource beginning with cookbook_file transfers the sdk.zip file to its new home on the client. Because PowerShell only parses the first subfolder level of the modules directory, you need to repackage the archive provided by Microsoft.
File extraction in Chef usually involves calling a command-line program, but I am going to use a different trick here. The PowerShell contains a DSC provider, which is responsible for unzipping various archives. Access to the provider always follows the same pattern. The string passed to resource_name determines the DSC providers to use, whereas the individual attributes are declared per property.
At the moment, the various DSC extensions are available in the form of cookbooks that you need to include in your own cookbook (Figure 2). To do so, edit metadata.rb (Listing 8). Note that communication between the DSC and PowerShell relies on WinRM – the service is disabled by default on Windows 8.1. Fortunately this can be resolved using winrm quickconfig. You are now ready. Wire up the new recipe and enjoy the abundance of resources after running.
Listing 8: metdata.rb Edits
name 'powershellextender'
maintainer 'YOUR_COMPANY_NAME'
maintainer_email 'YOUR_EMAIL'
license 'All rights reserved'
description 'Installs/Configures powershellextender'
long_description IO.read(File. join(File.dirname(__FILE__),'README.md'))
version '0.1.0'
depends 'dsc'

The git command is used as before,
git clone https://github.com/opscode-cookbooks/dsc.git
to download the cookbook code.
Conclusions
The learning curve for Chef is anything but easy: if you want to run chef-client on a non-Windows Server, you are by and large on your own. The instructions presented here – in conjunction with basic knowledge of the Ruby programming language – facilitate these critical first steps. There is no question that hacking together a batch file is much faster. But Chef has its strengths when you need to use the same image on multiple systems. The batch solution reaches its limits, once existing workstations or clients need to be updated to the latest version. Chef has also established itself in smaller deployments. This is because a server group created on the basis of the management tool is 100 percent in sync – Chef eliminates any imbalance when executing the client.
